Madness at Gardmore Abbey – MapTool campaign file

At long last, I have finished putting together my complete MapTool campaign file for the Madness at Gardmore Abbey adventure. Huzzah! You can download it right here.

I’m pretty sure this is the largest MapTool campaign file I’ve built to date (around 33 MB), and I’m quite happy with it. It has all of the maps, all of the monsters, all of the Deck of Many Things tokens, all of the traps. I’ve got a template token for PCs and a template token for monsters.

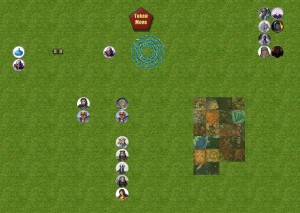
The campaign file consists of eight maps with encounters from the adventure, plus a ninth map that’s a holding pen for NPCs, the Deck tokens and some background stuff for the campaign (library token, templates). The maps are labeled according to the encounter numbers that are included on the map. For instance, the map named 01-04 Village has the encounter maps that take place in the outer part of Gardmore Village (Encounter 1: Main Gate; Encounter 3: Double Talk; Encounter 4: Ruined Garrison; plus the overland map of the abbey and the map of Winterhaven).

Because of the number of maps that are in this adventure, I’ve included Wolph42’s Bag of Tricks macros – specifically the Teleport Pads. To use these, you’ll need to click the “Back of Tricks Macros” button in the Campaign pane and then the Initialize Pads button. Once you’ve done that, you can drag tokens around the various maps by dragging them to the teleport pad corresponding to the map where you want them to go. The 01-04 Village map has the portals to every other map.

I hope that folks find this campaign file to be useful. I know that I’ve had a lot of fun with Madness at Gardmore Abbey so far, and I’m looking forward to running the rest of the adventure!

– Michael the OnlineDM

Finishing the Fire Forest (maps included)

Last night, my weekly online D&D 4e party finished the Fire Forest adventure, which is the second adventure in the War of the Burning Sky Series.  We only had four of the five players (sorry you couldn’t make it, Jaks!) but we played on for the climactic final encounters.

SPOILERS AHEAD

I haven’t written about each week of this adventure as I had the previous one, so I thought it would be good to recap our experiences.  The Fire Forest starts off with a couple of encounters with creatures of the forest that have been affected by the everlasting flames.  Amusingly, the very first encounter has two different fiery creatures fighting one another… with no way to hurt each other!  All of their attacks deal fire damage, and they’re immune to fire.  Oops.  Anyway, these encounters are good for giving the party a flavor of the Fire Forest, but that’s about all.

A devil, hired by the empire that is chasing the party, pops up a few times to harass and taunt the players before disappearing.  He ended up be an interesting little NPC to play with, but the party did finally get a shot to finish him off (I gave him a 50/50 shot of fighting for one more round or teleporting away – the dice said that he chose to fight, and die).The party met a dragonborn sorcerer who was researching the forest fire and attempting a ritual to put out the fire in a dryad’s grove.  The party went into some caverns to collect some mushrooms and flint that the sorcerer needed for the ritual and ended up fighting some fungus creatures.  They also found some treasures here, including a magical badge on the body of an eladrin knight.  There was a book that was discovered and discarded by the none-too-intellectual shaman in the party (I was amused by this later when we talked about it out of character).  The party helped the sorcerer put out the burning grove, though he was swallowed by the earth and surrounded by more fungus creatures that the adventurers went down to fight off.  This was a combined combat encounter and skill challenge, and I think it went pretty well.

Leaving the sorcerer to recuperate from his wounds, the party continued deeper into the forest and was contacted by a creature calling itself Indomitability, asking the party to silence some singing elves at a lake whose song was keeping him trapped in the forest.  The party agreed to help the creature (sort of).

Next up was a bridge crossing a wide river, with a tower in the middle of the bridge.  A magical mace trap made it hard to get into the tower, but the PCs found a way and discovered some background information about the forest in a journal, plus some mysterious seeds.

Map of the stone bridge with the tower - gridded

Gridless version of the stone bridge with tower map


On the far side of the bridge lay a ruined elf village, crawling with more fiery forest creatures.  This was another forgettable battle that, in retrospect, I probably should have skipped over.  The village did reveal some flavorful little treasures, such as a necklace of ivory leaves that would let the wearer understand and speak Elvish – but only Elvish.  Cute.

Near the village was a shrine in the shape of a willow tree, with a ghast and some skeletons living around it.  After fighting off the ghast, the party met an eladrin spirit in the shrine and finally was able to put together more of the back story of the Fire Forest.  This led them to head down the river toward the village of the seela (the magical winged elves of the forest).  It was on this journey that they encountered and finished off the devil.  They also found one of the winged elves back at the bridge, being attacked by some of the other elves.  Curiouser and curiouser.

Tiljann, the seela

At the seela village, the party did some investigating and learned about the main dryad of the forest, Timbre, who had walled herself off in her grove.  They also learned of the lake nymph, Gwenvere, who had transformed into a hag and had stolen a relic of the elf hero who had been Timbre’s love.  The party found the hag and recovered the relic, which they used to get close to the dryad.  A skill challenge with the dryad ensued, which the party succeeded on, and she agreed to help them.

Gwenvere, the lake hag

Timbre, the Fire Forest dryad

This brought us to the final session, wherein the party needed to head to the bottom of a lake to fight the creature Indomitability, trapped in the form of a flaming stag.  They rowed out in two boats and were beset by aquatic ogres. The ogres succeeded in sinking one boat, but the party was able to get back to shore.

After a short rest on shore, three of the party members piled into one boat, one swam, and one walked along the lake bed with the help of some magic boots.  The boot-wearer was the one to draw the sword out of fiery stag, which allowed Indomitability to be fought.  The interesting thing here is that the boot-wearer is a hybrid swordmage-wizard and followed up drawing the sword with casting a Web to try to immobilize the beast on the lake bed.  Unfortunately, the party’s fighter was also caught in the Web.

Indomitability

Indomitability tossed the fighter deeper into the web and then used a power that would leave the fighter dominated if he failed a saving throw- which he did.  The fighter failed, I believe, six saves in a row to continually be dominated, all while the battle was moving toward shore and the fighter was left with nothing interesting to do, even against his allies.  I felt bad about the way that turned out.

Once the stag got to shore, it started trampling all over the place, leaving fire in its wake.  It took a lot of opportunity attacks but dealt a lot of damage in the process, killing some of the seela.  I felt good about the range of the battle – it wasn’t held all in one little area.  I also used some of the Monster Vault dragon rules for Indomitability, giving him an extra attack at 10+his initiative roll and making it easier for him to shake off conditions that would leave him helpless.  Those made him much more interesting as a solo.

In the end, the fighter in the party did shake off the domination and got to the battle just in time to deal the killing blow.  That was quite satisfying for all concerned!

Now the party is finally able to leave the Fire Forest and continue on its quest southward, toward the town of Seaquen.  I believe we’ve now played either 14 or 15 sessions together.  I’m so happy with this online game – I’ve got a great group of players.

New campaign: Homebrew all the way!

As I mentioned in my last post, I’ve volunteered to take the next shift as dungeon master with the group I’ve been playing with here in Colorado for most of this year (my first real Dungeons and Dragons experience).  I had considered three options for this campaign:

  • War of the Burning Sky, which I am already running for my online campaign (though I would have to adjust for the fact that the in-person campaign is starting at level 5)
  • An adventure setting from Nevermet Press that I’ve volunteered to playtest (called Brother Ptolemy and the Hidden Kingdom)
  • A total homebrew campaign, based on an adventure I had written but never run for D&D Third Edition

War of the Burning Sky was originally my first choice, but after starting to work on the adjustments I’d have to make for the level issue and after talking to my current players and getting their thoughts on the matter, I decided that it didn’t seem like it would be as much fun for me (even though it would be a LOT less work).

The playtest game intrigues me a great deal, but the adventure would span several sessions, and I really didn’t want to commit to anything like that without having the time to really get to know the material first (the whole document is over 100 pages in length).

The more I thought about it, the more I realized that homebrew was what I really wanted.  Having discovered my adventure from years ago that never saw the light of day, I felt like I had to give it a go.I began by transferring my map of what was originally a goblin stronghold (the adventure was written for first-level characters) into MapTool.  It’s now an orc stronghold, since these characters are higher level.  I kept the geography pretty much the same as I had created it years ago, removing only a couple of pointless storage rooms (I like verisimilitude, but rooms that have no bearing on the adventurers at all should be cut).  I sketched out the whole complex, only making a couple of edits… and then realized that the party wouldn’t be STARTING in the stronghold, but out in a town where they’ll get the chance to find out about this thing.

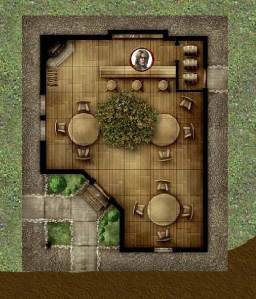
So, I needed to back up and draw some more.  I started with a tavern, using a Dungeon Tile image.  I called it the Shady Maple Inn and built it around a huge maple tree in the middle of the place.  It was built and owned by an elf who loved the tree and made it part of his establishment (this made me very happy for some reason).  The players had the possibility of meeting some bandits along the road, so I created a bridge encounter map.

There was also going to be an attack by some insects during a night spent camping in the forest, so I put together a forest encounter map with trees and bushes.

This would be everything the party would face, at least for the first session.  I figured that we would get through some decent fraction of the maps I had prepared.  After all, there was a lot to get through in the first session:

  • Character introductions
  • Determining how the party members know one another – past adventures together, etc.
  • Meeting the NPC who would ask for the party’s help
  • Getting from the tavern to the manor house where a minor noble was looking for aid (likely encountering bandits along the way)
  • Meeting the minor noble and learning about the family heirloom that had been stolen
  • Investigating near the manor house to learn more about the thieves
  • Tracking the thieves through the forest
  • Battling creatures overnight in the woods
  • Getting to the stronghold
  • Dealing with the front door defenses
  • Working their way into the depths of the keep

Now, I don’t know if it was the efficiency of running the game in MapTool with the projector or what, but we got through a LOT in one session!

We started playing at about 4:15 this afternoon.  We spent about 30 minutes on character introductions and party backgrounds.  Then the action started, and the players jumped on it.  No gallavanting about, chatting with random NPCs – they heard about a mission, pounced on it without asking questions and started to complete it.  They wisely figured out that they could take a boat up the river to the manor house, which meant that they could skip the bandit encounter at the bridge.  At the manor house, they investigated the theft of the family heirloom efficiently and moved on to the forest.

Here, they were set upon by some creepy crawlies at night.  The luck of the dice had this encounter happen during the first watch, which meant that everyone would be taking an extended rest afterwards (some of them had just started doing so).  This worked out pretty well, actually – since the extended rest was coming, everyone was free to blow daily powers and action points.  The attack came from some centipedes and rot grub swarms (set to appropriate levels for the party, of course).  Even after I brought in some extra centipedes in the second round, the PCs had no trouble beating them all up.

The next morning we had a little skill challenge to continue the navigation through the forest to the orcs’ lair.  The party just barely failed this skill challenge, which made for a cool encounter.  Instead of being able to walk right up to the front door and trying to figure out how to get through, their failure meant that orc archers in the guard tower saw them coming and got a surprise round on them.  This was excellent, because the archers with surprise were pretty darn scary.  Even though these are only level 4 creatures, they have a burst 1 attack (a hail of arrows, basically) that deals d10+6 damage to everyone in the burst that it hits, and I rolled a 9 and a 10 for damage for the two archers who fired into the group.  Suddenly our healer was down to 12 hit points (out of a maximum of 43) and the party was legitimately scared.

Despite the fear, the party had the right tools to handle this problem: Area attacks.  By the rules of the game, an area attack only requires that the spellcaster have line of effect to the origin square of the area burst (which the arrow slit grants), and then enemies inside the tower would not have cover from the area attack because it’s originating inside the tower.  Unleashing a few of these helped bring the archers down before they could raise the alarm.

The door to the stronghold was trapped, and I allowed some active Perception checks to notice the trap before just setting it off on everyone’s heads.  This was a bit generous on my part, but our games haven’t involved a lot of traps in the past and I felt like it was unfair to shock them TOO much by springing a trap when they would never think to look for one.  Now they’ll think about it!

Once inside, the party used some good Stealth to sneak up on the orc minions (two-hit minions, as is usual in my games) in the next room, who were distracted by their dice games.  For this battle, the minions went to the far side of the bridge and pulled it back across, attacking mainly from range (even though they’re not great at range).  I made it clear that the river is nasty and the party does not want to fall into it.  Again, the PCs beat up the bad guys before they could raise a further alarm.

The last battle of the evening took place in the orcs’ sleeping chamber.  This area was dark, as the night shift orcs were sleeping.  One orc was awake – the cook over in the kitchen area, preparing a foul-smelling stew.  The party again made good use of Stealth, letting the party’s Monk get a surprise attack on the cook.

This battle was a little more interesting, as the orcs who had been asleep quickly woke up and did their best to sneak toward the party in the dark.  The Monk ended up bloodied a couple of times, and the Warlock/Sorcerer got a little bit beat-up as well, but since the baddies kept clustering, they were mowed down by burst and blast attacks.  Who says you need dedicated controllers in a party?At this point it was a little after 9:15 PM.  It had been five hours since we had started playing, and we had taken about an hour-long break for dinner in the middle.  We played through four combat encounters, plus the background stuff and some role-playing, investigations and skill challenges.  And this was all with brand-new characters and players who were still figuring out what those characters can do.  I was amazed at how far the party had gotten.  This was as much of the adventure as I had prepared, so we called it a night at that point (playing a few games of Zombie Dice first).

Today was a great start for a new campaign!  I feel like everyone had a good time, and the MapTool / projector combo continues to be a big hit.

DM Lessons

  • Once you’re comfortable as a dungeon master, run your own homebrew games whenever possible.  Time constraints may make this hard, but don’t let a lack of confidence stand in the way.
  • Drop future adventure hooks liberally – even if you haven’t figured out exactly where they’ll lead yet.  See what piques your players’ interest, and run with those, abandoning the others.
  • Preparation is huge.  Know the layouts of combat areas and how the enemies will use them before the battle starts.  If you can do the mapping in advance (such as with MapTool, or even pre-drawing the maps on battle mats or paper) it will save a lot of time at the table.
  • Be prepared for players to come up with ways to skip over combat encounters, and let them do it if they find a way.  Don’t get too attached to a battle.  You can probably find an excuse to use it again at some point in the future!
  • If you’re comfortable with it, technology at the table can automate the boring parts and help everyone get to the fun faster.
http://onlinedm.wordpress.com/2010/08/03/two-hit-minions/

TactiCon Day 2 (Friday)

My blogging of the TactiCon experience continues with day 2: Friday.  This was the first full day of the convention, and I learned that it doesn’t really hit its complete stride until Saturday.

I was up late last night, so I didn’t make it to the convention site until a little after 10:00 this morning.  That ended up working out just fine.  The vendor hall still wasn’t open yet (it turns out that it was opening at 3:00 PM on FRIDAY, not Thursday), so I went down to the RPG area to watch for a bit.  I watched a little bit of a Savage Worlds game, which looked like fun.  I also watched some D&D players whom I knew, playing an LFR game for 7th-11th level characters on a cool pirate ship battlemap with a full model of a ship for them to run around on.

I then went to the registration desk to sign up for an LFR game in the afternoon.  They had one open for the 2:00 PM session, which fit perfectly.  Since it was pretty quiet at registration at the time, I chatted with the lady there, explaining that this was my first convention and that I was looking for suggestions and advice.  She advised me to pick up a couple of generic tickets for future games (either board games or RPGs).

When I asked about miniature painting (I had seen a sign for this), she told me to try the free (!) paint and take activity.  You just sign up for a slot, and they’ll give you a free metal mini, use of their paints, and some tips on how to do it.  The next slot was right away, at 11:00, so I signed up and went right over to miniature painting.

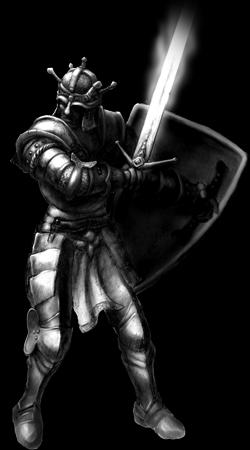
The guy who helped me was a very cool gentleman named Chris.  He gave me a choice of three different metal minis (apparently they’re 95% lead and 5% tin, so it’s too much lead to call them pewter).  I picked the one with armor and a sword, as he seemed like a perfect fit to be Rohgar, my half-elf paladin for LFR games.

The basics of miniature painting, as Chris explained to me, are:

  • Shake your paint pots thoroughly
  • Take some paint out of the pot and onto your styrofoam plate palette using a brush
  • Add a little water and mix to thin the paint
  • Start by painting the interior layers (face, underarmor) and work your way out
  • Have fun!

I ended up with the following mini:

Rohgar is completely and totally awesome-looking now! No, he’s not perfect – you can see where I missed some spots.  But he looks really, really good.  It took me about 90 minutes for the whole process, and I’m surprised to say that I had a good time.  I could definitely see myself painting minis for any character I plan on playing regularly.  I wouldn’t do it for armies of monsters, of course, but for a few PCs, yes, I think I would.

After mini painting, I grabbed a burger in the hotel restaurant. I still had an hour to kill before my 2:00 LFR game, so I dropped into the board game area.  A couple of guys were looking for more players for a game called Fresco, which I had never tried before.  Always being up for a new game, I sat down and learned to play.

I haven’t talked about this much on my blog, but I love board games, especially “Euro games” or “German-style board games” or whatever you want to call them.  Fresco is apparently pretty new, and I like it a lot.  The niftiest part is the mechanic to begin each “day” in the game, where each player decides what time they want to wake up.  If you wake up early (5:00 or 6:00), you get the best selection at the market and first choice of the available parts of the fresco to restore in the cathedral, but you make your apprentices unhappy and one might refuse to work.  If you sleep in, you have fewer market choices and you go last, but it makes your apprentices happy and you may attract another apprentice to work for you.  I also love the mixing of paints to make more valuable works.  It’s a cool game, and I think I might try to pick up a copy for myself at some point.

At 2:00, my afternoon LFR game began.  This one was a lot of fun.  The DM let me play Rohgar as a third-level character even though he was technically 10 points shy of level 3.  This meant that I got to use his +2 Vicious Longsword and his Cloak of Resistance +2 that he’d been carrying around since his first and second sessions, unable to use them until he hit level 3.  Woo hoo! The session was CORE 1-3 Sense of Wonder, which involved being transported into the middle of a bar fight by a gnome who thought he was summoning a living construct called a Gondling.  We then helped the gnome locate a temple of Gond that had been lost beneath the sea and fought our way through the temple, past some vicious guard robots, eventually ending at a very cool little puzzle.  The puzzle involved each player having a vision (written on paper), then comparing visions to figure out the right order to do things in order to open a vault of treasure.  Way fun, and the DM was awesome and enthusiastic.

Also, Timothy and Sheryl, the couple from last night, were at this game as well.  Sheryl was still just watching, but we chatted again.

I then stopped by the exhibitor hall to get some minis. I picked up a few cheap, generic minis that I can use in case a player needs one, but I also got one just for my wife Barbara:

I don’t know exactly what this is supposed to be, but it’s a dual-sword wielding cat creature.  Barbara loves cats – whenever she plays in the Daggerfall/Morrowind/Oblivion universe of video games, she loves to play a Khajiit, and her first D&D 4th Edition character was a Shifter.  She doesn’t have a character like that at the moment, but I’ve already told her that if I run an in-person campaign that she plays in, we can house-rule a Khajiit type of race for her to play.

I popped out to grab some dinner, then came back in time for the 7:00 PM LFR sessions.  I was planning to use my generic ticket to jump into whatever was open, but it became clear that things were getting messy for the organizer, Linda.  I had anticipated that this might happen, so I had brought my projector rig and left it in the car.  I volunteered to run a session of CORM 1-1 The Black Knight of Arabel (the same one I had just run on Tuesday), and Linda gratefully accepted my offer.

A couple of my players helped me get the stuff from my car to the hotel room where we were playing, which was kind of them.  We ended up starting the game around 7:30, and because of the late start I decided to run the battles as written, without making them more difficult.  That ended up being a little bit of a mistake, as the party mowed down everything in their path.  They seemed to have a good time doing it, though, and the role playing was fun, so I’m not complaining.

The best part for me was that Timothy and Sheryl were there again – and Sheryl played in this game! She mostly asked Timothy to drive, but she rolled her own dice.  By the last encounter, where the party came upon the cult leader getting ready to sacrifice a baby on the altar, she made her own decision: Rather than fight or talk, she wanted to move up there and grab the baby.  She ended up needing some help from the wizard, who used Mage Hand to get the baby to her (technically the baby was probably too heavy, but the Rule of Cool applied here), and then they passed the poor kid back and forth like a football, but the good guys won the day.

I’m continuing to have a blast at TactiCon, and I’m looking forward to running two games tomorrow.  I’m hoping I can get Barbara to come at some point, as I’m sure she would love some of the stuff in the vendor hall.  We need to get her a dragonborn mini to paint for Zaaria, her Runepriest.

Blogging TactiCon

August is GenCon month in the RPG world.  I’m jealous, of course – I live in Colorado and was not able to make it to Indianapolis for the convention. (Side note: The company I work for does have a big presence in Indy, and I’m thinking about seeing if I can get them to send me out there for a business trip just before GenCon next year – free plane ticket for gaming!)

That doesn’t mean I have to be out of luck entirely – Labor Day weekend in Denver means TactiCon!  Now, I’ll admit that I don’t really know exactly what TactiCon is all about yet (the brochure is here).  I’ve never been to a gaming convention of any sort before.  But hey, it’s a 20 minute drive from my house so I might as well make the most of it.

I’m signed up to run two Living Forgotten Realms games for D&D 4th Edition on Saturday using my fancy-schmancy new projector setup.  Now that I know it works, I’m really excited to use it at the convention.

I’m also planning to do some shopping at the Con.  I don’t currently own any minis, and while the projector setup means that I don’t ever plan to own any monster minis, I would like to have minis for my own player characters, my wife’s player character and some generic player characters to keep on hand in case I run a game where they players lack minis of their own.  I’m assuming that a convention is a good place to get minis, right?  I don’t mind paying a little bit of a premium to get high quality – preferably metal instead of plastic.  My shopping list includes:

  • A cloaked figure with a comically oversized sword to represent Kern, my Githzerai avenger
  • An armored character with a normal sword to represent Rhogar, the character I play in LFR games
  • A dragonborn mace-wielder in chain mail to represent my wife’s runepriest, Zaaria (or really any dragonborn character – Barbara loves dragonborn)
  • A few other minis to fill out a random party – something wizard-like, something archer-like, something cleric-like

Naturally, I want to play some games, too.  I haven’t played LFR in a while, so if I could get into a couple of games to get Rhogar up to third level, that would be cool.  I love board gaming, too, and it looks like there are a ton of games scheduled.  Honestly, aside from D&D, I mostly want to explore games that I’ve never played before.  I want to check out new board games and play at least one session of an unfamiliar RPG.  I’ve heard good things about Savage Worlds, so I might try that.

What recommendations do you have for me, a con virgin?  It’s not GenCon, so it won’t be totally overwhelming, but what should I try to see and do?  I’ve taken two days off work, so I’m going to make the most of it!

Creating tokens for in-person gaming

Victory is mine!  In my last couple of posts, I’ve talked about the fact that I’m going to be serving as dungeon master for a real-life D&D game at my local game store, Enchanted Grounds, on July 24, 2010.  It will be a Living Forgotten Realms game.  I don’t own any minis (little statues to represent creatures), so I decided to make my own tokens (little flat representations of creatures) using the guidelines from Newbie DM’s blog.

After a little bit of trial and error, I succeeded terrifically.  The steps are as follows:

  • Find a good image for a token online, such as this one for a paladin: Paladin
  • Drag the token into PhotoShop
  • Resize the canvas in PhotoShop to be way bigger than the current image, and fill the additional background space to match the background that came with the image (I recommend using the eyedropper tool to get the right color and the paint bucket tool for the fill):Paladin2
  • Open up Token Tool and drag this new image from PhotoShop into Token Tool
  • Pick a nice border in Token Tool.  Also, go with 256 x 256 for the token size
  • Resize and re-center the image in Token Tool to look the way you want
  • Drag the image from the top right corner of Token Tool into PhotoShop:Paladin Token
  • From here, follow the instructions from NewbieDM to copy the token to a new letter-sized image (8.5″ x 11″), duplicating the token image, dragging a bloodied layer over it and making the bloodied layer semi-transparent (note that minions don’t get bloodied, so minion tokens don’t need a bloodied image – you can put one minion on one side of a token and another minion on the other side)
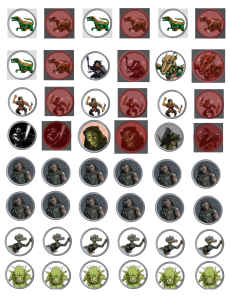
  • Rinse and repeat until you have a whole sheet of these tokens:Token Sheet

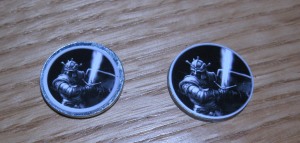
Play around with the size a little bit; I found that you actually want them to be a bit bigger than 1″ across, even though the ultimate size you’ll be punching out is 1″.  I like to have no border on my physical tokens – I like them to take up the whole 1″ circle if possible.  You’ll want to get a 1″ hole punch (I paid $10 for one at Michael’s – it’s pretty heavy duty) and a bunch of 1″ fender washers (I paid $8 for a box of 100 at the local hardware store) and a glue stick.  Below you can see my first pass at the paladin token (when I was aiming for 1″ exactly) and my second pass (when I went bigger) – the second looks way, way cooler.Paladin Tokens

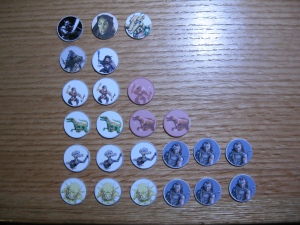
The overall result was awesome, in my humble opinion.  I made tokens for the paladin I play in LFR games (Rhogar), the Avenger I’m playing in my in-person game (Kern), Barbara’s dragonborn Runepriest (Zaaria), and the enemies I’ll need for the LFR module.  These include a wererat, a gnome arcanist, some gnome skulks, some guard drakes, and a whole bunch of human bandits (generally minions).  On the back of the bandits I put goblins and kobolds (common minions, I think).

Tokens

I’m really happy with the way these turned out.  I now have all of the minis that I need for my LFR game, and the maps that I shared yesterday ended up working out great when I used PosteRazor to print them out (I’ve just printed them in black and white for now as a proof of concept, but I know they’ll be fine in color, too).  I’m feeling good about this!

I’ll make the individual token files that I created available on the Downloads page of my blog, too, so you can get them all one by one.

Downloads are getting organized

I’ve decided that it’s time to organize my downloads page.  Rather than just leaving everything on one main page, I’ve created separate pages for Gametable maps, OpenRPG maps and monster minis.  I plan to later add pages for character minis and environmental elements (stairs, treasure chests, etc.).  Most of this is content that I’ve posted into individual blog posts as I’ve created it, but I hope that this blog will eventually become a useful resource for other online dungeon masters.  If that happens, I want it to be easy for new DMs to find the content and use it on the blog.

As a side note, I’m still in Boston and planning to play our second online session within the Keep on the Shadowfell tomorrow, if everything goes according to plan.  I’ve got the whole first level of the Keep set up in an OpenRPG map, so we should be ready to go.  I’ve also done some more work on the party’s back story and given a lot of thought to what comes AFTER the Keep on the Shadowfell (even though it will probably be late summer 2010 before we get there).  I’m having a great time with all of the planning – the hard part is knowing that I have to wait to reveal it all to the players (and therefore to my blog audience).  I can be patient.

My artistic skills are developing!

I’ve mentioned before that I am not artistic by nature.  Okay, singing and acting, sure, but not the visual arts.  However, being an online dungeon master (hey, that’s the name of the blog!) has forced me into the visual arts on a small scale, and I have to admit that I’m having a lot of fun with it.  Gametable comes with a lot of pre-made artwork to use – dungeon walls, trees, character and monster minis, etc. – which helps a lot.  But if I want my game to look right, I have to do some artwork.

Sometimes this involves drawing large, freehand features like rivers, roads and mountains.  These don’t need to be too detailed, so a rough outline of what they should look like is all I really need.  Witness the maps from my first online session:

Kobold Lair Exterior Kobold Ambush

However, we’ll soon be getting into the Keep on the Shadowfell itself, which deserves higher-quality artwork, in my humble opinion.  Having the dungeon walls pre-made helps.  I was able to add some simple features like doors.  I shared in an earlier post (and on my downloads page) some basic game elements like tables, prison bars and stairs.  For the next part of the dungeon, though, I needed some artwork.  Specifically, I needed a rune that appears several times on the floor of one section of the dungeon.  The runes are background elements, but they’re important.  I really wanted to get them right.  There’s an illustration in the adventure manual of what they should look like, roughly, but not the type of illustration that I could cut and paste to use in the game.  No, this time I had to actually draw the runes in Photoshop:Rune from Keep on the ShadowfellOkay, I know I’m not a pro, but come on – that’s a badass-looking rune!  And I really did have to draw it more or less freehand.  I first drew the top triangle-thingy, then copied and rotated it so that I had three of them, then drew the other symbols in part using the line tools in Photoshop and in part just freehanding it. I learned a lesson about combining layers in Photoshop, too.  By default, every time you draw a new shape, Photoshop Elements puts it on a whole new layer.  This is convenient much of the time, when you want to enlarge or rotate just one piece of the drawing (you don’t have to worry about selecting it perfectly – it’s on its own layer).  It got annoying, though, when I wanted to shift and resize the hand that I drew and I found that each finger was on its own layer, as was the palm.  Eventually I just merged all of the visible layers and selected the hand independently, which worked just fine.  And now I have a rune!

I also have some new environmental elements, most of which started with photos online that I resized or modified in some way.

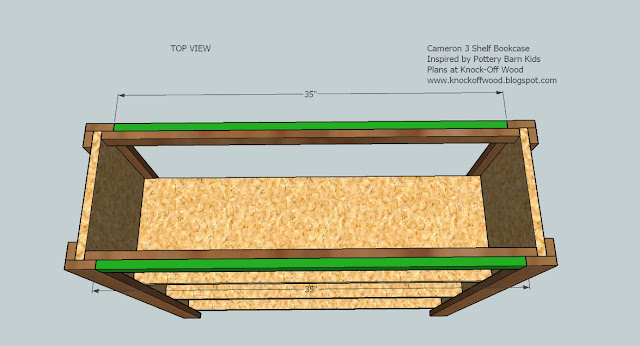
ShelfThis shelf, for instance, started from a schematic of a bookshelf that I found online.  It’s surprisingly hard to find overhead views of lots of the items I’m looking for in the game, so the schematic below was where I started:

Bookshelf schematic

From there, I used the eyedropper in Photoshop to pick up some of the brown color, then used the line tools to make the top solid, then got a little creative with making the 35″ measurement on the front of the middle shelf disappear.  Sure, my dungeon shelf has particle board, but that’s okay!

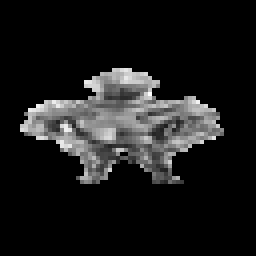
I also needed some suits of armor.  There are tons of great pictures of suits of armor online, but again, it’s hard to find one from overhead.  Fortunately, I was able to experiment with the tools in Photoshop to distort the image of a straight-on picture of armor so that it more or less looks like it’s coming from overhead.  I started with the picture on the left and ultimately turned it into the image on the right.  It’s not great, but it’s better than nothing (and it looks fine at its usual 64 by 64 pixel size).

Suit of armor - original Suit of armor - overhead

Finally, I created a few other miscellaneous minis that I’ve shown below without full write-ups.  These are things I’ve created from images I found online.  From left to right, my improved fire pit, a coffin, a tent, a blue slime (I love Dragon Warrior!), an ochre jelly and two kruthiks (yeah, I had no idea what I kruthik was, either).  Also, an awesome giant rat.

Fire pit Coffin Tent Blue Slime Ochre Jelly Kruthik - full body Kruthik - face close-up Giant rat

I’m pretty happy with myself, I have to say!  I hope we get to play this dungeon soon.  Lane, Zach and Barbara have said that they want to play sooner rather than later, even if we can’t get our full group of five players together.  We may run some more side quests – perhaps even some that I’ll try to build myself – or we may delve into the main keep and pick up other players for future adventures.  Frankly, I’m getting a little too excited about what I’ve created in the keep NOT to run it!  But we’ll see how things play out.  Barbara and I will be traveling next week, and we realized that there’s nothing keeping us from playing our online game while we’re on the road.  We’ll have the laptop, and that’s all we really need.  Plus, we’ll be in Boston, so we’ll be in the same time zone as our friends in Florida (as opposed to Mountain Time here in Colorado), so that might even be easier.  Our next session will likely be played from our hotel room!

First map in Gametable – game on!

I haven’t posted in a couple of days, but that doesn’t mean I haven’t been working on my online D&D game!  Our group is tentatively scheduled to meet online tomorrow (as I post this) for the first time.  We plan to try connecting to one another with Gametable and Skype and maybe, if the technology works out okay, try to get some gaming in.

I don’t have much of an audience for this blog (yet), but I could see my players checking it out from time to time.  This is interesting because I really want to share the work I’ve done so far, but I don’t want to spoil any surprises for the players.  Since it’s unlikely that my friends will be checking this before we play – and because I’m just anxious to share what I’ve learned – some lessons are below.

First of all, I should point out that I’m using a published D&D adventure (The Keep on the Shadowfell) for this first game.  I’m an inexperienced Dungeon Master, and my more knowledgeable brethren have told me to stick with pre-published adventures, at least at first.  This means that I can build maps in advance using Gametable.  I’ll jump to the punch line and show you the finished product (at least, finished so far):

Keep on Shadowfell Map 1

My first detailed map in Gametable, ready for adventure!

So, what’s all this?  It’s the first five areas of the Keep on the Shadowfell, fully revealed.  I used a few pre-packaged items and a whole bunch of items that I’ve created myself, so let me share with you a little bit about what I’ve done.

The basic building block of the dungeon is the dungeon wall.  Gametable comes with four walls – short (2 square) and long (4 square) horizontal and vertical walls.  These are easy to use for the basic dungeon layout.  It also comes with a bunch of pogs – that is, minis to use for characters and monsters.  I’ve used their Goblin mini (quite liberally) and one of their character minis (for one of my player characters).

Long vertical wall Long horizontal wall Short vertical wall Short horizontal wall

Above are the four dungeon wall graphics that come with Gametable; below are the monster and player pogs I’m using that came with the program:

Goblin pog

Goblin

Skeleton pog

Skeleton

Skeleton Lord pog

Skeleton Lord

Female character

Female character

Male character

Male character

Now, if you look at my map graphic, you’ll notice a whole lot of other things on there.  Everything aside from the stuff I just listed is something I made – usually using images I found online, but occasionally using my own skills of an artist.  My wife Barbara is the one who usually uses Photoshop Elements, but for this project I’ve had to get at least a little bit familiar with the program.  (By the way, if you own any of the images I’ve used and would like me to take them down, just let me know).

If you’re going to make graphics using Photoshop Elements for something like Gametable, you’re probably going to want them on a transparent background.  That way, if your new item (such as a treasure chest, a table, a stairway, etc.) doesn’t take up every pixel of its square, the pixels around it will match the dungeon background or the other elements you’ve put it on top of.  That’s a good thing.  The best way I’ve found to get a transparent background is to start with a new file, specifying that you want it to be transparent.

New Photoshop File

Note that the Transparent box at the bottom is checked

This will give you a file with a gray and white checkerboard background – that’s Photoshop’s indication that the background is transparent.  I don’t know of a way to do this in regular old MS Paint, so I’ve migrated to Photoshop Elements.

To turn an image online into a useful Gametable element, start by copying the image into Photoshop Elements.  You can do this by simply clicking on the image, dragging it down to Photoshop in your taskbar, waiting for the Photoshop window to open, and then releasing the image inside of Photoshop.  For instance, I need to get an image of a zombie (a monster my players will be encountering soon), so I’ll begin by searching for promising images using Google.  Here’s one that I like, from a blog called Great White Snark (this is actually a picture of a cake!):

Zombie large

I copied this to my clipboard, then went into Photoshop Elements and selected File – New – Image from clipboard.  Now I have the image open in Photoshop exactly as you see it above.  I don’t want the whole thing for my zombie mini – specifically, I don’t want the white walls in the background, nor do I want to see the edge of the table that the cake is sitting on.  So, I use the Magnetic Lasso tool to highlight just the parts of the image that I want (yes, this can be very painstaking) and then go to Edit – Copy.  Now that just the zombie itself is on my clipboard, I create a new blank file with a transparent background as described above and paste my zombie image into that.

Zombie2

Finally, I need to get my zombie image to the size that I want.  I described in an earlier post a program called TokenTool that helps you generate pogs like those that come with Gametable – round, with some kind of border encircling them.  Those are fine, but I’ve discovered that I actually prefer my minis to be like little statues with transparent backgrounds rather than filled-in circles.  This way, if they ever end up on top of each other, you can still see some of the mini that’s hidden behind the other.  Also, I try to make them square so that I can anticipate how they’ll look.  Finally, I’m starting to feel like I want my minis to be a little bit smaller than the full size of the square, just so that they don’t overlap with the edge of a wall or anything like that.

I’ll start by making the image a square.  To do that, I want to pad the canvas size in the horizontal direction so that it matches the vertical direction.  I go to Image – Resize – Canvas Size, and I see that my image is currently 333 pixels by 489 pixels.  I want some extra space around the mini, so I’ll resize to 525 pixels by 525 pixels (the canvas, remember, not the image), and I’m left with this:

Zombie3

Now all that’s left to do is to shrink this down to the size of a mini for Gametable – 64 by 64 pixels (if it were a large creature, it would be 128 by 128 pixels, and so on for bigger sizes).  I go to Image – Resize – Image Size (as opposed to my earlier Canvas Size) and choose 64 by 64 pixels.  With that, I have my finished zombie mini (note that Gametable uses PNG files for its images, not JPGs):

Zombie Mini

To make the other items you see on the map, I used pretty much the same procedure.  This includes crates, chests, three different tables, plank bridges and a torture rack, all of which are below:

Crate mini

Crate

Chest mini

Chest

Small table

Small table

Tall table

Tall table

Long table

Long table

Plank bridge

Plank bridge

Torture Rack

Torture Rack

There were a few items that I drew myself in Photoshop.  The biggest pain in the butt was actually the stairs, because I wanted them to be open rectangles that showed the dungeon background through them, rather than filled-in rectangles (which Photoshop draws by default).  In Paint this is an easy change to make, but in Photoshop it’s a huge pain.  I ended up using this article from About.com in order to make the stairs work, but boy, what a hassle!  They did turn out looking great, but SO MANY LAYERS!  I used a more freehand approach to draw the curtain, which I end up changing within Gametable so that it has a face size of 2 squares (with just 1 square, it sits in the middle of the square – I wanted it to go across the border of the squares).  The pillar was easy (just a gray circle), and the prison bars were also simple (a few gray squares copied over a few times – also changed within Gametable to have a 2 square face size).  The bed was a little bit trickier – I used the wood from the plank bridge as the headboard and then some rounded rectangles for the bed itself and the pillow.  The bedspread needed texture – a flat color looked awful – so I picked one from within Photoshop.  I freely admit that my fire pit looks like a pizza – I guess I should have searched for a good image of that online, but oh well!  And the iron maiden’s fancy artwork is all me, baby.  Yes, I am a crappy artist, but it kind of looks like an overhead view of an iron maiden, doesn’t it?  Kind of?  A little?

Stairs

Stairs

Curtain

Curtain

Pillar

Pillar

Prison bars

Prison bars

Bed

Bed

Fire pit

Fire pit

Iron Maiden

Iron Maiden

I also created a couple of custom monster and character minis – I’ll probably need to make a few more characters before tomorrow night’s session, for the rest of my players.

With that, I’ll call it a day.  I’ve discovered several more features of Gametable, such as how to hide areas and monsters from your players until the players encounter them, but I’ll save those lessons for another day.  If you’re running your own games in Gametable or similar software and you’d like to use any of the graphics I’ve created, please feel free – I hope I can save you some trouble!

OpenRPG – installation and map basics

When my friends first told me that they were interested in continuing the D&D game that we had begun at a wedding in Florida by playing the game online, we needed to figure out how to make this work.  One of my friends pointed me toward OpenRPG – a free program that creates a virtual tabletop for everyone to “sit” around, see the battle map, chat and roll dice.  Now the trick was figuring out how to make it work.

I’ll begin by noting that I am running OpenRPG on my Dell laptop, which uses Windows XP.  It’s a machine that I bought around 2005, so it certainly doesn’t have the latest bells and whistles, but it has no problem at all running OpenRPG.

You can download OpenRPG at this link.  As I write this, the latest version is 1.8.  The download is somewhat more involved than a typical internet download, in that it start by installing Python (the programming language in which OpenRPG is written) onto your computer.  When you run the program, you will see that it will run in two separate windows – one DOS prompt window for Python and then the OpenRPG program window itself (see below).
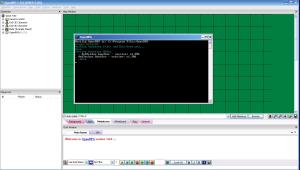
Note the main OpenRPG screen (the background) and the DOS window (foreground)

Note the main OpenRPG screen (the background) and the DOS window (foreground)

There is an online user manual for OpenRPG which does have some useful features, but what I’ll present below are the basics for my use of OpenRPG.  These include some lessons that I had to learn via trial and error.  I’ll note right now that I’m only focusing on the map for now.  The chat window and the dice roller will be addressed later.  As for such things as character sheets, I don’t plan to use them in my game for the time being.

The map is the real power tool of OpenRPG and what makes it worthwhile for online role playing games.  You’ll note that the map has six tabs beneath it, and you’ll want to ultimately use all of these to set up your virtual tabletop for your game.

  • Background: This is where you set up what you would generally think of as “the map” – the walls of your dungeon, the trees in your field, the various features of the area where your player characters (PCs) will do battle.
  • Grid: This is where you specify the size of the underlying grid of the map and what it will look like to your players.
  • Miniatures: Here’s where you put the virtual equivalent of miniature figurines (which I’ll still call “minis” in this blog) onto the battlefield, representing PCs, NPCs (non-player characters) and monsters.
  • Whiteboard: This lets you write on the map on the fly – I’m not very experienced with this yet.
  • Fog: This lets you hide and then reveal parts of the map as your players explore
  • General: Set the size of the overall map itself (in pixels), or reset the map to its default settings.

I’d suggest starting with the Grid tab and going from there.  While your game may vary, I’m playing Dungeons and Dragons fourth edition, and I use a square-grid map with minis that (assuming they’re Medium-sized) will only occupy one square at a time.  This means that I use a Rectangular rather than Hexagonal or Isometric grid, and I use the Snap option (which makes each mini be in one square or another, not spread across squares).  I also do like to see the grid clearly, so I use Solid Lines rather than Dotted Lines or No Lines, and I like them colored black (but feel free to use gray or whatever makes sense for your grid).  Finally, I like the grid boxes to be 60 pixels by 60 pixels.  This will give you boxes that are big enough to see the minis in them clearly.  Now, that takes up a lot of space if you have a sprawling battle map, so you’ll probably need to scroll around the map when you’re playing (or zoom out).  Personally, I think that’s no big deal.

My OpenRPG grid settings

These are the settings that I use for my grid in OpenRPG

Next up: Background.  This is where the action really is.  The background is where you draw the walls of your cavern, the stairs that your characters can use, terrain features, buildings, doors, etc.  That is, everything you would draw yourself on an erasable battle map or build with Dungeon Tiles.  In order to do this, you need to develop your skills of an artist.

I freely admit that I’m a lousy artist.  I was a great student in school, but not so much in art class.  However, I LOVE gaming, and I’ve found inspiration to do some art for online DMing.  Still, I’m keeping my map background art very simple for now.  If you’re playing around on your desktop (not connected to a server for playing with other players online), you can load up an image file to use as your background by choosing “Image” from the dropdown menu on the Background tab, then clicking Browse and selecting the image file you want to use.  However, if you want to use the image for online games, you’ll need to get that image file onto the internet somewhere so that your players can access it, too, and then enter its URL into the Background tab.  I’m going to be using my blog for hosting my files, but something like Photobucket or Picasa should work just fine, too.  And if you want to use any of the background images that are on my blog, feel free to link to them in your game!

So, how do you go about creating a good background?  Well, I’ve decided to start with the grid.  I wanted a blank image file with a grid of 60 by 60 pixel squares on it (to match the actual grid in the game), and then I would fill in squares that are walls and leave blank the squares that are floors.  Building the 60-pixel grid image file was surprisingly a pain, but I managed it – and now you don’t have to!  Feel free to start with the grids below.  One of them is 16 squares by 16 squares (not all that big, but probably enough for a single encounter area) and one is 32 by 32 squares (much more useful for putting together something like an entire floor of a dungeon, perhaps, or at least a big chunk of one).  Make sure you click on the grid you want to pull up the full-size version of the file.

Map grid - 16 by 16 squares, 60 pixels each

Map grid - 16 by 16 squares, 60 pixels each

Map Grid - 32 by 32 squares, 60 pixels each

Map Grid - 32 by 32 squares, 60 pixels each

Once you have this grid, you can start filling in squares using something as simple as MS Paint and the paint bucket tool, then save a new version that’s an actual map.  From there, you can add fancier art as you wish – though I freely admit I haven’t done this yet!  It’s all black and white, square walls, featureless corridors, etc.  Better art will come over time!  Below is an example of a grid that has a room roughed in, just to give you an example of what this might look like.  I’ll share actual rooms that I put together as I assemble them over time.
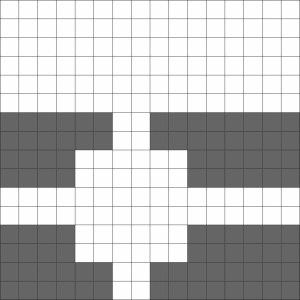
Rough room map

An example of the small grid with a simple room roughed in with gray walls.

Since we’re talking about the background, we should go to the General tab.  There are really two main functions here.  First, we have the Default Map button, which clears away anything you’ve added (backgrounds, grid changes, minis, fog) and lets you start from scratch.  Second, you can set the size of the map.  If you use the 16 by 16 square map, the size will be 961 by 961 pixels.  If you use the big 32 by 32 square map, the size will be 1921 by 1921 pixels.

You’ll note from the image below that I’ve set the map size appropriately for the large grid, and I’ve scrolled to the bottom right corner of the map.  However, you’ll note that while the grid’s background color is white (from the image file), there’s a green border around the edges of the map.

OpenRPG - General Map Settings

These are the General map settings for the large grid. Note the green border along the right and bottom sides of the map.

If you want that green edging to go away, go to the Background tab, select Color from the dropdown menu, click the Color button and pick the color you want.  That will change the color of the Color button itself.  To actually put it into place on the map, you then click the Apply button.

OpenRPG - Background Color

Setting the background color to white, with the necessary dropdowns and buttons circled.

All that remains for me to talk about today is minis.  To create a mini from scratch using MS Paint, I suggest starting with a file that is the right size and filling it in.  Assuming you’re using a 60-pixel grid, I recommend creating minis that are 58 by 58 pixels.  That way, they fit inside the grid squares and do not cover up the borders of the squares.  To do this, go to the Image menu in Paint, then select Attributes, then set the size you want, in pixels.

From here, you’ll be left with a tiny little box to draw in.  I highly recommend zooming in for more accuracy (View – Zoom).  This is the procedure I used to create my first mini – Stick Mini.

Stick Mini

Stick Mini - little, but mighty!

Now, if you’re not a great Paint artist and you want some better-looking minis, the simplest thing to do is to find an image that you like online (assuming that the owner of the image is okay with you using it), copy it to Paint, crop it as you see fit, get it into a square size, and the resize it to 58 by 58 pixels.

Let’s say that you find an image of a kobold that you like.  For instance, I found the image below at a blog called Dice Monkey.

In his current form, this kobold has two problems that keep him from being a good mini: He’s too tall (not a square) and he’s too big (not a mini).  The image dimensions are 240 pixels wide by 327 pixels tall.  To solve the first problem, I grabbed the top of his spear and shifted it down closer to his hand, and I moved the image around until he was at the top of the box.  I then cropped the image (Image – Attributes) to 240 by 240 pixels, leaving me with the picture below.

Short KoboldNow he’s 240 by 240, but I want him to be 58 by 58.  Some math reveals that 58 divided by 240 equals about 24%, so I want to resize the image so that it’s 24% as tall and 24% as wide as it currently is.  To do this, I go to Image – Stretch/Skew and enter 24 for both Vertical and Horizontal.

Kobold resizing

After resizing, I’m left with my finished kobold mini:

Kobold mini

My finished kobold mini, in all of his 58 by 58 pixel glory

You can use the same process to create minis for other monsters, NPCs and even player characters.  However, if you have players who like to get involved with their characters, I highly recommend asking them to create their own minis and sending them to you for use in the game.  It’s way more fun for them to control a character that they created, after all!

That wraps up the map basics.  In future posts, I’ll talk more about the fog of war, creating more detailed backgrounds and more minis, and how to actually USE the stuff you’ve created.  As always, comments are highly encouraged!