Hotel room Dungeons and Dragons part 2

I’m hoping to get up two posts today, as I’ve had two different sessions of D&D in the last two days.  I’ll start with Wednesday evening, when Barbara and I in our hotel room in Boston got online with Lane and Zach from their home in Florida to continue our adventures in the Keep on the Shadowfell.  In our first session in the Keep this past Sunday, we had to improvise in a hurry as we learned that we wouldn’t be able to use Gametable due to networking issues in the hotel, and I switched things over to OpenRPG in a rush.  This time, I was prepared – I had already converted the maps over to OpenRPG and was ready to go (the OpenRPG map of the first level of the Keep is available here or on the downloads page – but my players shouldn’t go poking through it just yet!).  We called each other on Skype, connected to the appropriate room on an OpenRPG server, and we were gaming!

We started with some back story.  When we first began playing together, it was a big rush and no one had any ideas on back story for their characters, why they were adventuring together, etc.  I had thought about this over the past few days and filled in the party (since they were willing to hear my thoughts).  All of the characters are female, so I explained that they had all been approached when they were younger girls (the human equivalent of 10-12 years old) by a Deva named Juni Lamplighter (or one of her allies) to come to the Academy of Adventure.  Juni, being a Deva, remembered times when the world was not so dark and chaotic and wanted to bring some light and order to the world, so she decided to set up a place where individuals with talent, primarily girls who felt like outcasts, could train to become adventurers and work to do good in the world.  The PCs were all pupils at the Academy, and Juni had sent them to Winterhaven after they finished the main body of their training as a way to get started in making a difference.  Yes, it’s a bit Hogwarts-esque, but that’s not a problem.  The players seemed fine with this, and it provides both a reason for adventuring as well as some future plot hooks, so we’ll run with it.

At the end of the previous session, the party had just cleared out the goblin torture chamber and decided to rescue Splug, a goblin prisoner who had been put in a cell for cheating (or as he called it, “being good at playing cards against”) the other goblins.  He offered to serve as a porter for the party and tell them what he knows of the Keep if they would free him.  They let him out, and he told them about the excavation where goblins were digging for some unspecified treasure (but hadn’t found anything), the stairs that lead down to some caves, the main door and the secret door to the chamber of the goblin leader, and the door that led to the deeper part of the Keep, where Splug had never been.

Balgron the Fat

Balgron the Fat

The PCs decided to use the secret door to sneak into the sleeping quarters of the goblin boss, Balgron the Fat, to surprise him while he was asleep.  Zach’s rogue rolled great on her Stealth checks to get into the bedchamber, and they decided to try to tie up Balgron while he slept in order to interrogate him about the rest of the Keep.  This was awesome – the players were thinking outside the box!  They had rope in their packs, so I ruled that this would require a Dexterity check (figuring that Balgron would probably wake up while being tied).  Well, the dexterity roll was crazy high, so I ruled that they succeeded in tying up Balgron, but he woke up as they finished.  Balgron was confused for a moment, but as soon as they started asking him questions, he yelled for his guards and we rolled initiative.

There was only one other goblin in the room with Balgron, and I had that guy poke his head into the curtained area that surrounded Balgron’s bed, see the situation, and run for the door to get the other troops.  The door was locked, so it took him a little time, during which time the PCs attacked him to try to stop him.  Lane’s character had been hanging back, keeping an eye on Splug, but when the battle began and Lane’s character ran into the fray, Splug skedaddled.  The party wasn’t able to stop the goblin guard before he opened the door and raised the alarm.  A bunch of other guards came running down the hall, and the party decided to try to close and re-lock the door rather than just fighting (creative!).

I ruled that Balgron had another copy of the key on him, and since the rogue had decided to sneak attack the crap out of him while he was tied up (not very nice, but brutally effective), Balgron decided to cooperate to save his own hide.  He told the PCs where the key was, and they locked the door.  Naturally, the goblins began trying to bash it down, and wouldn’t you know it, one of the little minions got a critical hit in throwing himself at the door, so I ruled that it broke off its hinges and was now open again.

Balgron was willing to answer some questions now, and also willing to tell his guards to go away, which they did.  The party started asking him about the Keep, who hired him (Kalarel), what he was doing there, etc., and he answered more or less honestly.  Then the party opened up his treasure chest and he started bargaining for his life.  The chest had some gold, an enchanted short sword (which Zach’s rogue coveted) and some potions of healing (which the party had none of, and I figured they could use them).  Balgron was willing to give up the potions in exchange for his life.  The rogue held out for the sword, and Balgron grew enraged, burst out of his ropes and called the guards back in.

The ensuing battle was actually not all that interesting.  Balgron was already badly bloodied, and the fact that all of the goblins were coming down a narrow passageway made them easy fodder for Barbara’s swordmage’s enlarged dragon breath.  A few got into the bedroom and Balgron did his goblin shuffle once, but that was all she wrote. There was barely any damage to any of the PCs.  They rolled really well, and used smart, creative tactics.

Next up, the party knew about the excavation going on, but they weren’t interested in taking on those goblins – they wanted to go down into the caves.  They wanted the digging goblins to leave peacefully and debated whether to charge in and fight them, try to reason with them by telling them that their leader was dead and they were free, or something else.  They decided to leave Balgron’s severed head (yuck) where the goblins would be able to see it when they left the excavation chamber, and then head into the caves, figuring that the goblins would see the head as a sign to get out of there.

Well, I had the goblins roll Perception to see if they noticed the head while they were still working, and they did.  As the adventurers started heading down the stairs, the goblins quietly moved into position and started throwing Alchemist’s Fire.  The battle was on.

Guard Drake

Guard Drake

Two guard drakes charged up to the top of the stairs, and the PCs were basically hemmed in on a stairway.  They came perilously close to backing into the caves at the bottom of the stairs, at which point they very well may have been set upon by more enemies from the back, but they just barely stayed on the staircase and thus only had to face the goblin bombardiers and guard drakes.  This battle was tougher, and Barbara’s swordmage actually fell to zero hit points before being healed by Lane’s druid.  It was a close call, but once the drakes were dead, things turned in the party’s favor.  The last goblin bargained for his life, offering a dirt-covered object that he had dug up in exchange for being allowed to leave.  The party agreed (though not before the rogue observed that they could just kill the goblin and take the item), and the goblin was escorted out of the keep.  I’ve decided that he was named Steek.  The item turned out to be an enchanted totem with some healing powers, which is useful for Lane’s druid.

At this point, we called it a night.  I have to say that this adventure is beginning to feel like a success.  The players seem to be having a good time, and the technology is pretty much transparent (though I’m feeling like the OpenRPG dice roller tends to roll on the high side quite a lot; probably my imagination).  The players are definitely thinking creatively, and I feel like I’m doing pretty well at rolling with the creativity.  They’ve now gone through four encounters with no extended rest and only using one daily power.  I’m pretty sure I need to ramp up the challenge level a little bit (though we discovered that we had been playing Zach’s rogue a little bit wrong on Sunday, letting her get combat advantage too easily with the sling), but everyone seems to be having a good time, so I don’t want to go nuts.  Zach and Lane are going on a two-week vacation soon, so it might be a while before we get to play again, but our in-person game in Denver was just canceled for Sunday, so who knows?  Maybe we can play one more time then.  I’m up for it!

Improvisation is important

Barbara and I are now in Boston for a business trip of mine, so what do we do on our first day in town?  Play D&D online with our friends in Florida, of course!  Hey, we’re all on the same time zone now, so we might as well.

At 11:00 AM, we all met online to play.  I called Zach and Lane via Skype, which worked great.  My maps in Gametable were ready to go, so I loaded up a map and hit Host.  I checked my IP address and told it to Zach… and realized that we can’t use Gametable when the host doesn’t own the internet router that they’re connecting to.  As you may recall from my earlier article about connecting to your players via Gametable, I had to go into my router settings and forward internet traffic that came to my IP address to my computer in particular, rather than to Barbara’s computer or some other device on our network.  Since I didn’t own the hotel router that I was connecting to, I couldn’t go into its settings to forward internet traffic to my computer.  Zach and Lane could host on their computer, but that wouldn’t work since they’re not the DM.  I could send them the complete map with all of the monsters revealed and everything, but that’s a less fun experience for them.

So, I improvised.  Back in the earliest days of my blog, I thought we were going to be using OpenRPG rather than Gametable for running our online games.  Gametable is far easier to build maps in, but OpenRPG is easier on the networking side.  As long as everyone can connect to the same server, OpenRPG is good to go.  So, we could play via OpenRPG – but all of my maps were in Gametable.  What to do?

I started by asking Lane and Zach to give me 20 minutes to get everything set up.

  • I then opened up Gametable, set the view to show the first area of the Keep on the Shadowfell (the entry chamber guarded by goblins) and took a screenshot.
  • I pasted the screenshot into Photoshop Elements.
  • I trimmed the canvas so that the top left corner was on the top left corner of a grid square, and the same for the top right.
  • I resized the map image so that the grid squares were 64 pixels wide (that’s where they started, but I had to zoom out in order for enough of the map to show up on my screen shot).  In order to do this, I counted the number of squares across in the image, multiplied that number by 64, and resized the image (keeping the proportions constant) so that the width equaled the number of squares times 64 pixels.
  • I erased the areas of the map that weren’t part of this first encounter.
  • I saved this image file on my Dropbox public directory (more on Dropbox in a later post).
  • I opened OpenRPG.
  • I set the General property of the map so that the map was plenty large enough for my new image.
  • I set the background color of the map to gray (not necessary, but nice).
  • I set the grid size to 64 pixels and made the grid lines invisible (since my image file had the grid lines from Gametable).
  • I loaded my new map image as the background, using the public URL from the Dropbox directory.
  • I also copied all of my Gametable character and monster pogs to my Dropbox public directory so that I could load them into OpenRPG. (I suppose I could actually do the same with environmental pogs… hmm…)

Once I had this set up, I opened a new room on an OpenRPG server, called Lane and Zach back and told them how to connect to my room in OpenRPG.  I assigned them the role of Player, and they could then move their minis around the map.  Huzzah!

The map image I created is below.  It’s messy, because I had to manually erase the parts of the map that I didn’t want the players to see, but that’s okay.

Entry chamber

We played through the entry chamber and the torture chamber (which I created in the same manner and had to load as a separate background image when they went into that area), and I have to say that it all went pretty well.  I had to manually add each monster as they encountered them rather than revealing them from the private map as I would have done in Gametable, but that was easy enough to do.

It’s worth mentioning that the party ripped through the bad guys like a knife through butter!  Zach’s rogue successfully stealthed down the stairs and got a sneak attack with a sling on the first goblin warrior, then rolled the highest initiative and finished the warrior off with more sneak attack damage before he had a chance to warn his friends.  I had already removed the pit trap and the swarm of rats from the encounter in order to level it down for a party of three PCs, and I was planning to remove one of the goblin sharpshooters as well.  But since the party was handling everything so skillfully, I left the second sharpshooter in the battle, and the PCs had no trouble at all.  The torture chamber was a little more challenging, but it was awesome when Barbara’s swordmage shoved a goblin into the iron maiden and slammed it shut on him to start the battle.  I removed just one goblin from the battle, and that was all I did to level it down (well, I also forgot about the daily power of the hobgoblin’s magic armor, but oh well).  After the two battles, we had played for two and a half hours (including technical difficulty time) and decided to call it a day.  The party did decide to release Splug, cautiously, which should be interesting!  Best of all, they were still excited about the game and want to get together tomorrow evening to continue!  I’d call that a success.  They were within a few XP of leveling up, so I awarded them a few extra points for good roleplaying and general cool moves so that they could begin tomorrow with level 2 characters.

Since I’ve now had a little more time to prepare to run the game in OpenRPG, I’ve figured out the fog of war function and decided to use it for tomorrow’s battle.  I created an image of the entire first level of the Keep on the Shadowfell (even though there’s no way the party will get to all of it tomorrow), loaded it into OpenRPG, and used the fog function to hide everything that the players haven’t discovered yet.  This is a little imperfect, as Barbara can see my screen (we only have the one laptop here in the hotel room), but that’s okay – she’s good at playing based on what her character knows rather than what she as a player knows.  Tomorrow should be even smoother!

Success with networking

As I mentioned in my last post, I first thought that OpenRPG would be the tool that I would use to run my online D&D game, but then discovered Gametable, which I absolutely loved.  The only problem with Gametable is that I couldn’t connect my wife Barbara’s computer to mine with it, which I could easily do with OpenRPG.

Fortunately, one of the players in the game, Zach, is a computer pro and was able to help me set things up so that I could host a game that both Zach and Barbara could connect to.  (We can presumably connect more people, too, though we haven’t tried yet.)  Let me share my new knowledge with you.

First, I’ll say a few words about connecting to your players via OpenRPG (since I never addressed this in my earlier posts).  In this program, you start by connecting to one of the servers out there for OpenRPG (you could also run your own server, but that’s beyond my needs).

OpenRPG Server Menu

To start networking, go to Game Server - Browse Servers

One you’re browsing the servers, you’ll want to pick one and join its Lobby. I’ve tried creating a room before joining a lobby, but for some reason it didn’t seem to work properly.

OpenRPG Join a Lobby

Double click a server on the left, then click on the Lobby on the right

Once you’re in a server’s lobby, you can create the room for your game at the bottom right corner of this window.  Give it a name, and then a password if you wish (this keeps other people from taking over the room, though I’m not sure I’d be too worried about that) and an admin password – then click Create Room.

After that, you need to tell your players what server you’re on and what room you’re in (and the room password, if you’ve assigned one).  They’ll need to go to the Lobby, then click on your room and “Join Room.”  They’ll show up on the Player List in your room, and you can right click on their names to assign them the role of Player, which will let them interact with their minis.  By default they will be Lurkers, who can’t affect the game.  Only the GM (the person who started the room, or anyone who is assigned the GM role) can do things like changing the background to bring up the next map.

So, connecting to other players via OpenRPG is easy.  With Gametable, it could be a little bit harder.  I’ll lay out my experience, though yours may vary depending on your setup.  I’m using a Dell laptop running Windows XP.  Barbara has a Dell desktop, also running XP.  We have cable internet service, which comes out of the wall and into our cable modem, then into a Netgear wireless router.  From there, an Ethernet cable connects to Barbara’s computer, while my laptop connects to our secured network wirelessly.

The reason I go into all of this detail is that I had to mess with some settings to make everything work properly.  First, let me explain the steps within Gametable to start an online game.  If you’re hosting, start by going to the Network menu and selecting Host.

Gametable Network Menu

To host a game, go to Network, then Host.

From here, you’ll be prompted to enter your name, your character’s name, a password (entirely optional – I don’t think I’ll bother) and a port (I use the default of 6812).

Gametable Host MenuEasy enough.  For your players to connect to your game once you’re hosting it, they’ll go to the Network menu and choose Join, where they’ll be prompted with this screen:

Gametable Join MenuYes, it’s the same as the Host screen, except it’s asking for the host address.  As the host, you’ll have to tell your players what your IP address is.  The simplest way to find this is by going to http://whatismyipaddress.com/ (pretty obvious, I know).  It’s entirely possible that this is all that you’ll need – your players will enter the IP address you tell them, they’ll join your game, and you’re off and running.

I had two issues to deal with.  First, and I’m not absolutely certain that I had to do this but I thought I should mention it, I opened port 6812 in the Windows Firewall.  This involved going to the Control Panel, opening Windows Firewall, clicking the Exceptions tab, then the Add Port button.  I named the new port Gametable and had it open port 6812.  Maybe that port was already open, maybe not, but it definitely is now.

Firewall SettingsNext, I had to mess with some settings on my router.  This may not apply to most of you, but in my case I had two router issues to deal with.  First, since there are multiple devices on this IP address (including my computer and Barbara’s computer), I had to make sure that anyone connecting to this IP address would be routed to my computer.  Second, I needed to figure out how to have Barbara’s computer connect to mine, since they have the same external IP address.

I’ll take the second issue first, since it helped me address the first one.  It turns out that my computer has both an external IP address and an internal IP address.  The external IP address is the one other computers on the internet would use to connect to me, while the internal IP address is what the router assigns to my particular computer among the devices in the house.  To get the internal IP address, I went to the Run menu in Windows and typed cmd to bring up a command prompt (ah, the good old days of DOS – such memories).  From that prompt, I typed ipconfig.  This brought up information showing me, among other things, my internal IP address.

Running IPConfig

The steps I used to get to my internal IP address - click to enlarge

Now that I know my internal IP address (192.168.1.5), I could enter this into Barbara’s Gametable program to connect to my computer – success!

In order to get computers on the internet to connect to my computer, I needed to set things up so that anyone connecting to my external IP address would be forwarded to my computer and not Barbara’s, which meant that I needed to change some router settings.  To get to the router settings, I went to 192.168.1.1 in my browser and entered my login and password information for the router (I’m very glad that I remembered to write this down when I set up the router!).  From the main router settings menu, I clicked on “Port Forwarding / Port Triggering.”  On the next screen, I clicked Add Custom Service, then set things up for Gametable with the appropriate port (6812) and internal IP address to forward that port to (192.168.1.5).  Voila!

Router SettingsThis might sound like a lot of effort, but honestly, once I knew what I needed to do it hardly took any time at all.  And the upshot is that now I can use Gametable to host games!

Since it looks like I’ll  be abandoning OpenRPG before I even got a chance to really use it (which, I’ll admit, makes me feel a little bit sad somehow), I’ll shift to talking more about Gametable in future posts.  It’s extremely user friendly, so I doubt if I’ll need as much detail on the basics as I provided for OpenRPG.  My friend Zach, who helped me with the networking issues, got a chance to try out Gametable and seemed impressed.  I think this is going to be a winner!

Program promiscuity

No sooner did I finish my first detailed post about OpenRPG than I discovered some more awesome, free tools for playing D&D online.  I’m still not sure which tools I plan to use yet, but I thought I would share some information about what I’ve found.  I should point out that I discovered these tools by browsing some blogs at the amazing RPG Bloggers site.  If I end up making this blog a long-term project, I’d definitely like to be a member of that group!

The first new program I discovered is Gametable.  This program basically has the map and dice roller tools of OpenRPG, except better.  With OpenRPG, as far as I’ve been able to tell, you have to do all of your map prep work before you play – you have to have the background images properly formatted with all of your grid lines in place, with the file loaded onto a public web site, etc.

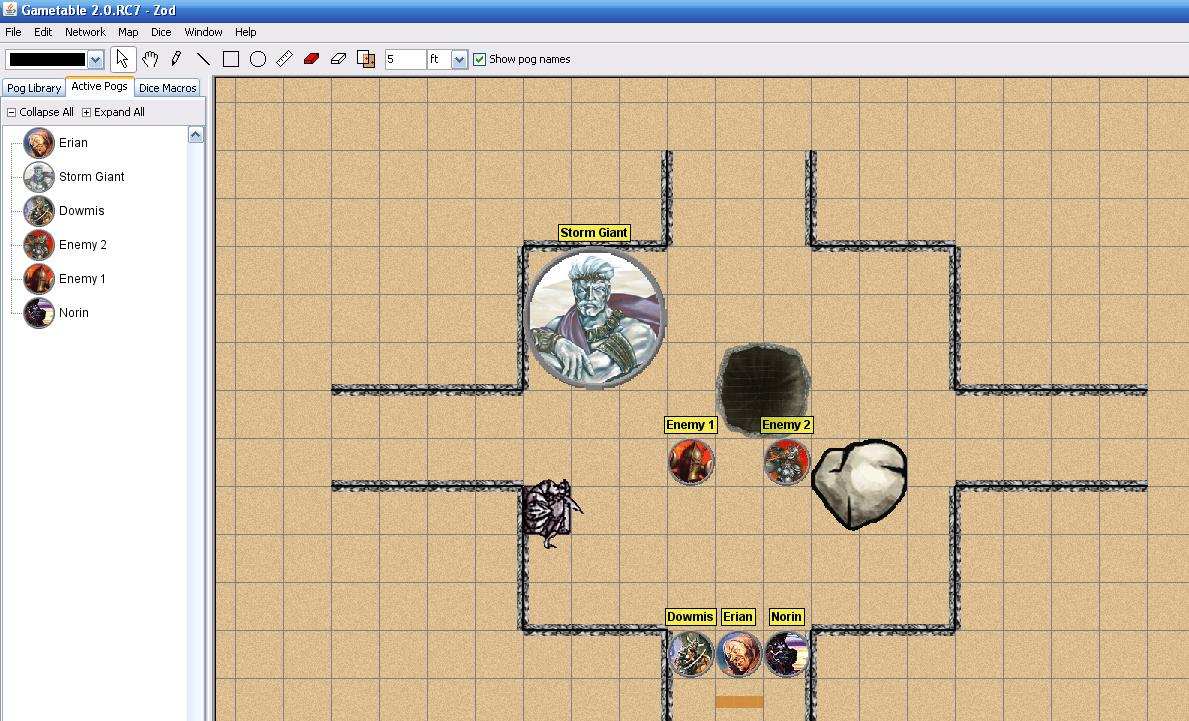
Gametable goes in another, much more flexible direction.  When you open up Gametable, the map takes up most of the screen, and by default it looks like the tan-colored battle maps that those of us who play D&D with pen and paper are used to (though you can change the color).  The coolest part is that you can easily draw maps on the fly, just as you would around a real table.  The program has basic tools for drawing lines and bringing in walls, plus pre-made areas that you can just drag onto the board and run with.  It has pre-made battle features like rocks and trees and pits that you can just drag onto the screen, and they look great.  It also comes pre-loaded with a bunch of “pogs” or minis of various sizes.  Super-simple, with no setup required.  You could have your players log in and start with a blank board, and then you could draw the battle map on the fly, just as you would on a real battle mat.  Outstanding!

Gametable example

An example Gametable session, which took maybe 5 minutes to assemble

I’ve discovered only one quibble with Gametable so far – connecting to other players has been harder for me than it was with OpenRPG.  With OpenRPG, you browse for available servers (of which there are plenty), create a room for your game, and then have your players go to that same room from their computers.  With Gametable, you’re hosting the game directly on your computer, which means that other players have to enter your IP address to connect.  This might be easy in most cases, but my only test computer is also here in the house, running off the same router – which means it has the same IP address.  I haven’t been able to connect two computers yet – but I won’t give up!  This program just looks so good and seems so easy to use, I can’t give up on it without giving it a good chance.

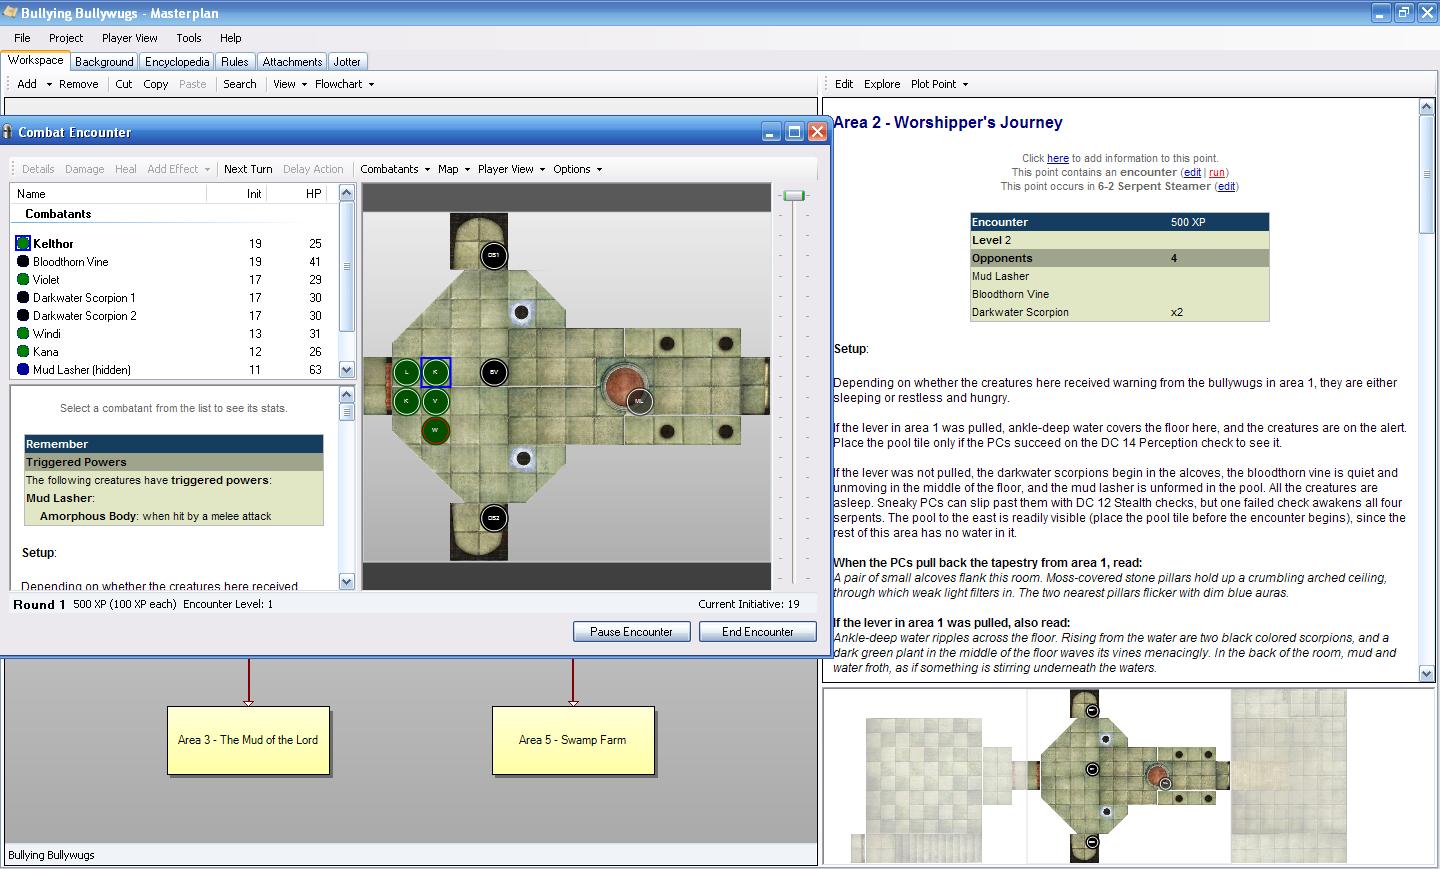
The second amazing program I discovered is not actually a program to PLAY D&D online, but it’s a fantastic program for a DM to build their game and run it in the background.  It’s called Masterplan.  While OpenRPG and Gametable are flexible map programs for playing any RPG, Masterplan is a Dungeons and Dragons fourth edition tool, period.  First off, the game is fully integrated with other official Wizards of the Coast D&D tools.  When you open it up for the first time, it asks you if you have a D&D Insider (D&DI) subscription (I’m glad that I do!), and if you log in to D&DI it will then download all of the monsters and items that are in the D&D Compendium.  For me, that was a little over 9,600 items, which took about 20 minutes to download.  Unlike OpenRPG or Gametable, Masterplan comes with a fantastic, detailed user manual with tons of screenshots and examples.  It also has some pre-made adventures, which are great for seeing the program in action.

Basically, Masterplan lets you plan adventures.  It centers around a flowchart view of plot points for your campaign.  For instance, you might start with a simple “you all meet in a tavern” plot point, which could lead to either of two different paths depending on what the characters decide to do.  The next step on each path might be a combat encounter.  Masterplan lets you build the map for that encounter using slick Dungeon Tiles that look very cool.  It lets you add whatever enemies you think make sense – or it can help you autobuild a set of enemies to provide whatever level of challenge you want, given the party that will be playing it.  You can import your players’ character files straight out of Character Builder so that Masterplan will know what level the party is, what powers they have, their defenses, their hit points, etc.  Every monster in any published D&D 4e book is here, with easy additions of your custom monsters from Adventure Tools.  You can run the battle within the program, rolling initiative, keeping track of hit points, even tracking ongoing conditions with prompts for end of turn saves.  I’m absolutely blown away.

Masterplan example

A Masterplan screen shot, with a battle running in the foreground and the rest of the features in the background

So, what will I be using?  Well, I haven’t decided yet.  I’m almost certain that I’ll be using Masterplan at some point, certainly whenever I start making my own adventures.  Since I’m running pre-published adventures for now, though, I don’t know that I want to go to the trouble of recreating them within Masterplan.  However, I do think it’s possible that I might make some maps in Masterplan (which, as I said, look awesome) and resize them to a 60-pixel grid to serve as a background within OpenRPG.  If my games end up more free-form, though, I think I’ll have to go with Gametable (assuming I can solve the connectivity issues) just so I can draw maps on the fly.

What do you think?  Do you have any experience with any of these programs?  I’d love to get advice from someone who has used them!

OpenRPG – installation and map basics

When my friends first told me that they were interested in continuing the D&D game that we had begun at a wedding in Florida by playing the game online, we needed to figure out how to make this work.  One of my friends pointed me toward OpenRPG – a free program that creates a virtual tabletop for everyone to “sit” around, see the battle map, chat and roll dice.  Now the trick was figuring out how to make it work.

I’ll begin by noting that I am running OpenRPG on my Dell laptop, which uses Windows XP.  It’s a machine that I bought around 2005, so it certainly doesn’t have the latest bells and whistles, but it has no problem at all running OpenRPG.

You can download OpenRPG at this link.  As I write this, the latest version is 1.8.  The download is somewhat more involved than a typical internet download, in that it start by installing Python (the programming language in which OpenRPG is written) onto your computer.  When you run the program, you will see that it will run in two separate windows – one DOS prompt window for Python and then the OpenRPG program window itself (see below).

Note the main OpenRPG screen (the background) and the DOS window (foreground)

Note the main OpenRPG screen (the background) and the DOS window (foreground)

There is an online user manual for OpenRPG which does have some useful features, but what I’ll present below are the basics for my use of OpenRPG.  These include some lessons that I had to learn via trial and error.  I’ll note right now that I’m only focusing on the map for now.  The chat window and the dice roller will be addressed later.  As for such things as character sheets, I don’t plan to use them in my game for the time being.

The map is the real power tool of OpenRPG and what makes it worthwhile for online role playing games.  You’ll note that the map has six tabs beneath it, and you’ll want to ultimately use all of these to set up your virtual tabletop for your game.

  • Background: This is where you set up what you would generally think of as “the map” – the walls of your dungeon, the trees in your field, the various features of the area where your player characters (PCs) will do battle.
  • Grid: This is where you specify the size of the underlying grid of the map and what it will look like to your players.
  • Miniatures: Here’s where you put the virtual equivalent of miniature figurines (which I’ll still call “minis” in this blog) onto the battlefield, representing PCs, NPCs (non-player characters) and monsters.
  • Whiteboard: This lets you write on the map on the fly – I’m not very experienced with this yet.
  • Fog: This lets you hide and then reveal parts of the map as your players explore
  • General: Set the size of the overall map itself (in pixels), or reset the map to its default settings.

I’d suggest starting with the Grid tab and going from there.  While your game may vary, I’m playing Dungeons and Dragons fourth edition, and I use a square-grid map with minis that (assuming they’re Medium-sized) will only occupy one square at a time.  This means that I use a Rectangular rather than Hexagonal or Isometric grid, and I use the Snap option (which makes each mini be in one square or another, not spread across squares).  I also do like to see the grid clearly, so I use Solid Lines rather than Dotted Lines or No Lines, and I like them colored black (but feel free to use gray or whatever makes sense for your grid).  Finally, I like the grid boxes to be 60 pixels by 60 pixels.  This will give you boxes that are big enough to see the minis in them clearly.  Now, that takes up a lot of space if you have a sprawling battle map, so you’ll probably need to scroll around the map when you’re playing (or zoom out).  Personally, I think that’s no big deal.

My OpenRPG grid settings

These are the settings that I use for my grid in OpenRPG

Next up: Background.  This is where the action really is.  The background is where you draw the walls of your cavern, the stairs that your characters can use, terrain features, buildings, doors, etc.  That is, everything you would draw yourself on an erasable battle map or build with Dungeon Tiles.  In order to do this, you need to develop your skills of an artist.

I freely admit that I’m a lousy artist.  I was a great student in school, but not so much in art class.  However, I LOVE gaming, and I’ve found inspiration to do some art for online DMing.  Still, I’m keeping my map background art very simple for now.  If you’re playing around on your desktop (not connected to a server for playing with other players online), you can load up an image file to use as your background by choosing “Image” from the dropdown menu on the Background tab, then clicking Browse and selecting the image file you want to use.  However, if you want to use the image for online games, you’ll need to get that image file onto the internet somewhere so that your players can access it, too, and then enter its URL into the Background tab.  I’m going to be using my blog for hosting my files, but something like Photobucket or Picasa should work just fine, too.  And if you want to use any of the background images that are on my blog, feel free to link to them in your game!

So, how do you go about creating a good background?  Well, I’ve decided to start with the grid.  I wanted a blank image file with a grid of 60 by 60 pixel squares on it (to match the actual grid in the game), and then I would fill in squares that are walls and leave blank the squares that are floors.  Building the 60-pixel grid image file was surprisingly a pain, but I managed it – and now you don’t have to!  Feel free to start with the grids below.  One of them is 16 squares by 16 squares (not all that big, but probably enough for a single encounter area) and one is 32 by 32 squares (much more useful for putting together something like an entire floor of a dungeon, perhaps, or at least a big chunk of one).  Make sure you click on the grid you want to pull up the full-size version of the file.

Map grid - 16 by 16 squares, 60 pixels each

Map grid - 16 by 16 squares, 60 pixels each

Map Grid - 32 by 32 squares, 60 pixels each

Map Grid - 32 by 32 squares, 60 pixels each

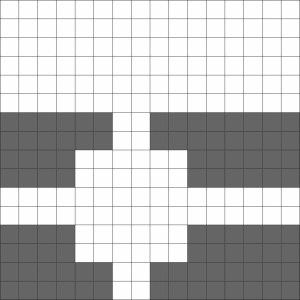
Once you have this grid, you can start filling in squares using something as simple as MS Paint and the paint bucket tool, then save a new version that’s an actual map.  From there, you can add fancier art as you wish – though I freely admit I haven’t done this yet!  It’s all black and white, square walls, featureless corridors, etc.  Better art will come over time!  Below is an example of a grid that has a room roughed in, just to give you an example of what this might look like.  I’ll share actual rooms that I put together as I assemble them over time.

Rough room map

An example of the small grid with a simple room roughed in with gray walls.

Since we’re talking about the background, we should go to the General tab.  There are really two main functions here.  First, we have the Default Map button, which clears away anything you’ve added (backgrounds, grid changes, minis, fog) and lets you start from scratch.  Second, you can set the size of the map.  If you use the 16 by 16 square map, the size will be 961 by 961 pixels.  If you use the big 32 by 32 square map, the size will be 1921 by 1921 pixels.

You’ll note from the image below that I’ve set the map size appropriately for the large grid, and I’ve scrolled to the bottom right corner of the map.  However, you’ll note that while the grid’s background color is white (from the image file), there’s a green border around the edges of the map.

OpenRPG - General Map Settings

These are the General map settings for the large grid. Note the green border along the right and bottom sides of the map.

If you want that green edging to go away, go to the Background tab, select Color from the dropdown menu, click the Color button and pick the color you want.  That will change the color of the Color button itself.  To actually put it into place on the map, you then click the Apply button.

OpenRPG - Background Color

Setting the background color to white, with the necessary dropdowns and buttons circled.

All that remains for me to talk about today is minis.  To create a mini from scratch using MS Paint, I suggest starting with a file that is the right size and filling it in.  Assuming you’re using a 60-pixel grid, I recommend creating minis that are 58 by 58 pixels.  That way, they fit inside the grid squares and do not cover up the borders of the squares.  To do this, go to the Image menu in Paint, then select Attributes, then set the size you want, in pixels.

From here, you’ll be left with a tiny little box to draw in.  I highly recommend zooming in for more accuracy (View – Zoom).  This is the procedure I used to create my first mini – Stick Mini.

Stick Mini

Stick Mini - little, but mighty!

Now, if you’re not a great Paint artist and you want some better-looking minis, the simplest thing to do is to find an image that you like online (assuming that the owner of the image is okay with you using it), copy it to Paint, crop it as you see fit, get it into a square size, and the resize it to 58 by 58 pixels.

Let’s say that you find an image of a kobold that you like.  For instance, I found the image below at a blog called Dice Monkey.

In his current form, this kobold has two problems that keep him from being a good mini: He’s too tall (not a square) and he’s too big (not a mini).  The image dimensions are 240 pixels wide by 327 pixels tall.  To solve the first problem, I grabbed the top of his spear and shifted it down closer to his hand, and I moved the image around until he was at the top of the box.  I then cropped the image (Image – Attributes) to 240 by 240 pixels, leaving me with the picture below.

Short KoboldNow he’s 240 by 240, but I want him to be 58 by 58.  Some math reveals that 58 divided by 240 equals about 24%, so I want to resize the image so that it’s 24% as tall and 24% as wide as it currently is.  To do this, I go to Image – Stretch/Skew and enter 24 for both Vertical and Horizontal.

Kobold resizing

After resizing, I’m left with my finished kobold mini:

Kobold mini

My finished kobold mini, in all of his 58 by 58 pixel glory

You can use the same process to create minis for other monsters, NPCs and even player characters.  However, if you have players who like to get involved with their characters, I highly recommend asking them to create their own minis and sending them to you for use in the game.  It’s way more fun for them to control a character that they created, after all!

That wraps up the map basics.  In future posts, I’ll talk more about the fog of war, creating more detailed backgrounds and more minis, and how to actually USE the stuff you’ve created.  As always, comments are highly encouraged!