The Staff of Suha Cycle – three free D&D adventures

I was excited earlier this week when a friend of mine in New York said that he was planning on running his party through the adventure trilogy that I had written for D&D 4th Edition in the past couple of years. This made me realize, though, that I had never put all of the adventures in a single document.

Well, now I’ve fixed that. The three adventures, The Stolen Staff, Tallinn’s Tower and Descent Into Darkness, are now all in a single document, called the Staff of Suha Cycle.

Download the trilogy here. (17.5 MB)

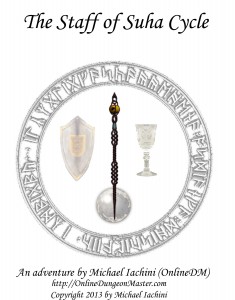
Staff of Suha Cover Page

For those who don’t know, this is a series of adventures that I wrote for Dungeons and Dragons 4th Edition, mainly for me to run at local conventions. I’ve run all of the adventures a bunch of times and made lots of revisions along the way, so they’re pretty polished now. Each one is designed to be run in a single session of about four hours.

For more on the first two adventures (including MapTool files), read this post.

For more on the final adventure (including MapTool files), read this post.

If you want all of the maps from these adventures, plus other maps I’ve created, you can find those on the Map Library page.

In summary, the Stolen Staff is a pretty straightforward dungeon delve. Tallinn’s Tower is an adventure through a tricky tower maintained by a powerful illusionist (and it includes poetry!). Descent Into Darkness is exactly what it says on the tin, and it features my favorite puzzle that I’ve designed so far (the room of runes) and a really cool final encounter area.

Final encounter area for Descent Into Darkness

Final encounter map for Descent Into Darkness

If you do try out any of these adventures with your own group, I would love to hear about your experience!

Michael the OnlineDM

ClayCrucible on Twitter

Online DM’s Kid-Friendly RPG

For Christmas 2010, my wife’s brother and his family stayed with us for a couple of weeks. We introduced my brother in law and his wife to Dungeons & Dragons, and they became big fans, continuing our game online via MapTool over the next couple of years.

My brother in law’s family also includes two kids, a girl who is currently 8 years old and a boy who is now 5. They’ve been really interested in D&D, so when the family came back to visit for Christmas 2012, I knew it was time to introduce them to role playing games.

Now, I love playing D&D 4th Edition, but I knew that there was no way my 8 year old niece and 5 year old nephew would be able to handle the game yet. I went searching for a version of D&D that could work for the children, and I took a great deal of inspiration from Newbie DM’s RPG Kids. Ultimately, though, I ended up going with something of my own creation, which I’m uncreatively calling my Kid-Friendly RPG (KFRPG if you need an acronym).

The rules

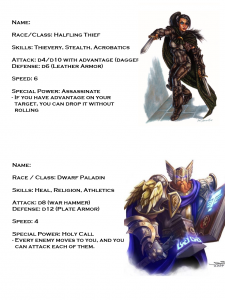
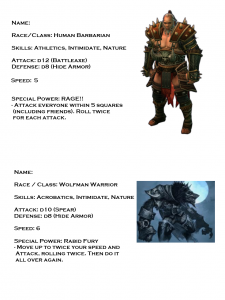
Each player has a half-page character sheet (see below). When you’re not in combat, the Kid-Friendly RPG works just like any other role-playing game – you tell the game master what you want to do, and the GM tells you what happens.

Character sheets

Feel free to use these character sheets yourself (note that there are two characters per page). I’ll note here that I do not own the character illustrations; if you own these illustrations and want me to take them down, just let me know. If you’re creating your own character sheets, I highly recommend having a big picture of the character on it for the kids.
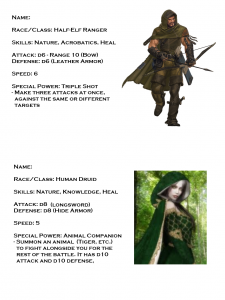
Character sheets for half-elf ranger and human druid

Character sheets for halfling thief and dwarf paladin

Character sheets for human barbarian and wolfman warrior

Character sheets for zombie wizard and elf cleric

Skills

If a character tries something that might not work, the GM will ask for a d20 roll. In most cases, a 10 or better will succeed, but the GM is free to set the target higher or lower for harder or easier tasks.

If the character is trying to do something that’s connected to one of the three skills on their character sheet, they can roll the d20 twice and take the best result.

Combat

When combat breaks out, the party chooses a player to roll a d20 and the GM rolls a d20. If the party’s representative wins, their team will go first. If the GM wins, the bad guys will go first. Ties go to the party (ties always go to the players rather than the GM).

Rather than tracking initiative, each member of the party takes a turn, starting with the player to the GM’s left and proceeding clockwise around the table. The GM has the monsters take their turns in whatever order the GM wishes.

On a character’s turn, the character can move up to its speed (measured in squares on the board) and take an action. Most of the time, the action will be an attack, but other options include administering a healing potion to themselves or a friend, using a special power or trying something creative.

Attacking and Defending

Each character has an Attack die and a Defense die, ranging from d4 to d12. When you make an attack, roll your Attack die. Your target will roll its Defense die. If a player character’s Attack roll matches or beats the enemy’s Defense roll, the enemy takes 1 damage. Most enemies only have 1 hit point, so this is usually enough to take the enemy out.

When an enemy attacks a player character, the enemy rolls its Attack die and the player rolls the character’s Defense die. If the Defense roll is at least as high as the Attack roll, then the attack misses. If the Attack roll from the enemy is higher, then the player character takes 1 damage.

Note that in both cases, Attacking and Defending, ties go to the player character. So, if the player is attacking and rolls a 3 and the defender rolls a 3, it’s a hit on the enemy. But if an enemy is attacking a player character and they both roll a 3, it’s a miss on the player character.

Hit points

Each player character starts with 3 hit points, which are tracked with some kind of physical object (I use red poker chips). When the character takes damage, the player gives one of these chips to the GM. If the player has no more hit point chips, then the character is knocked out (not dead, just not able to act).

Healing

Each character starts with 1 healing potion, tracked with a green poker chip. One of the actions available in combat is to drink the healing potion or administer it to a friend. If a character drinks their own healing potion, they regain 1 hit point (the GM gives back a red chip). If a character administers it to a friend, the friend regains 1 hit point. However, if a character has the Heal skill and administers the potion to a friend, the friend regains 2 hit points. Note that a character with the Heal skill who drinks his or her own potion still just gets the 1 hit point (your Heal skill only helps friends).

If a character is knocked out, a character with the Heal skill can use an action in battle to try to heal the knocked out character, even without a healing potion. The healer can roll the d20 twice, and if they get a 15 or better, the knocked out character regains 1 hit point. A character without the Heal skill can try this, too, but they only get one roll and still need a 15 or better.

If a battle ends with one or more player characters knocked out, those characters regain 1 hit point after laying there for a few minutes.

Special Powers

Each character has a special power, which starts charged up. This is represented by a blue poker chip. If the player wants to use his or her character’s special power, they give the blue chip to the GM and then carry out the instructions.

Range of attack

Most attacks are melee attacks, which means that the character needs to be next to the target. If a Range is specified, the character can be that many squares away from the target and can still attack.

Advantage

If two player characters are both adjacent to an enemy, they have the advantage on that enemy (they do not need to be in flanking positions, just both adjacent). A player character with the advantage gets a one-size bigger die for attacks (if the attack die is a d12, just add 1 to the result of the roll). Having advantage doesn’t help on defense.

Enemies can benefit from advantage at the GM’s discretion (a good rule of thumb is that you need 3 or 4 adjacent enemies to get advantage for them).

Movement

Each character has a Speed number, which is the number of squares they can move on a turn in addition to taking an action. The default is 5, with fast characters having 6 and slow characters having 4.

If a character doesn’t take another action, they can move their speed twice on a turn.

Enemies

Most enemies have 1 hit point and a d6 for both attacking and defending, and they only attack in melee. They do not have special powers or healing potions.

A tougher or easier enemy might have bigger or smaller dice for attacks or defense. They might have a ranged attack (generally with a range no more than 5 squares). They might have a slight twist to their attack, such as an attack that grabs a character and doesn’t let it get away until the enemy is destroyed.

A boss enemy might have 3 hit points and a special power, just like a character (though no healing potions).

Optional rule: Charging

If a character wants to charge a far-off enemy, the character can move its speed and then move its speed again with an attack at the end of the second move. This attack uses a die that’s one size smaller than the character’s usual attack die (since it’s hard to attack while running).

Optional rule: Opportunity attacks

If you want to teach your players about tactical movement, you can rule that moving past an enemy without fighting it will let the enemy take a free attack at the character (which can work both ways for player characters and enemies).

Tah-dah!

So, that’s the game. I ran this with two kids and three adults (which later ballooned to five adults as more people joined in). We played a short adventure that involved three fights and a trap (note: the kids just didn’t get the trap at all), plus a bunch of role playing at the tavern at the beginning. The game lasted somewhere between an hour and a half and two hours. The kids had a blast, as did I. The rules are simple and they encourage lots of improvisation all around.

If you end up trying this out with your own group of kids, please let me know how it goes!

-Michael the OnlineDM

OnlineDM1 on Twitter

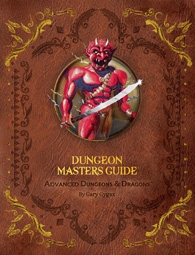
Cover images for 1e D&D reprints are now up

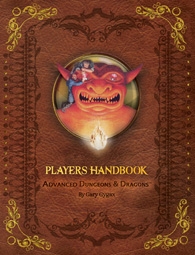
It looks like Wizards of the Coast now has the cover images for their first edition AD&D Player’s Handbook, Dungeon Master’s Guide and Monster Manual on their web site:

Hm. Well, I have to admit that I’m not all that impressed. But I’m hoping that they’ll look cooler at full size and in person. I’ve already pre-ordered my copies!

Edit: You know, looking at them some more, I think they’re better-looking than I first thought. I like the nods to the originals while still being clearly different. And as a commenter on EN World pointed out, they sure would look nifty if they were actual leather…

Reavers of Harkenwold Maps: The official versions

Well, I feel a little bit stupid now. I was so proud of the JPG maps that I created for the Reavers of Harkenwold adventure for use in MapTool or other virtual tabletop programs. They’re good-looking adaptations of the poster maps that came in the Dungeon Master Kit for use with the adventure. I put a fair amount of time into them, include the time to format them to a 50-pixel grid scale for sharing on my blog.

Then earlier this week I saw a link on the Dungeons and Dragons home page to maps from The Shadowfell: Gloomwrought and Beyond box set. Hey – that’s cool! I can use those maps for my game if I run any Shadowfell adventures. All I have to do is download them and resize them, and they’re good to go.

This got me thinking… if they had distributed maps for this box set, what about Reavers of Harkenwold from the DM Kit?

Yep. They have those maps, too.

Now, these are only available to D&D Insider subscribers, but I am such a subscriber. All the work I did to recreate those poster maps myself in MapTool was a bit of a waste – I could have just downloaded and resized the official, nice-looking versions from Wizards of the Coast directly.

The down side is that I feel like I wasted some time. The upside is twofold. First, I can redistribute the maps I drew myself on my blog, but I’m sure I’m not allowed to redistribute the official maps (you have to subscribe to DDI if you want those). Second, I discovered a whole BUNCH of official maps from other Wizards of the Coast adventures – Dungeon magazine adventures, Keep on the Shadowfell, Orcs of Stonefang Pass, etc. I can probably use those in future adventures.

For any of you DDI subscribers who want access to all of the official Wizards of the Coast maps, the gallery link is here. I guess when it comes to discovering this resource, better late than never!

Balanced-power parties are ideal

This post was inspired by my response to Robert J. Schwalb’s blog post about the Killer DM within.  A quick aside: I found Robert’s blog via a link on Sarah Darkmagic – a fellow RPG Blogger Network member whose blog I regularly follow.  I love the way RPG Bloggers leads me to so many interesting items online.

Some dungeon masters / game masters hate power gamers.  These are the players who try to find every possible advantage from any available material when putting their character together.  If there’s an overpowered angle to take on a character, they’ll find and use it.  This is sometimes referred to as “character optimization” or “CharOp”.  Those who don’t approve might call it “being a munchkin” or “twinking”.  This is the character who can easily kill monsters well above their own their level without breaking a sweat.

Robert talks about the Killer DM having the potential to emerge when the DM is frustrated with the players and the way they’re playing the game.  I think DMs in general are not fans of power gamers who min-max to the hilt.

Having thought this issue through, I’ve concluded that the problem isn’t exactly power gamers per se – you can always ramp up the difficulty to make it a challenge for them.  The problem is when you have characters of vastly different power levels in the same party.

If everyone in the party is super-powerful for their level, then the DM’s job isn’t too hard – you use higher-level encounters, give monsters extra abilities that will make them more challenging, and so on.  The problem is when one or two players are super-powerful but the others are of a normal power level.  In that situation, ramping up the difficulty to challenge the power gamers will make the monsters just plain deadly to the rest of the party.

The same problem can occur in reverse if you have a party of mostly average-power characters and one or two characters who have terrible stats for combat (the weak but charismatic fighter, for instance).  Those under-powered characters are not going to be able to fight interesting battles alongside their more powerful brethren and will be reduced to either standing in the back or getting themselves slaughtered.

In my opinion, the key to a fun gaming environment is to have a party of similarly-powered characters.  They don’t have to be all the same power level, but they should be close.  In that situation, the DM can create encounters that challenge everyone but that everyone can contribute to.  That’s what we want as dungeon masters.

I’m happy to say that my online campaign feels like the party is pretty well balanced from a power perspective.  When it comes to combat, everyone can contribute.  If we ever got to the point that one character was simply outshining all of the others, I would talk to that player about ways to bring the character in line, because otherwise combats will be too easy or too deadly for some part of the party.  A balanced-power party is a happy party.

Building a simple, portable RPG projector setup

Update 8/24/2010: I’ve improved the design to make the projector floor-mounted with an adjustable angle.  Details are in this post.

At long last, I have built a working, portable projector setup for playing D&D using MapTools to run the game.

First, let’s see the finished rig in all its glory:

Maybe it’s not the most beautiful rig in the world, but by golly it works!

I’ll say right here that I’m a little surprised that I ended up going with a single-pole rig anchored with a sandbag.  I originally expected to build a big cube rig out of aluminum (like Sean Pecor’s), then thought I’d build a wooden tripod, but I settled on this design after receiving lots of great feedback here on the blog and on EN World.  It feels quite stable, too – heavy wood, heavy pipes and a heavy sandbag all combine to result in a rig that makes me feel comfortable that my projector is in no danger of falling (well, except for the coat hangers that are in place until the real mount arrives, that is).  I plan to carry the laptop, projector, cords/mouse and sandbag in an old roll-aboard suitcase and the rest of the rig in one piece in my other hand whenever I take this on the road.

Would you like to build something similar?  Here’s how to do it.

Parts

  • 1 heavy board at least 2 feet long.  Mine was a four-foot long 10 by 2 (actually 9.5″ by 1.5″) that I found in the scrap bin of Home Depot for 51 cents.  I believe it’s pressure-treated – it’s quite dense.  Cost: 51 cents.
  • 2 floor flanges for 1″ galvanized pipe. Cost: $6.38 each, $12.76 total
  • A three-foot length of 1″ diameter galvanized pipe (black), threaded at both ends (technically called a nipple). Cost: $11.37
  • A 90 degree elbow for 1″ galvanized pipe. Cost: $2.36
  • A two-inch long nipple for 1″ diameter galvanized pipe. Cost: $1.22
  • Eight wood screws, 1″ in length. Cost: I had these in my toolbox, but we’ll call it 25 cents.
  • Two curtain rod mounts plus four more wood screws for mounting them. Cost: I had these laying around, but I imagine you would spend about $1 each on them if you had to buy them plus another 25 cents for the screws, I guess.  Feel free to substitute something similar for the projector to rest on.
  • A 60-pound  bag of tube sand. Cost: $3.99
  • Two pieces of 30″ by 20″ white foam board from Michael’s (I would have preferred a single bigger piece, but this is what they had). Cost: $1.50 each, $3.00 total.
  • Some duct tape. Cost: I’ll assume you have this on hand already.
  • A projector mount. I got mine via Amazon from a company called Projector Ceiling Mounts Direct. Cost: $26.40 (with shipping)
  • A projector.  I went with the ViewSonic PJD5152 and purchased it from Buy.com via Amazon. Cost: $463.99 (free shipping)
  • An extension cord and probably a splitter / surge protector. Cost: Already on hand.
  • A laptop – but I’ll assume you have that already.

Total cost:

  • Projector: $463.99
  • Rig: $64.11
  • Projector and rig together: $528.10

Before the projector mount had arrived I was too excited to wait, so I substituted some coat hangers for testing purposes.  Those, too, were lying around – no cost. 🙂 (You can see that version in some of the pictures.)

Also, I ended up using 1″ galvanized pipe, but I was planning on getting 3/4″ galvanized pipe.  Home Depot was out of 3/4″ flanges, though, so I went with 1″. I’m guessing either one will work fine.

Tools

  • A table saw (or some other way of cutting the board – you could also probably get it pre-cut at the hardware store)
  • A drill with a screwdriver bit (you could technically get by with a regular screwdriver, but the drill makes it go faster

Assembly instructions

This version ended up being dead simple to put together, much easier than my tripod – and better, too.  You could knock this together in less than an hour if you had all of the parts ready to go.

  • Cut a 12″ length and a 7″ length from your long board using a table saw. The 12″ length will be the base of your rig and the 7″ piece will be the top plate that the mount connects to.
  • Screw one of the flanges to the middle of the 12″ board using four of the wood screws and your drill or screwdriver.
  • Screw the other flange to the middle of the 7″ board using the other four wood screws and your drill or screwdriver.
  • Manually screw the 36″ pipe into the flange on the 12″ board.
  • Manually screw the 90 degree elbow onto the top of the 36″ pipe.
  • Manually screw the 2″ nipple onto the other end of the 90 degree elbow.
  • Take the 7″ board with the other flange and screw that board/flange assembly onto the other end of the 2″ nipple.  Tighten as necessary to get it pointed at the angle you want (I went with vertical).
  • Put the rig on your gaming table.
  • Empty out about half of the sand from your sandbag and twist tie / tie / duct tape up the opened end.
  • Wrap the sandbag around the base of the rig, sitting on the base board.  Put more of the weight toward the edge of the table (opposite of where the projector will be).
  • Assemble the mount per its instructions.  One piece will be attached to the far side of the 7″ board and the other piece will be attached to the projector itself.
  • Tighten the projector onto the mount as best you can. If your mount is like mine, it will want to move.
  • Figure out the exact angle you want the projector to be held at, and hold the curtain rod holders underneath either front corner of the projector at the proper place to support it.  Mark the places for the screw holes in the curtain rod brackets with a pencil.
  • Take the projector assembly off the base part of the mount, remove the top board, and screw the curtain rod holders to the board in the appropriate spot.  Reassemble – now your projector should stay where you want it.  Feel free to bend the curtain rod holders a little bit as needed.
  • Put the foam boards on the table beneath and in front of the projector.

At this point, your rig is completely set up.  All that’s left now is to hook up the cables, make any necessary adjustments (either to the projector’s position on the mount, to the keystone of the image, to the lens focus/zoom, etc.) and start running your game!

Running the game

  • Create your maps / monsters / etc. in MapTool
  • Start MapTool on your laptop and load up the appropriate campaign
  • Start a server in MapTool
  • Open a second instance of MapTool
  • In that second instance, connect to the first one as a client (it will be in the LAN tab on the connection menu)
  • Hook the laptop to the projector
  • Set your display to the Extend Desktop option (setting the resolutions on each monitor appropriately).  The laptop should the primary (left) monitor, with the projector being the secondary (right) monitor.
  • Drag the second instance of MapTool onto the projector (drag it off to the right)
  • In the second instance, hit Ctrl+Alt+Enter to put it in fullscreen mode
  • Adjust the zoom level on both versions so that your squares are 1″ on a side.  The simplest way to do this is to just adjust it on the main MapTool instance and then use Ctrl+F to force the second instance to the same view as the main instance.
  • Run the game as you normally would online!

That’s all there is to it!  I haven’t gotten to run a real game with this yet, but it will at the very least get some use at TactiCon here in Denver over Labor Day weekend.  I’m excited to try it out!

Maybe 800 by 600 is enough

With my planned projector setup for RPG mapping, it looks like I’ve gotten some good news and some bad news about the projector that I bought.  The good news is that my buddy who works with projectors was able to help me out with my projector last night at the bowling alley, and it looks like the resolution will be just fine.

A quick aside: Toting a laptop, projector, cables and an extension cord into a bowling alley will get you some funny looks.  Accidentally shining the projected image onto the lanes (distracting the other bowlers) will get you yelled at.

Anyway, my friend was able to show me how to adjust the height of the projector and the zoom of the lens to get the image focused from a good height in such a way that the quality of the image was on par with what I was looking for.  It’s still a little pixellated, but not bad at all.  A higher resolution projector wouldn’t make any difference.

The bad news is that if I want a better image quality, I’ll have to use something other than MapTool.  Now, I love MapTool.  I’m not really interested in using anything else, so that means that I’m willing to accept so-so graphics.  The graphics for the maps themselves are fine – it’s the tokens for the monsters that don’t look great.  I’m probably okay with that in the end, but I will at some point experiment with other graphics options.

I’ve also gotten lots of good feedback from commenters on the blog and people on EN World about my tripod setup and other options.  My bowling pal likes the idea of a tripod, with one leg right under the projector and the other two legs some distance back, resulting in a squat isoceles triangle of legs rather than the equilateral triangle I have now.  However, my next approach will be as follows:

  • Get a 12 inch square piece of pretty heavy wood (maybe 3/4″ thick)
  • Mount a pipe flange onto that piece of wood with screws
  • Screw a length of pipe (maybe 24 inches long) into that flange
  • Put a 90 degree elbow on the top of that pipe
  • Screw a short pipe (maybe 4 inches) onto the elbow, sticking out parallel to the table
  • Screw another flange on another piece of wood onto the end of that short pipe
  • Put a projector mount (perpendicular to the table) on the other side of the piece of wood
  • Put the projector on that mount, aiming downward (and maybe slightly outward, with keystone correction)

This, too, should be pretty inexpensive.  I’ve ordered a projector mount for about $27, and I’m guessing that the pipes, flanges, wood and elbow shouldn’t be more than another $25 or so.  I’ll need to get some good clamps to hold the bottom piece of wood to the table, and maybe some kind of weight to put on that wood as well, but I expect the mounting system all-in to cost less than $75.

Next stop: The hardware store!

War of the Burning Sky – First session

This past Friday evening I ran my online group through our first session of EN World’s War of the Burning Sky campaign.  It did not go as well as our session from the previous week, where I had run them through a Living Forgotten Realms adventure, and it’s my fault: I just wasn’t as prepared as I should have been, and it showed.

The session started off well, with the players talking about some back story for their characters and possible connections with one another and with the campaign setting.  I really enjoyed this part of the session, and it’s given me some good ideas for the future.

Then we got into the actual adventure itself (WARNING: SPOILERS AHEAD).  Some of this was okay and some… less so.  The party begins by meeting a woman named Torrent in a tavern that has been closed by the city guards because the owner is a magic user and there’s a coming crackdown on magic (“The Scourge”).  Torrent is there to bring the party into “The Resistance.”  Great, no problem.

V. Shane's awesome depiction of Torrent from the War of the Burning Sky

As they finish chatting, they’re ambushed by bounty hunters.  Now, this is laid out as a pretty exciting encounter in the published adventure, and I totally biffed it.  There’s a warning of something coming, with the sound of creaking floorboards overhead in what is supposed to be an empty building.  Then some bounty hunters come barging in the front door, with the goal of forcing the party out the side door. (I was totally unable to accomplish this.)

Then a bomb hits the building and flames burst out all over the place.  Then the ceiling starts collapsing in places.  This would have been a good way to force the players out of the building and into the alley, but I failed to play it that way.  They basically ignored the chaos and beat the crap out of the bounty hunters.  I decided to have the leader of the bounty hunters (who wisely stayed outside) tell his men to retreat, but the party kept beating them on the way out (and really, who can blame them?).

We then had an interaction with the lead bounty hunter, Kathor, which, as I played it, didn’t make any sense.  Kathor is supposed to be ambivalent about being a bounty hunter, and that came across okay, but it was tough for me to reasonably play it so that the players would accept his withdrawal without attacking him further.  We worked it out so that the players are trying to recruit him into the resistance (a cool idea on the party’s part), but I admit that I didn’t handle this encounter very well.

We next played a few vignettes as the party made their way through the now-burning city toward their rendezvous with a gnome who is supposed to have information that they’re to take out of the city.  These little scenes were a bit out of place, but the party role-played them well.

Then we had to abruptly cut off the game, as one of the players got called into work unexpectedly.  I was okay with this, frankly, as it will give me more time to prepare for the next session.

After much reflection, I’ve decided that I have no interest in running a pre-packaged campaign through to completion.  A pre-packaged adventure, sure, but not a whole campaign.  I need to be able to wing it on the fly and change NPC motivations, all sorts of crazy things, and that’s tough with a published campaign.  So, I’ll be using the published campaign for inspiration and nothing more.  For one thing, I’m interested in getting the party into an underground area of some sort for some cool battles, and I don’t see anything like that in the near future for this campaign.  Easy solution: Change it!

My lessons from this time around are:

  • BE PREPARED!  If you’re not prepared as the DM, things aren’t going to go well.
  • Maintain flexibility.  Unless you’re the kind of DM who can run a party closely to a script, don’t hew too closely to a published adventure path.  You need to be able to adapt on the fly.
  • When you’re given cool material (like the burning, collapsing building that the party is fighting inside) make the most of it!  Describe it vividly, and let it affect the characters in whatever way seems most appropriate to you.

Next session is going to be better, I can already tell.  I’ve already made some big changes to the next combat encounter, which will take the adventure mildly off the published path.  I’m anxious to start working with my player characters’ backgrounds, too, and I have some interesting ideas on how to do that.

Running my first in-person Living Forgotten Realms game

Today I officially became not only an online dungeon master but also an in-person dungeon master.  I finally ran a Living Forgotten Realms game at my friendly local game store, Enchanted Grounds (spoiler alert: I ended up killing one of the PCs).  I started preparing for this game (and talking about it on the blog) almost a month ago, and I already ran this same adventure for my online group last week, so it’s fair to say that I was well-prepared!

The module was WATE1-1: Heirloom, a Living Forgotten Realms adventure for a party of four to six players of levels one to four.  There will be some spoilers for this particular adventure ahead, just so you know.

The game was scheduled to start at 9:00 AM.  I got to the store around 8:45 to get ready – and then realized at 8:50 that I had forgotten the handouts for the players (they explain the laws of Waterdeep, show a map of Waterdeep, and show a list of stolen items that was provided to the City Watch in the story).  Fortunately, I live within walking distance of home, so it took me only two minutes to drive back, two minutes two print the handouts and two minutes to get back to the store.

We were fortunate to be allowed to play on Enchanted Grounds’ fancy new gaming table, which has an inset in the middle for the battle map and a special pull-out tray with a built-in screen for the game master.  There were four players at game time, and two more were on their way but running late.  We waited about 25 minutes before starting – and naturally the two latecomers showed up just as we got going.  No harm done!

Since this blog is meant to be educational, I think it’s worth talking about what I did to prepare for running this adventure:

  • Read the adventure at least twice, paying special attention to the point of the story and, on later read-throughs, the details of combat tactics from the enemies
  • Create the maps in MapTool, convert them to posters with PosteRazor, print them out in color and tape them together
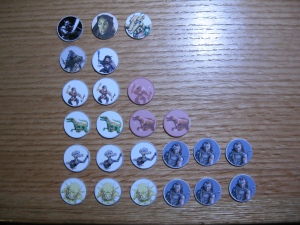
  • Get monster minis together – I used self-made tokens.  I wish I had also brought some generic non-combatant NPC tokens, but that was a minor oversight.Tokens
  • Get some way of keeping track of conditions such as bloodied, slowed, marked, etc.  I went with little rubber bands from Target that are intended to be hair bands for girls.  I believe my wife Barbara found a big container of them for $3.  I sorted them by color and stored them on twist-ties.
  • Get dice.  Lots of dice.  No, a few more than that.  Yeah, that’s the ticket! (Note the awesome d12s that have Roman numerals for 1 to 4 printed three times – actually rollable d4s!  I got them from Dicepool.) 
  • Write the name of each type of monster on a half index card and roll initiative for it.  Write that number on the half index card.
  • Get blank half index cards for each player character.  Write the character’s name (along with race and class, maybe the player’s name and a description of the mini so you know who it is – all optional, but nice) at the top of the card.  As the players roll initiative for a battle, write the character’s initiative on the card, crossing out any old initiative number that’s on it.  You can then order the cards (PCs and bad guys) by initiative and use this to keep track of who’s up and who’s next – plus it’s easy if someone delays or readies an action to put them in a new position.
  • Get a blank piece of paper for each battle.  Write the name of each monster on a line, treating multiple monsters of the same type separately (so Guard Drake 1 has a line, as does Guard Drake 2).  Write in parentheses next to the monster its bloodied value, followed by a colon and the starting hit points.  As the monster takes damage, cross off the rightmost number and replace it with the new HP total.  Check it against the bloodied value to see if the monster is bloodied yet.
  • When you’re at the table, write down each player’s name, their character’s name, their race and class, their passive Insight and Perception scores and their initiative modifier

With that, we were off and running.  The adventure begins with a long skill challenge to find the thief who stole the title heirloom.  As with my online game, I never said that we were in a skill challenge.  Instead I said, “Okay, what do you want to do now?”  Someone decided to ask around the pub for information on where they might be able to find stolen goods – “Give me a Streetwise roll.”  That pointed them to another tavern, where they looked around to see if they could find anyone matching the description of the information broker they had been given – “All right, Perception.”  And so on.

In the middle of the long skill challenge, we had a quick-hit combat encounter with some drunken sailors.  There was some fun role playing, as one of the PCs tried to hit on the damsel in distress (she wasn’t interested, and I played her as such).  There was some great bluffing of the City Watch, too – “Honest, officers, these men just fell down drunk.  We didn’t attack them…”

Once the thief was located in his lair, the battle became more interesting.  I had ramped up the difficulty level of the battle a little bit, based on past experience, and I’m glad I did.  Lots of players ended up severely bloodied, but nobody dropped.  Our assassin got a little cocky after teleporting in behind a bandit and basically destroying him in one shot, so he ended up trying to take on a couple of halfling thieves by himself.  Bad idea – those guys love to get combat advantage and deal extra damage!

The players did defeat the thief and successfully interrogated him about the stolen heirloom.  He told them where to find the person who hired him to steal it.  I then asked the players what they wanted to do with the thief and his gang.  After a short discussion, they decided to execute them.  I had a bloodthirsty table!  But so it goes.  Had this been a home game, I would have made sure that there would be consequences from this in the future, but for a one-shot I decided to just move on.

The final battle against the gnome factor and his allies in an inn room was pretty cool.  Our assassin and our monk were stealthy about getting into position, seeing some gnomes in their room at the end of a hall and successfully hiding from the gnomes.  Our fighter tried to be stealthy but failed, making too much noise while coming up the steps.  The gnomes looked up, and our bard, thinking quickly, walked up the stairs and past the hallway, whistling merrily – so I had him make a Bluff check, which he totally rocked.  Thus, with surprise preserved, the party was able to charge down the hall in a surprise round before the battle began.

Our strikers jumped right into the thick of things, dealing tons of damage but leaving themselves exposed – especially the monk.  The gnomes spread the hurt around a little bit, but the two dumb guard drakes attacked the closest thing that was threatening their master, which was our monk.  The monk did get an opportunity attack on one drake as the drake moved into position between the monk and the gnomes, but then both drakes took big bites out of the monk.  Guard drakes, as it turns out, do tons of damage when they’re near allies, and the two big chomps put the monk at exactly his negative bloodied value.  He was dead – that is, dead dead, not just “I’m lying on the ground but I’ll be fine later” dead.  I felt a little bad, but that’s what happens when a relatively squishy striker charges into battle without waiting for defender support (a lesson I learned myself the first time I played an avenger).

Pretty soon the gnomes were all bloodied, facing our wizard’s Flaming Sphere, and several of them were invisible due to their fade away power.  When the gnome leader’s turn came up, with his invisibility in place, I had him open the window of the room, fey step down to the street below and start running.  Of course, all the player characters could see was a window opening.  They were left with a tough choice – attack the empty space where they had last seen the gnome leader, or try to go after him in case he ran.

The bard attacked the empty square and rolled well enough that I told him that he didn’t feel like there was anything there to hit.  So the wizard decided to run back down the stairs and into the alley leading to the front of the inn – where he spotted the gnome!  Meanwhile, back in the room, the fighter and psion took care of the guard drakes, the other gnomes jumped out the window (one killing himself) and the bard decided to take a flying leap after everyone.  He made his Acrobatics check, landed on his feet, saw the gnome leader and pegged him with two arrows (smart use of an action point).  Mission accomplished!

This was a fun way to spend a Saturday morning, and I know the players had fun, too.  Interestingly, the person whose player I killed, Jason, had played this adventure once before (in the same party as me when I had played it), and during the course of the adventure he said, “Wow, this is way cooler than the last time!”  That’s what I love to hear.  Even though his character died, he still role-played the things that his spirit was doing, cheering on the rest of the party.  The two players at the table who were new to fourth edition had a good time and learned a lot about how the game works.  Fun was had by all.

I’m learning that I really like being a dungeon master, whether in person or online.  I’ve also learned that I need to feel prepared in order to do well. (In my next post I’ll talk about my experience running my online group through the beginning of the War of the Burning Sky while not being as prepared as I’d like.) I think I’d like to do some more DMing for Living Forgotten Realms in the future.

Online campaign – What a rush!

It’s amazing that I have the energy to write tonight, given that I just spent four and a half hours running a D&D adventure online for EIGHT PLAYERS, but it was such a rush.  I can’t believe how well it all went!  Seven of the players were already logged in before the scheduled start time, and the eighth ran about 10-15 minutes late (no big deal).

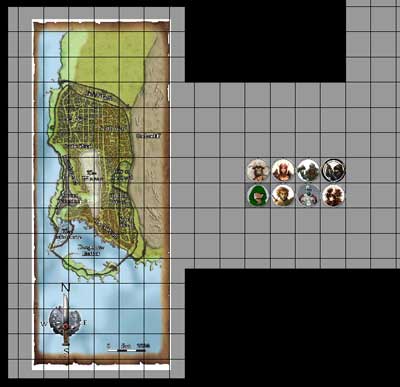
Starting Screen

We started off with everyone being able to see their tokens on a small map (with an image of the map of Waterdeep on the page), and I explained how MapTool worked.  As a player, the only things they really needed to know were how to move their token (click and drag), how to move around the map (right click and drag; zoom with the mouse wheel) and how to deal with their macros (just click them).  That went pretty easily.

We also spent a little time talking about the future of the group.  We’re going to split in two – one with me as the DM playing at level 1 and one with another person from the group as the DM, playing at some higher level in order to get to paragon tier faster.  But since I had put everything together for this evening with the plan of having eight players, we would still play the adventure together.  (It was the Living Forgotten Realm module that I’ll be running in my local store next Saturday – WATE1-1 Heirloom.)

I should also point out that, in addition to having MapTool open with everyone impersonating their characters in order to talk in-character (way cool), we also had Skype open for voice chat.  Let me give a huge shout-out to Skype – this software is awesome.  We had excellent call quality with eight active lines (two of the players were together at one computer), no lag – it was just fantastic.

Anyway, I used audio to communicate with my players most of the time, and they used a mixture of audio and text.  The adventure started off with a lengthy skill challenge to track down a thief who had stolen a family heirloom (hence the title of the module, “Heirloom”).  Mixed in the middle was a quickie combat encounter with some drunken sailors, which ended in one action – the party’s invoker walking up and unleashing an encounter power that just about wiped them out (whereupon the sailors that were still up surrendered and staggered away).

At the end of the skill challenge, the party confronted the thief and his cronies in their underground lair.  This battle was much more interesting, with some good movement, creative use of marks, and SO many conditions to keep track of!  It’s easier in MapTool than in real life – I can’t imagine running this encounter with eight PCs around a real table.

We took a five-minute break before diving into the final encounter, where the party faced the person who had hired the thief to steal the heirloom.  The party did a good job of achieving surprise, and it became clear that I could either have the bad guys fight smart – keeping their guard drakes in front of the door to the room and making it hard for the party to do anything – or have them fight fun – letting the drakes shift back into the room so the melee fighters had something interesting to do.  I went with fun, and I’m glad I did.

The best part of the evening was the very end of this encounter.  I had some bad guys, who were hidden at the time, go out the window of the room they were in, trying to escape.  Hilarity ensued as the party tried to go after them.  Lots of falling out windows, landing on people who had already fallen (dealing improvised damage – why not?), and so on.

Looking back, it was clear that the encounters were not all that challenging for the party, since no one ever ended up making death saving throws.  But you know what?  For a party of eight, that’s okay.  The encounters were long enough already, and making them tougher would have made them take longer.

The most important thing was that everyone legitimately seemed to have a great time.  A couple of people who were planning to go play in the high-level game reached out to me to say that they were having so much fun that they were considering staying low-level.  That’s really gratifying to hear – “I’m having so much fun that I want to keep playing in your game.”  Is there a better feeling as a DM?  Not to mention the fact that one of the players is an Englishman playing in his first-ever tabletop RPG, and he played with us from 1:00 AM to 5:30 AM his time.  How’s that for dedication!

It will be a little sad to break up the group, but I honestly don’t have the energy for an eight-PC campaign.  I can handle four or five, but beyond that I think it’s just a little too much.  Still, just to run a game this big one time was worthwhile.  It was, quite frankly, an unqualified success, and I can’t imagine it having gone any better.  This is what I live for as an online dungeon master!