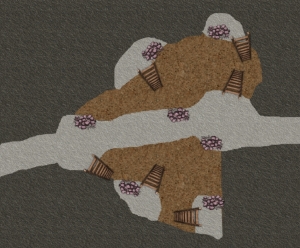
At last, my adventure trilogy is complete. The first two adventures, The Stolen Staff and Tallinn’s Tower, were released here on the blog over the past few months. The third adventure, as I mentioned here, is now available.
Descent Into Darkness is an adventure for 4-6 heroic tier characters. The adventure is presented at level 2, 4, 6, 8 and 10. I personally recommend it at level 6, 8, or 10, but it can work at lower-level (though the PCs might be surprised and scared by the final boss).
Synopsis
The powerful wizardess Tallinn seeks adventurers to be teleported into the Underdark bearing a powerful magical artifact, the Staff of Suha. The mission: Find three other artifacts that have been stolen by unknown creatures, likely in an effort to recreate a teleportation device once used by a long-dead drow sorcerer to bring his foul armies to the overworld in conquest. The other three artifacts (Orb of Oradia, Chalice of Chale and Shield of Shalimar) must be recovered or destroyed, and the forces behind their theft must be stopped.
The adventurers discover that the powerful beholder Ergoptis has enslaved drow, diggers (new insectoid monsters), halfling thieves and mindless duergar as soldiers and hunters of artifacts. The party must fight their way through treacherous traps and puzzles to ultimately face Ergoptis and its underlings in a room dominated by a ziggurat, with a magma river crossed by bridges and floating platforms. Can they recover the final artifact and escape or destroy Ergoptis before the one-hour time limit on their teleportation ritual runs out? Or will the beholder simply add the adventurers to its army of enslaved warriors and continue its plans for domination?
Descent Into Darkness includes four new artifacts, an all-new monster (the digger), a find-the-path puzzle with custom runes and an exciting final encounter with an evil beholder.
Files
Download the full heroic tier adventure PDF (level 2/4/6/8/10)
Download the MapTool campaign file (compatible with version 1.3.b86 of MapTool)
Maps (scaled to 50 pixels per square)
Afterword
If you decide to run this adventure or have the opportunity to play in it, I’d love to hear about it! And if you have any feedback based on your own read-throughs, I’m always trying to improve the adventures themselves. Feel free to chime in via the comments, email, or Twitter.
-Michael, the OnlineDM
onlinedungeonmaster@gmail.com
OnlineDM1 on Twitter


Pingback: Descent Into Darkness | Joel's Scattered Thoughts
Pingback: Rejected for DDI – and I feel fine! « Online Dungeon Master
Here’s some further feedback on the adventure.
Just to give you some idea of my group, my players tend to lean towards tactics rather than RP. I had a completely new player join us and he had fun in the adventure.
I loved the time limit and I found it easy to track with the notes in the text. It dealt beautifully with the 5 minute adventuring day. My players kept asking how they were doing for time and I always had an answer for them. If they hadn’t made it, I would have done an “Escape from the Underdark” adventure for the next session or two. It might have been fun to have an annoyed Tallinn waiting when they emerged.
The mine encounter was well done – minions for the wizard to blast, reasonably high attacks from the miners to get past the fighter’s high armor, lots of movement and terrain effects.
The skill challenges were appropriately themed. The room of runes was a favorite – they managed to puzzle it out quickly using the hints. I liked that you clearly outlined alternatives if the players got stuck. They used skills to bypass the hidden door and groaned when they found out the solution. Nice entrance to Moria homage!
I tried to set them up for a bit of RP with the halflings, but the players decided they were in a hurry and wanted sneak attack bonuses. Turning the statues into allies was fun. I had the statues deactivate when the chalice was taken out of Niko’s contraption. I didn’t want to take the chance that they’d use the statues in future fights.
The glowing mushrooms used up a healing surge and warned the beholder, but I didn’t foreshadow it much so it was pretty forgettable.
I screwed up the beholder fight in a number of ways. The biggest two were that I forgot about the shield’s DR till about halfway into the fight and that I used the eyebeams at random rather than strategically. I hated the central eye power – it struck me as a big “screw you” to melee while leaving ranged unaffected. Stripping players of powers is just cruel. I used it as an encounter power rather than an at-will. Apart from the central eye thing and my own mistakes, it was a solid encounter.
Overall this was really well done. I wish I could have hit rewind on the final fight to run it properly, but it was still fun.
Thank you for the adventure and keep up the good work!
Thanks for running the adventure and taking the time to share your experiences with it here, Joel! I’m glad your group enjoyed it. I could see toning down the central eye ray at the end, too. Good suggestion!