Lords of Waterdeep, and a break to build MapTool macros

I don’t usually go multiple weeks without a post here on Online Dungeon Master, so I thought I’d give my loyal fans an update.

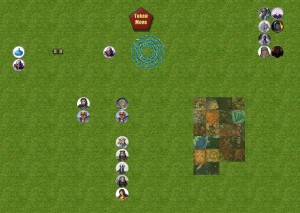
I’ve been traveling for work a lot in the past  couple of weeks, which certainly interferes with blogging time. However, I HAVE been using the time for D&D stuff – specifically MapTool work. You may recall that I had built and shared some macros for quickly creating monster powers a few weeks ago. Well, I’ve been working on the same thing for PC powers in D&D 4e. It’s been tremendously time consuming to build the macros, but actually using them has been fast! (Aside from bug killing, that is.)

Three of the players in my long-running Friday night War of the Burning Sky campaign created new characters for last week’s game (one new player, two existing players switching to new characters), so I had the chance to put my new PC power creation macros through their paces. I’m pleased to say that they worked like a charm! No problems at all so far, and the ability to recharge a power with a button click has been awesome.

The next step is to add a character sheet frame, similar to what I’ve done for Marvel Heroic RPG. I’d love for my D&D players to be able to scroll through their powers in a custom frame rather than the buttons in the Selection window. I could include the rules text of the powers in a small font, links to recharge powers individually, some nice-looking tables for organization purposes, and so on. But for now I still have a little tweaking to do on the PC power creation, though I hope to start sharing pieces of it soon. It’s a complicated family of macros, and I have not yet figured out how to break it into blog-post-sized chunks.

I haven’t run Madness at Gardmore Abbey in the past few weeks, which is a bit of a bummer. I finally have that whole campaign prepped in MapTool, so I’m ready to go at a moment’s notice! But the timing hasn’t worked out with my players.

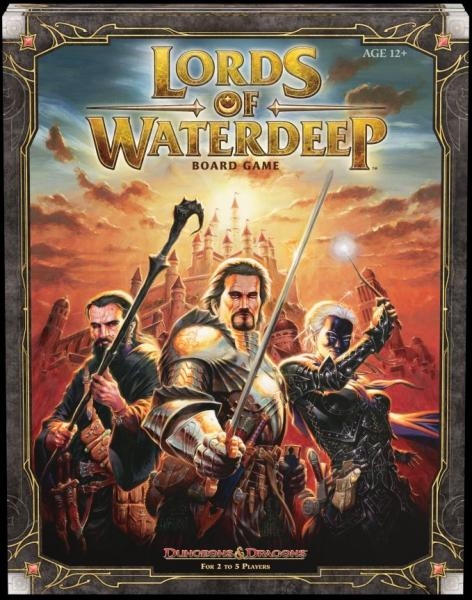
I was going to try to revive my ZEITGEIST campaign for today’s gaming session, but two players had to bow out at the last moment. The day wasn’t a total loss, though, since the rest of us used the time to play three games of Lords of Waterdeep!

I’ve played a total of five games of Lords of Waterdeep now, and I absolutely love it even though I haven’t won yet. LoW feels like a streamlined fantasy setting of Agricola, another game that I absolutely love. We haven’t discovered a “dominant strategy” yet, which is a good thing. I love the design of the box itself – there’s a great insert to organize all of the pieces. The rulebook is excellent, too – very clear, with a handy summary of the rules on the back cover. It’s tons of fun, and everyone who has played it so far has loved it. I highly recommend Lords of Waterdeep.

I’m going to be out of town on vacation starting next weekend, so I hope to get another post or two up before I go. But if not, don’t expect to see anything from me until late April.

-Michael the OnlineDM

Madness at Gardmore Abbey – MapTool campaign file

At long last, I have finished putting together my complete MapTool campaign file for the Madness at Gardmore Abbey adventure. Huzzah! You can download it right here.

I’m pretty sure this is the largest MapTool campaign file I’ve built to date (around 33 MB), and I’m quite happy with it. It has all of the maps, all of the monsters, all of the Deck of Many Things tokens, all of the traps. I’ve got a template token for PCs and a template token for monsters.

The campaign file consists of eight maps with encounters from the adventure, plus a ninth map that’s a holding pen for NPCs, the Deck tokens and some background stuff for the campaign (library token, templates). The maps are labeled according to the encounter numbers that are included on the map. For instance, the map named 01-04 Village has the encounter maps that take place in the outer part of Gardmore Village (Encounter 1: Main Gate; Encounter 3: Double Talk; Encounter 4: Ruined Garrison; plus the overland map of the abbey and the map of Winterhaven).

Because of the number of maps that are in this adventure, I’ve included Wolph42’s Bag of Tricks macros – specifically the Teleport Pads. To use these, you’ll need to click the “Back of Tricks Macros” button in the Campaign pane and then the Initialize Pads button. Once you’ve done that, you can drag tokens around the various maps by dragging them to the teleport pad corresponding to the map where you want them to go. The 01-04 Village map has the portals to every other map.

I hope that folks find this campaign file to be useful. I know that I’ve had a lot of fun with Madness at Gardmore Abbey so far, and I’m looking forward to running the rest of the adventure!

– Michael the OnlineDM

Madness at Gardmore Abbey: Session Five

Past sessions: Session OneSession TwoSession Three, Session Four

After a six-week break, I was finally able to gather again via MapTool with my wife, her brother, and his wife for our continuing adventure in Gardmore Abbey. At this point I pretty much have the entire adventure prepared in MapTool (still a few wrinkles to work on before it’s done, though), so I’m ready for unexpected twists.

As always, SPOILERS AHEAD.

The party’s current quest is to help Sir Oakley, paladin of Bahamut and scion of Gardmore Abbey, to recover three relics he needs in order to purify the main Temple of Bahamut in the abbey. Sora the dragonbornn swordmage, Homer the elf hunter and Stasi the half-elf warpriest are currently with Sir Oakley in the catacombs beneath the abbey.

At the end of the last session, they had finished a difficult battle against undead monstrosities and had found a magic fountain of Bahamut that granted some necrotic resistance. Some of them were talking about an extended rest, but they really weren’t ready for that yet (not enough adventuring). As they stood by the Font of Divine Health discussing their plans, they heard some footsteps from the stairs leading up to the Temple.

Homer crept over to the nearby door and tried to peer through the keyhole (sure, let’s say there’s a keyhole). His perception roll was terrible, though, so he could only tell that there were some humanoid-shaped creatures (more than two), that they were talking (but he couldn’t make out the language, let alone what they were saying) and that they were carrying a light source (but he couldn’t tell what it was). He decided to head around to the Memorial Chamber to spy from there, but he wasn’t very stealthy about it. As he got into the Memorial Chamber, he heard footsteps hurrying back up the stairs and saw the light around the corner getting dimmer.

The rest of the party came over to join Homer and they decided not to pursue the other people.

Though I didn’t tell them this, they had just had their first encounter with the rival adventuring party. I was supposed to have made it so that the Altar of Glory had already been cleared out by the other party when our heroes arrived, but I forgot. So instead I decided to have them come down, find the Altar of Glory already cleared by our heroes, and then skedaddle when the heroes detected them. It worked out really well.

After this, the group pressed on to a large chamber in which they could hear something heavy dragging along the floor in the darkness.

Encounter 27: Great Hall

Vadin Cartwright

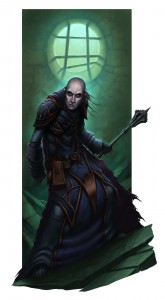
Since they weren’t particularly stealthy in entering this chamber, Vadin Cartwright called out in a cold voice, “Ah, we have visitors. Get them, friends!” This was the first Villain encounter, where a bad guy was drawing cards from the Deck of Many Things. Vadin drew the Knight, which gave him a flanking buddy. I ruled that he could use a move action to move the Knight, who would otherwise have been useless since Vadin was so far from the action.

The basilisk was the first problem. Sir Oakley, Sora and Stasi were clustered together, ripe for the basislisk’s venomous gaze. Some vampire minions soon closed to melee and started grabbing PCs left and right. Homer did his traditional chicken impression, staying out of the room and shooting from the hallway. Vadin Cartwright himself waited until the end of the second round to make his move, coming in with a terrifying howl that stunned the three melee characters.

Since stunned can be such an un-fun condition, I house rule it a little differently at my table:

OnlineDM’s house rule for stunned: A character who is stunned is dazed and cannot attack.

I’ve experimented in the past with saying that a stunned character can’t take standard actions, but if someone wants to make a heal check or take second wind or total defense as their entire turn, I’m fine with that.

In this case, Stasi used her one action to grant Sir Oakley a saving throw and then made her own saving throw at the end of her turn, so the team was back in the game quickly. Vadin was a tough opponent to hit; I ended up lowering his AC from 26 to 24 (de-soldierifying him) just because I saw that this encounter could get grindy otherwise. I also left the Snaketongue Vampire out of the fight since we had only three PCs plus Oakley (who is a full participant in combat).

Vadin drew the Donjon card when he was down to two-thirds of his starting hit points. The villain effect on this card gives adjacent enemies a -2 penalty to attack rolls, which is exactly the kind of ability I hate. Anything that results in missed attacks slows the game down. So, I changed it to an aura that gave enemies vulnerable 2 to all damage. When the Sun card was drawn later, I had the same problem; as written, it gives the villain concealment, which would be another -2 to hit. I switched this to a fiery halo that dealt 5 fire damage to the first PC to hit Vadin in melee (which, combined with the vulnerability, was painful and fun).

During the battle, Homer eventually dashed over to the niche in the wall where Vadin was keeping a vial of a strange red liquid. This vial was glowing, and Homer couldn’t resist picking it up and taunting Vadin with it. This definitely got Vadin’s attention, which was a good thing since Oakley was unconscious and on two failed death saves and Stasi the healer had just joined him on the ground. My brother in law asked if Homer could still shoot his bow while holding the stopperless vial, and I said sure. He carefully lined up his shot and critically hit Vadin! But some of the goop in the vial crept out and onto his bow hand; that’s some bad news right there.

Once Vadin had turned his attention to Homer, Sora was able to perform first aid on Sir Oakley, letting him spend his second wind, and he then healed Stasi. With all four characters back in action, they were able to take Vadin down. Oakley had no surges left; Sora had two, I believe. It was an exhausting series of fights for the party, but they had acquired three more cards from the Deck of Many Things from Vadin. They also found a magic sword and some money in a compartment in the room. The sword is called Moonbane and is an ancestral item from the Markelhay family that currently rules Fallcrest. I decided to make it a +3 sword since it would otherwise be pretty unexciting (as written, it’s +2). Sora was happy to wield it. This also switches her from a broadsword to a longsword, so she should hit more often now.

The group then spent the rest of their day holed up in the secret chamber in the catacombs, with Stasi tending to Homer. The red liquid had left Homer infected with unpleasant boils up his left arm, and he lost a healing surge. Stasi’s healing skill wasn’t very useful for Homer, but at least he didn’t get any worse. After an extended rest in the chamber, Homer woke up feeling better (a good endurance check), and the disease was cured – although he carries the scars still.

Red goop diaries

Next question: What to do about the red liquid? Vadin had raved about Tharizdun, the Chained God, and the substance definitely seemed evil. Homer and Stasi decided to pour some holy water from the Font of Divine Health in the next room into the vial to see what would happen. What happened was that the water started bubbling over, and Homer threw the vial against the far wall. The red goo seemed to have emerged mostly unscathed, and it started creeping up the wall. Sora scooped it up in a bottle that previously held a healing potion, and stoppered the thing shut.

After some discussion, the group decided to tie the bottle to a rock, unstopper it and drop it in the fountain. The font started frothing over and turning a bit pinkish for a minute or two before calming down. The magical energy from the fountain has dissipated, but the overwhelming evil of the red stuff doesn’t feel strong any more.

From here, the adventurers explored the easternmost chamber of this floor They opened a door to reveal – a curtain of dragon scales obscuring the next room! But beyond that lay more sarcophagi – and undead monsters.

Encounter 26: Dragonslayers’ Tomb

A couple of ghasts emerged from the darkness, followed by a wraith surrounded by swirling winds (a vortex wraith). The curtain of dragon scales blocked Homer’s shot into the room, so Sora yanked it to the ground. The vortex wraith started off being dazed thanks to Homer’s disruptive shot, so I ruled that its aura wasn’t working at first. Once it started up, though, its automatic damage and pulling of PCs toward the wraith had a major effect on the battle. Fortunately Stasi and Sir Oakley were doing their best to keep dealing radiant damage, and Sora’s Moonbane sword was ignoring the wraith’s insubstantiality.

Meanwhile, a regular non-vortex wraith had phased through a wall to come after Homer in the hallway. He pulled out the Sun card and managed to activate it to give himself some concealment, but the wraith’s invisibility every time it got hit made it a tough fight.

Things only got worse when a second vortex wraith joined the battle in the third round. Sir Oakley finished off the first one, which promptly exploded, sending the party flying all over the place. The one remaining vortex wraith focused on Sora, bringing the dragonborn to the ground briefly before she was rescued by Stasi and the wraith was at last destroyed.

Once all of the monsters were dealt with, the explorers discovered one of the relics Sir Oakley had been seeking – the Bowl of Io’s Blood. Huzzah! A great victory was shared by all.

I’m still having a ton of fun with this adventure. Ad-libbing the reaction of the red goo to the holy water was lots of fun, and I plan to have Homer’s scars from the disease come into play in the future. The mystery of the other people investigating the catacombs has worked out beautifully. And with five cards in their possession, the group is much more interested in and aware of the Deck of Many Things and its power. Now that I have almost everything prepped in MapTool, I’m ready for whatever they want to do next.

– Michael the OnlineDM

Madness at Gardmore Abbey: Session Four

Past sessions: Session OneSession Two, Session Three

This is the recap of my fourth session running the Madness at Gardmore Abbey adventure via MapTool and Skype for my family group. As always, SPOILERS AHEAD.

Sora the dragonborn swordmage (played by my wife), Homer the elf hunter (played by my brother in law) and Stasi the half-elf warpriest of Pelor (played by my sister in law) found themselves in the Temple of Bahamut on Dragon’s Roost, having just finished an extended rest under the protection of Sir Oakley. Upon their waking, Sir Oakley offered the party a mysterious object he had found hidden in a niche on the altar to Bahamut: An ivory plate that the party immediately recognized as a second card from the Deck of Many Things, to go along with the Key card they had found earlier.

This card had an engraving of three women – one young, one middle-aged, and one old (with a pair of scissors). Stasi was able to figure out that this represented the Fates. (Note that I’m running the game online and therefore am not handing out the physical cards; I like that the players get to puzzle out what some of the cards represent based on a description that I provide rather than getting to read the names on the cards.) Stasi agreed to carry this card with the other for the time being.

Having escorted Sir Oakley to the Abbey and having helped him defeat the enemies in the Temple itself, the adventurers agreed to help him find the three missing relics that would be necessary for him to perform the needed cleansing rituals. He didn’t know where these relics were, but he knew that they must be somewhere within the grounds of Gardmore Abbey. Sir Oakley ultimately agreed to accompany the group on their search (with a three-PC party, it’s nice to have a companion character along to help with the scaling of battles).

The group decided to start by searching the catacombs. Stasi the warpriest was itching to blast the heck out of some undead creatures (which have been rare in the Essentials adventures to this point). Coming down the stairs, they heard prayers ahead. Homer the hunter stayed back on the stairs while Stasi and Sora accompanied Sir Oakley down to investigate. They found a bunch of humans in armor praying around an altar of Bahamut.
Thus began Encounter 23: Altar of Glory. I’ll say right here that I totally screwed this up, because this was supposed to be the first encounter where my party was to meet The Others – the rival adventuring party. Oops. I forgot all about that, and I hadn’t prepared The Others in MapTool yet anyway. Major oversight on my part, but I have an idea of how I’ll fix this.

My other oversight is that I once again forgot to have the cards from the Deck do anything in combat, but that’s in part because combat was a little weird in starting. This encounter began with a skill challenge for the party to figure out what was going on with these knights praying in the catacombs. Sir Oakley joined in the prayers at the urging of the PCs. A religion check from the warpriest showed that the lead knight was making up some of the prayers as he went along, and the other knights were following his lead. They also noticed that the knights had their scabbards loosened and kept their hands close to their weapons, as though they were expecting a fight. However, they failed to recall any history of the Abbey that might be helpful in understanding the situation, and they twice failed to notice that the knights weren’t casting shadows.

Thus, the skill challenge was failed, and the knights attacked with a surprise round. It soon became clear that these weren’t actual knights – they were pale reavers disguised in the forms they once held in life. I loved describing the first attack, as one of the minions disappeared into a wall, reappeared next to a PC, and then reached for his sword, which somehow transformed into a long mane of hair as the reaver’s true form was revealed.

The fight was challenging with the surprise round and the good initiative roll from the lead reaver, but our warpriest finally got to Smite Undead on the lead reaver, and the group kept him pinned in a corner for much of the fight while they beat up his friends and later focused on him. Some surges were spent, but none were actually drained by the reavers themselves.

Examining the room showed that the altar to Bahamut could infuse a weapon with the one-time ability to deal fire damage, which Homer the hunter was all over. Sir Oakley helped him with the prayers, and the dragon heads on the altar came to life and bathed Homer’s bow in flames, which then died down, leaving the bow warm to the touch. This came in handy in the next fight.

One sarcophagus in this room had been pried open, and the skeleton within was missing its skull. Corruption emanated from this coffin, and the party was able to figure out that the corruption could only be cleansed if the skull could be returned. No skull was to be found in this room, however.

Onward to the east, then! The stone doors opened smoothly enough, revealing a room with a badly damaged ceiling. Roots from above had grown through the ceiling, creating a tangle that extended most of the way to the floor, stopping six feet above the ground. Stasi’s Sun’s Glow showed a good portion of the room, and the party could hear some shuffling footsteps in a far corner and a very faint sound of movement coming from another corner of the room near the ceiling (up in the roots). After Stasi and Sora moved into the room, the light revealed a mummy coming toward them

Encounter 25: Memorial Chamber was under way. Homer won initiative but delayed, staying back in the Altar of Glory chamber. The mummy moved toward the doorway and cursed Stasi, so that she would take necrotic damage every time she tried to hurt the mummy (a brutal but cool ability). Sora figured out that she could yank on the roots in order to bring the fragile ceiling down on the mummy, which worked like a charm (I decided that DC16 Strength would be for a minor action check and DC12 would be for a standard action). That mummy struggled for the next three rounds to free its legs from the rubble (immobilized, save ends).

Knowing that they had heard other movement in the chamber, the party was cautious about moving farther in. Too bad for them, then, when a swarm of rot scarab beetles stealthily crawled through the roots on the ceiling without attracting attention and then rained down onto Sora’s head. This was a wonderfully disgusting moment, leaving Sora the swordmage inside the swarm. Homer eventually jumped into initiative at the end of the round, after Sir Oakley told him that the mummy would catch fire if hit with fire, using Bahamut’s blessing from the previous chamber to light that mummy up.

At the beginning of round two, I remembered that I wanted to use the Deck of Many Things, and I decided later that I actually kind of prefer having the Deck manifest its power after the first round of battle. It feels artificial for the Deck to know exactly when combat is breaking out and to show up immediately; I like the idea that it responds to the stress of actual combat and then manifests.

In this case, the image of the Key appeared next to Stasi as a big glowing light. A minor action Arcana check revealed that someone standing in the Key square could use a move action to teleport 5 squares; pretty cool stuff!

Round two is also when the Flameskull revealed itself from behind a mosaic-covered wall on the far side of the room and dropped a fireball that enveloped three of the PCs plus the mummy and the scarab swarm. Uh oh! The new threat caused some major concern.

Eventually, Sir Oakley ended up charging into the chamber largely to get away from the swarm’s aura and to go after the Flameskull (and because I wanted to make the combat more dynamic than a chokepoint between two rooms). He was left to his own devices for a while as the PCs finished off the mummy and the swarm. Finally, the PCs came to help, rescuing Sir Oakley from unconsciousness and destroying the Flameskull.

When the Flameskull was defeated, the skull’s fires went out, leaving behind a normal skull. The PCs immediately thought – aha, perhaps this is the missing skull from the earlier sarcophagus. Indeed it was, and Stasi the warpriest returned it to its rightful place and used some healing magic to cleanse the corruption – in the process gaining Bahamut’s blessing and the one-time ability to breathe fire.

The Memorial Chamber was revealed to have a secret door to the north (the Perception check beat a 19, but not a 23), which led to a small room with three long-dead knights of Bahamut beneath a mural depicting the Platinum Dragon as a dracolich. Sir Oakley was able to explain that this was a private practice of some worshippers of Bahamut, and that it represented adherents steeling themselves to face death rather than worshipping undeath. Some searching of this secret chapel revealed two other doors leading to other chambers, three topazes that had been taken from the temple, and the fact that these knights evidently closed themselves in this room and starved to death rather than leaving. Interesting stuff. Having Oakley along at this point has been helpful.

From here, the party decided to go through the door on the west part of the north wall of the Memorial Chamber, which revealed a short hallway, beyond which was a room with a fountain – and a couple of skeletons.

Encounter 24: Font of Divine Health began with two skeletal tomb guardians arising and attacking. I once again had Sir Oakley get himself in the middle of things in order to create some movement. A blazing skeleton popped out from a niche to light Stasi on fire.

In round two, the Fates revealed themselves. The new card from the Deck manifested adjacent to Stasi, who boldly stepped into the light and understood that if she were hit by an attack while in the Fates’ square, she could force a re-roll of that attack with a -2 penalty. This power appealed greatly to Homer, the great chicken of the party, who camped in that square for several rounds.

Meanwhile, the tomb guardians were slicing and dicing all over the place, making effectively four attacks per round (a fun mechanic). Some skeletal minons revealed themselves, providing a flank for the guardians. All the while, the blazing skeleton kept burning things from a distance.

The fight ended with Stasi using a daily power, then finishing the final foe in a blaze of holy might. At this point, the mosaic of the head of Bahamut inlaid in the floor glowed brightly, and the whole party regained some free hit points. It was soon discovered that drinking from the fountain in this room would also regain some free hit points, plus grant some necrotic resistance. Good times; I love these alternate, short-term rewards.

Here we stopped for the night, with Homer and Stasi suggesting an extended rest in the secret chamber and Sir Oakley adamant that they must press on and find the holy relics. I hope they do press on; they’re not in severe shape just yet (Oakley is the lowest on surges by far). If they decide to rest in the secret chapel, so be it. It’s possible that their entrance has guaranteed that it will not remain secret indefinitely…

-Michael the OnlineDM

OnlineDM1 on Twitter

Next session: Session five

Madness at Gardmore Abbey: Session Three

Past sessions: Session OneSession Two

As always, SPOILERS AHEAD!

The group left Winterhaven, escorting Sir Oakley to Gardmore Abbey on his quest to purify the main temple on top of the mountain. He explained that he knew of the existence of a secret stair to take the party up the back side of the mountain and straight to Dragon’s Roost (the  mountaintop). After an hour or two of searching, they uncovered the stair and made their way up the long climb.

At the top, they found four buildings still standing. The main temple was the grandest of these, and only partially ruined. The stair came up directly behind a squat, columned building. To the south was a long, ruined structure, and to the north was the relatively intact gate house that guarded the road down to the orc village.

Since they were right next to the squat building, they peeked inside and saw webs all over the ceiling. Recalling their earlier, unpleasant run-in with deathjump spiders, they moved elsewhere.

Our intrepid explorers decided to poke around the long, ruined building to the south next. Peering inside, they saw some broken bunks, a well, and a rubble-covered stairway. This building had evidently been a barracks. After debating for a few minutes whether they should go inside (the well was strangely tempting for our elf hunter, who had enjoyed drinking from the Font of Ioun earlier), I had them roll a stealth check… which they failed.

Suddenly, a big-ass bug popped out of the ground in the middle of their group, spraying rocks and debris all over them. It was a bulette! And so battle ensued.

This was Encounter 19: The Barracks. With a party of five, it would include the bulette and two carrion crawlers. I scaled it down for my three-PC party by removing a carrion crawler. Having Sir Oakley in the party made it a pretty easy encounter.

Running the bulette was fun; I was happy to let him get opportunity attacked if need be in order to dig back into the ground and burst out later, creating zones of difficult terrain all over the place. I had the carrion crawler make stealth checks for the first two rounds to get close to the doorway where the fight was taking place, and the warpriest who chased the bulette into the main barracks had to make a quick decision whether to fight on or retreat when she saw the tentacled monstrosity clinging to the wall inside the door. She fought on, and the day was soon won.

Our elf hunter was disappointed to discover that the well only had water 30 feet down, with no bucket to fetch it. Mature character that he is, he decided to poop down the well in frustration. Okay then. He also searched the ruins and found a skeleton with a small amount of gold and two potion vials. These turned out to be an Elixir of Flying and an Elixir of Accuracy (I’m so loving Mordenkainen’s Magnificent Emporium).

The group asked Sir Oakley about the stairs, which he explained led down to the ancient vaults far beneath Dragon’s Roost, in which there were chambers devoted to all of the gods worshiped at Gardmore Abbey. He said that, while he would one day love to cleanse the entirety of the abbey from evil influence, including the vaults, his main goal for now was to cleanse the temple.

Thus, the party headed for the grand building. Inside, they saw altars devoted to Kord, Pelor, Erathis, Ioun and Moradin, in addition to the grand altar to Bahamut himself. Bahamut’s human knight avatar was also represented in statue form in the middle of the temple.

The temple was not entirely uninhabited, however, as the group soon learned. A disgusting half-woman, half-vulture creature swooped down and invited the group to come and pray for Bahamut, but she wasn’t making a lot of sense. Her sister in the rafters was babbling incoherently. Our dragonborn swordmage recognized the creatures as harpies. Sir Oakley didn’t like this one bit, saying that harpies are not known for their worship of Bahamut, and this harpy’s preaching was nonsensical and sacrilegious. He drew his sword, as did the rest of the party, and the harpies began the fight. They were soon joined by a pair of angels of valor; creatures that normally would defend a temple, but that seemed intent on destroying the intruders, even though Sir Oakley was clearly a paladin of Bahamut. Thus began Encounter 21.

The lead harpy soon enthralled most of the party with her bizarre hymn to Bahamut, pulling them closer to her so that the angels could zap them with lightning. [Side note: I LOVE the descriptions of the harpies from a role-playing perspective on page 7 of book 4. Giving these monsters not only names but also personalities and descriptions of their songs was fantastic!]

Once our hunter had escaped the enthralling song, he decided to pull out the Elixir of Flying and take to the air. As he got close to the altar of Kord, his deity, he felt a pull in that direction and discovered that fighting while near the altar of his god made him more powerful. He took great pleasure in shooting the angels out of the air and sending them crashing to the floor.

Our swordmage, who is firmly unaligned and worships no deity, asked if she could do an on-the-spot conversion to worship Ioun, whose altar was the easiest for her to get to. I absolutely allowed this – and oh, there will be consequences!

Eventually, the swordmage’s ongoing lightning damage felled the final angel, and the group could rest for a moment in the temple. They discovered they harpies’ chamber, where the gaps between the bricks had been stuffed with gold coins. They also discovered a mace hidden under a harpy-dung-covered pile of fabric and furs, which had clearly belonged to an original defender of the temple. This was revealed to be a Mace of Disruption (yay Mordenkainen again!), which I thought was a perfect fit for the temple and a useful weapon for our half-elf warpriest.

Sir Oakley then attempted his ritual to purify the temple, while the PCs assisted (since they now each worshiped a deity represented here). Sadly, the ritual failed because three religious relics were missing from the main altar. Sir Oakley asked the party to find the relics and bring them back to him in the temple, confident that they must be somewhere in the area of Gardmore Abbey.

The group asked Sir Oakley if he would stand guard while they took an extended rest in the temple, and he agreed to do so.

Thus ended session three. I have not yet revealed the treasure hidden in the altar to Bahamut, but I think it will come up soon. I also have yet to remember the Key card from the Deck of Many Things that the party carries, but the players haven’t remembered it yet, either. I’m looking forward to session four next weekend!

Later sessions: Session four

Madness at Gardmore Abbey: Session Two

Earlier sessions: Session One

My party of three recovered from their run-in with giant spiders in the feygrove of Gardmore Abbey and continued making their way toward the orc village. Before long, they came upon a spring populated by a number of eladrin warriors. The leader of the eladrin ordered his soldiers to surround the party, which they did via teleportation. The leader demanded to know who they PCs were and what business they had here.

Homer the elf hunter (played by my brother-in-law) quickly explained that the PCs had been sent by Lord Padraig of Winterhaven to scout the orc threat, and they meant the eladrin no harm. Deciding that enemies of the orcs couldn’t be all bad, the eladrin leader introduced himself as Berrian Velfarren and invited the party to come to the spring to join him in a glass of high-quality feywine.

Berrian explained that he had come to the region of Gardmore Abbey in search of his father, but that the trail had gone cold. Making matters worse, his sister Analastra had gone off on her own and hadn’t reported back yet. Berrian said that he would appreciate help in locating her, which the party agreed to do. Berrian explained that he planned to stay by the spring, trying to understand more about its magical properties.

Stasi the half-elf warpriest (played by my sister-in-law) talked to Berrian and examined the fountain and determined that drinking from it could give visions of the history of the region. Only Homer the hunter was brave enough to take a sip, and he experienced a vision of a valorous knight of Bahamut defending himself against an onrushing horde of ten orcs, slaying them all in swift order and emerging victorious. This vision of heroism left Homer with the ability to get some extra minor actions in a future battle.

The party then left the Font of Ioun and moved toward the orc village, eventually coming upon the sounds of struggle in the woods ahead. An eladrin woman was fleeing from a pair of displacer beasts, and the beasts caught up to her and knocked her to the ground, unconscious, as the PCs entered the grove. A dire stirge emerged from a nearby ruined bell tower, and the party moved to attack. Thus began Encounter 11: Bell Tower.

Since there are only three PCs in my party, scaling the battles down is always a little bit tricky. I decided to let this one be a challenge, and I only removed one dire stirge instead of removing a displacer beast (or a displacer beast AND a dire stirge). All I can say is wow, displacer beasts sure are annoying to fight! Rolling a 17 or 19 on the attack die and finding out that you missed is a major bummer.

I scaled things a little bit on the fly. I had a stirge go after a bloodied displacer beast. I had a surge die when it was knocked down to about 10 hit points, and I did something similar with one of the displacer beasts. I was planning on having the other displacer beast flee when it was badly bloodied, but the PCs REALLY wanted to kill that thing (it did eventually escape with 9 hit points). The battle ended with Stasi unconscious (but stable) and Homer only on his feat because he got a 20 on a death save. Whew!

After the battle, the PCs were able to revive Analastra, the fallen eladrin. She thanked them, but was clearly embarrassed to have needed their help. She asked them to come with her to meet her brother, whom the PCs revealed they had already met.

Berrian was grateful to see his sister again, and thanked the party by asking what he could do for them. They mentioned that they wanted information about the orcs, and Berrian obliged by telling them what he knew. He also let the party rest in his grove while his soldiers stood guard and Analastra regained her strength (an extended rest – they needed it!).

In the morning, Analastra escorted the party to the garden hedge maze that marked the end of the feygrove, from which point the party could see much of the orc village for themselves. They also noted the wizard’s tower, and the fact that the keep seemed to be the headquarters for the orcs, based on the foot traffic in and out.

As the adventurers made their way back through the feygrove to head back to Winterhaven, Berrian gave Sora the dragonborn swordmage (played by my wife, and the only PC to have made it through the displacer beast encounter without falling unconscious) with a Giantslayer Broadsword +2. Yay for Mordenkainen’s Magnificent Emporium (the first time I’ve actually used the book).

Back in Winterhaven, the party settled in at Wrafton’s Inn and sent word to Lord Padraig that they were back and ready to report. Padraig came to see them in the inn, and they showed him the map of the orc village they had created with their notes about the strength of the orc troops. I asked the party if they were telling Padraig about the eladrin the feygrove, and they said no.

Padraig expressed dismay at the size of the orc force and said that he would need allies in order to chase off the orcs. Still no mention of the eladrin. He asked about the wooded area on the map. Still mention of the eladrin.

Shrug.

Padraig did at least note that the wizard’s tower the party had seen would probably be of interest to Valthrun the Prescient. He also paid the party some gold as a reward for their scouting report.

After Padraig left, the party was approached by a paladin in full-on shiny armor with the device of Bahamut prominently displayed. He introduced himself as Sir Oakley and said that he had heard that the party had been to Gardmore Abbey. He explained that he was a direct descendant of Gardrin the Hammer, founder of the Abbey, and that he wanted to cleanse the Abbey of evil and set it as a beacon of good in the world before he died.  Also, he knew of a secret stair that would lead straight to the top of Dragon’s Roost, bypassing the orcs. He asked the heroes to help him, and they readily agreed.

They stopped off to talk with Valthrun before leaving town the next day, and he was excited to hear about the tower. He’d been researching the Abbey in the week the party had been gone, and he asked them to be on the lookout for a book bound in white dragon scales, which his research indicated had been owned by the last wizard to use the tower before the fall of Gardmore Abbey.

Thus ends session two. I hadn’t put together the encounters on Dragon’s Roost in MapTool yet, so we had to cut things a little bit short. We should be able to play again before the end of 2012.

Next session: Session three

Madness at Gardmore Abbey: Session One

At Christmas 2010, my wife’s brother and his wife came to visit us for a couple of weeks. During that time, I introduced them to Dungeons and Dragons, and they were hooked right away.

We started off with a Living Forgotten Realms module I had run at my friendly local game store, and they wanted to know what came next. So, I spent the next day crafting an LFR-style adventure that was the sequel (I really should post about my LURU 2-3 sequel one of these days – Deeper Into the Crypts). I ran it that night, and they loved it. I ran them through two or three more adventures that week before they had to go home. Good times.

Once they were back in Texas, they wanted to keep playing. No problem – MapTool to the rescue! I had heard such good things about Reavers of Harkenwold that I decided to run them through it next, followed by Cairn of the Winter King.

Now that we’re on the standard post-Essentials adventure path, I figured I might as well go with the next adventure: Madness at Gardmore Abbey. I got the box months ago, read through the first two books, and started building monsters in MapTool. Once we figured out when we’d actually be able to play again, I re-read the books, formatted the maps from WotC to fit to a 50 pixel grid, and put a few more monsters together. I randomly determined the positions of the cards from the Deck of Many Things and all of the consequences of those positions. And now, off we go!

SPOILERS AHEAD

Session one began with the party in Fallcrest, relaxing after their voyage to the Cairn of the Winter King. A messenger from Winterhaven rode to town, seeking the adventurers whose reputation was growing as problem solvers. Her name was Elaine (though no one asked). She knew the party by name: Sora the dragonborn swordmage (played by my wife), Homer the drow hunter (played by my wife’s brother) and Stasi the half-elf warpriest (played by my sister-in-law). The messenger explained that Lord Padraig of Winterhaven had a bit of an orc problem that needed solving, and his regular troops weren’t up to the task. He’d heard good things about the adventurers, and decided to send the messenger to hire them.

Being the easygoing, “Where’s the next fight?” group that they are, they eagerly agreed to travel with Elaine to Winterhaven. Lord Padraig had arranged for the party to be put up at Wrafton’s Inn at no charge during their time helping the town. They tried to catch a whiff of rumor about the orcs from the patrons who were there in the early afternoon (Rond Kelfem, Valthrun the Prescient, a few peasants and of course Salvana Wrafton), but their Streetwise was lousy. So, they waited for Padraig to show up.

The Lord came to the Inn around dinner time, and waved for Salvana to bring him his regular mug of ale. He bowed slightly to the party with a few words of flattery and asked to sit with them. He explained the orc problem and what he wanted the group to do (the Scout the Abbey quest from page 8 of book 2). Again, they readily agreed.

After Padraig left, the group tried to pick up some more information, which they got from Valthrun and Eilian the Old at a corner table. They learned about the sacking of Gardmore Abbey 150 years prior and the orcs who lived there ever since. Eilian had seen the ruins as a boy, but never ventured too close. Valthrun expressed interest in the grounds – surely there must be some intriguing mysteries within. He asked the party to let him know if they found anything mysterious.

And with that, they set off to Gardmore Abbey. After three days’ travel, they arrived at the place where a path left the King’s Road to head up to the wall around the abbey’s hill. Their keen eyes spotted some orcs manning (well, orcing) the guard towers by the main gate, so they decided to head south, where trees could be seen on the opposite side of the wall. Finding a gap in the wall, they decided to head on through.

At this point, I decided they needed a fight, so I tossed them into encounter 9 against the spiders (even though they weren’t coming at the Feygrove via the village). The three of them fought off five deathjump spiders without trouble.

During a short rest after the battle, the adventurers noticed an armor-clad skeleton tangled up in some webs in the trees. Armor might mean treasure, so they climbed up and cut the body down. They were able to figure out that this was the body of a paladin of Bahamut, and in addition to a faint magic aura from the paladin’s sword, they also discovered a thin plate of ivory, about the size of the palm of a hand, blank on one side, and with an etched image of key on the other side (which I described as being similar to scrimshaw). Stasi, the Arcana-trained warpriest, was able to figure out that this was a card from the Deck of Many Things, a legendary artifact known as a force for chaos in the universe. She was also able to determine what effect the Key card would have in battle. Intrigued, she decided to hang onto the card.

And thus ends session one. I’m excited about how things have gone so far. It didn’t take much encouragement for my group to decide to check out the Abbey, and now they’ve found one of the cards of the Deck of Many Things. They’re in the Abbey to scout the orcs, but have taken a circuitous route to get there – and that’s okay! Madness at Gardmore Abbey allows for a lot of freedom, which I appreciate.

Now I need to put some more encounters together – I only have 1 through 14 done!

Next session: Session two