Last day for Otters! And how to run a humble Kickstarter campaign.

Today is the final day for my Otters Kickstarter campaign, so if you haven’t checked it out yet, please go do so! The project is almost 500% funded, which is wonderful and humbling.

Speaking of humbling, I also wrote a blog post on my board game site, Clay Crucible Games, about my experience in running what I’m calling a “humble” Kickstarter campaign. While it’s mainly written from the point of view of a board or card game publisher, it could be relevant for RPG folks as well.

Thanks all!

Michael Iachini

@ClayCrucible on Twitter

Moving my board game blogging to Clay Crucible Games

Hi all! This is a bit of a meta post, about my blog itself.

I started Online Dungeon Master back in 2010, when I was fairly new to Dungeons & Dragons and was starting to run D&D games online. I didn’t find a ton of blogs to teach me specifically about how to do this, so I decided I would start my own blog, sharing what I learned as I went.

Online DM now has a ton of tips for playing RPGs online, lots of specifics about MapTool in particular, bunches of free maps, and even some free adventures. Just yesterday I received an email from someone who had discovered my Staff of Suha adventure trilogy and was loving it; that made my day!

In mid 2012, though, my gaming life took a left turn. I came up with the idea for what would become my first game design, Chaos & Alchemy. I started blogging about the development and publication process of that game, which has since been picked up by Game Salute and very successfully Kickstarted. Game Salute will be getting out to backers sometime in the next few months, and I’m excited about that.

The problem, though, is that my blog is called Online Dungeon Master, but I don’t actually play much D&D (or any RPG) anymore, and none at all online. When I blog, it’s about board gaming.

So, I’ve decided that it’s time for me to move my board game blogging over to my board game web site, Clay Crucible Games.

I’m not going to remove any of the content from Online Dungeon Master, but I do hope to mirror all of the board game content eventually over on the Clay Crucible site. And future blog posts about board games will originate there.

For a little while, I’ll still post a notice here on OnlineDM whenever I put up a new post on Clay Crucible, but eventually I’m hoping that my readers who are interested in board games will just drift over to the new site. And on that rare occasion that I do have something to say about RPGs, I’ll write it right here, just like I always have.

So, on that note, I put up a new board game post on Clay Crucible today, providing an update on my NaGaDeMon project, Otters. It’s ready to go on Kickstarter, and I plan to launch the campaign in late January or early February. I hope you’ll check it out!

Michael Iachini – the OnlineDM

@ClayCrucible on Twitter

How to print on blank game cards: Prototyping tips

Many game designers are going to need to create prototype cards at some point. You have choices about how to do this.

Some people start with index cards and markers – a fine place to begin.

For me, I tend to start with a simple Excel template (no art) that lets me print out a page with a dozen cards, cut them up, and drop them into sleeves with Magic cards.
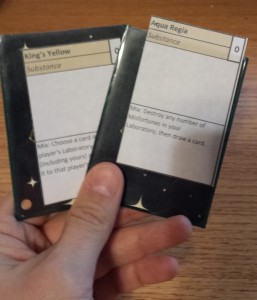
Paper slips printed in Excel, cut up, and dropped into sleeves with other cards

Paper slips printed in Excel, cut up, and dropped into sleeves with other cards (Chaos & Alchemy Substances playtest from last year)

Eventually, I get to a point where I want to make better-looking prototype cards, but not to the point where I want to order cards from The Game Crafter or anything like that. What to do?

Stickers – too expensive

For several months this year, I went with stickers. You can get Avery name badge labels that are just the right size to stick on a poker-size card (2.5″ by 3.5″ – the size of a Magic: The Gathering card, for instance). These come on sheets that are ready to run through your printer, and you can even get templates that size everything perfectly.
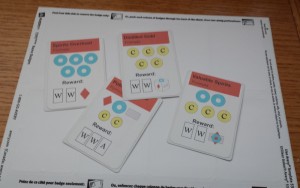
Old Alchemy Bazaar prototypes made with stickers

Old Alchemy Bazaar prototypes made with stickers

There are two problems with this approach, though. The first is cost: Each sticker will run you about 8 cents apiece based on the current Amazon price of $32 for a box of 400 labels (50 sheets, 8 labels to a sheet). That doesn’t even count the cost of ink to print on these cards.

Since I was using blank white cards from the Game Crafter (about 2 cents apiece when I bought them; looks like they’re 2.5 cents now), I wanted to print directly onto the cards. I couldn’t find anywhere that taught me how to do this, so I figured it out for myself. Now I’m teaching you.

Step 1: Create the file you’re going to print

Real designers will use things like PhotoShop and InDesign to make nice-looking cards. I do have an old version of PhotoShop Elements that I use near the end of this process (as you’ll see), but I like using Paint.NET. It’s a free program and I find it to be very user-friendly and flexible.

My template basically consists of a 3 by 3 grid layer to guide my positioning of the cards beneath. The file is at 150 ppi (so, not professional print quality, but plenty good for prototyping), and it’s 10 inches tall by 7.2 inches wide. This means that each card is 2.38 inches by 3.31 inches. I’ve found this to be a good size for cards that I want to drop into sleeves with Magic cards. However, I want them bigger when it comes to printing on the actual physical blank cards.

Grid to overlay card designs for prototyping

Grid to overlay card designs for prototyping

From there, I manually create cards by typing in text, coloring backgrounds, adding picture, etc. Here’s a sample page from the Apprentices mini-expansion for Chaos & Alchemy that I’m currently prototyping.
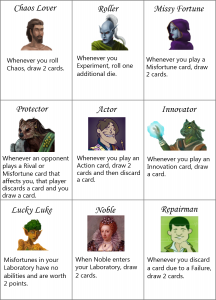
Sample cards for Chaos & Alchemy - Apprentices

Sample cards for Chaos & Alchemy – Apprentices

Now, the one thing I don’t love about Paint.NET is that I have a terrible time trying to print from it. Thus, I copy the merged image from Paint.NET into Adobe PhotoShop Elements and save it as a PDF. That’s what I’m going to print.

Also, to get a clean printout without grid lines, I want to save a version of my cards without grid lines (just hide the grid layer in your file).
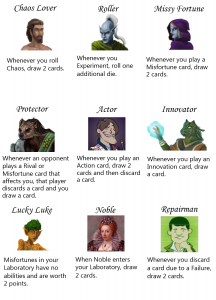
Same as above, but with the grid lines turned off

Same as above, but with the grid lines turned off

PDF of the blank grid

PDF of the card images

PDF of the cards WITHOUT the grid

Step 2: Print a template on card stock

So far when I’ve done this step, I’ve printed the actual full image with the words and pictures and everything, but I’ve since realized that I could instead just print the grid.

As I mentioned, I’ve sized this file so that it works if I want to print on regular paper, cut it up, and drop it into sleeves with Magic cards. But if I’m printing directly onto full-size poker cards, I want the image to be bigger.

Fortunately, I’ve found that if I just tell my printer to use the “Fit” option when printing from Adobe Acrobat Reader rather than the “Actual Size” option, things work perfectly.
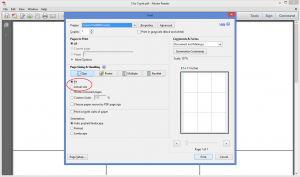
Note that the Fit option is selected, not Actual Size

Note that the Fit option is selected, not Actual Size

This leaves me with a piece of card stock with a blank grid on it. I made a little note to remember which side is the top; that’s the side that goes through my printer first (it’s more or less symmetrical, but better safe than sorry).

Printed grid, ready for glue

Printed grid, ready for glue

Step 3: Put a dab of 2-way glue in the four corners of each spot on the grid

This was the piece of the process that I struggled to find: Glue that would hold the cards in place on the template as they went through the printer, but would let them go cleanly afterward. I went to a craft store, and someone pointed me toward ZIG Memory System 2-Way Glue (I use the broad tip version).

When you put this glue on your card stock, it will be blue at first. But if you wait a few moments, it will turn clear. The beauty of this type of glue is that when it’s clear, it forms a temporary bond. Perfect!
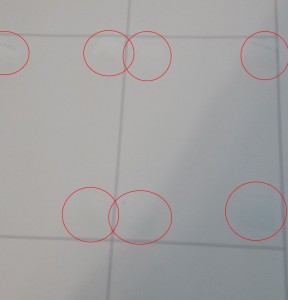
You can barely see the glue spots, so I've circled them

You can barely see the glue spots, so I’ve circled them

I’ll note that when I first tried this stuff, I smeared it all over the template. That turned out to be overkill; a bit in each corner of each card does the trick much more cleanly.

Step 4: Wait for the glue to turn clear, then position your cards on the template

Pretty straightforward. Make sure you press on each corner of each card a little bit so that it will hold.
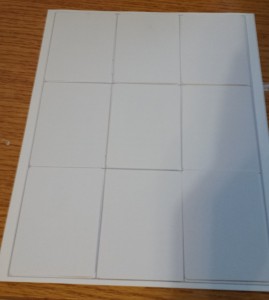
Ready for printing!

Ready for printing!

Step 5: Print the no-grid version of your cards – Use the Fit option again

If you’ve positioned everything properly, this should work like a charm.
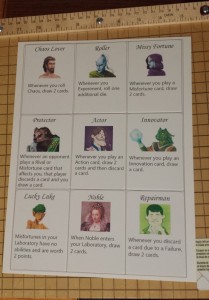
Tah dah!

Tah dah!

Step 6: Peel your finished cards off the template

Make sure you let the ink dry a bit first so that you don’t smudge it
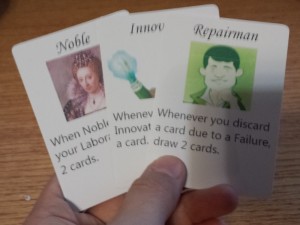
Finished Cards

Step 7: Position new cards on the template and repeat

No need for more glue! I’ve done five or six pages of cards in a row without having to worry about reapplying glue. I imagine you could do a lot more than that if you wanted to.

Caveats

First, let me clarify that this is only appropriate later in the development process, when you want some nicer-looking cards than the scraps of paper in sleeves approach.

Second, this is not the only approach. I know some folks will print cards on heavy card stock and then cut them out, even rounding the corners. I’m sure that’s a great approach; I haven’t done it myself.

Third, yes, you only get nine cards at a time this way. It’s still pretty quick to do, but the process is stick blank cards on the grid, print one page, peel the cards off, repeat. If you’re doing 200 cards, it will get old. 50 isn’t bad at all, though. And it’s no slower than stickers.

Fourth, this works best if you’re okay with a white background on your cards. I’ve tried it with borders, and it can work if you’re really careful, but that’s tricky to pull off. With white borders, even if your card is shifted a bit on the template, it’s not a problem.

Fifth, I recommend printing on “draft” or “fast” quality. Blank cards aren’t the same as photo paper, and even on “standard” rather than “high” quality, things can come out a bit muddy. Also, it takes longer for the ink to try if you go above “draft” quality, at least on my printer.

Sixth, I’ve only tried this with a color inkjet printer. I have no idea if this would work on a laser printer.

The finished product

In the end, I’m really happy with this approach. With stickers, the extra thickness made the cards a bit weird to shuffle; that doesn’t seem to be the case with this approach. It’s cheaper, and it feels less wasteful.

If anyone else tries this approach to making some nice-looking prototype cards, I’d love to hear about it!

Some sample cards from Otters - along with the star of this show, the glue

Some sample cards from Otters – along with the star of this show, the glue

P.S. I’m still eager for people to try the print-and-play version of Otters. Download the cards here, and download the rules here!

Michael Iachini – Clay Crucible Games

@ClayCrucible on Twitter

NaGaDeMon 2013 Part 3 – Otters – hiring a graphic designer

Recap: I’m participating in National Game Design Month (NaGaDeMon) again this year, making a kid-friendly card game called Otters. Previous posts:

Graphic design

Now that I have the mechanics of the game and the art for the cards, I need good graphic design to bring it all together. Specifically, I need:

  • Card layout
  • A game logo
  • Card back illustration (incorporating the logo)
  • Rules layout (probably on a card)
  • Maybe a box design (depending on how I make this game available for purchase)

For Chaos & Alchemy, I worked with a friend who is also a professional graphic designer, Bree Heiss. You can see my post about her awesome graphic design work on the game here.

Fortunately for her, Bree now works for Wizards of the Coast, doing awesome graphic design work on their games. That’s a bit unfortunate for me, though, since it means I need a new graphic designer.

Making my choice

I put out a call on Twitter, asking if anyone had any recommendations for graphic designers. Several recommendations came in, and I followed up with three different designers.

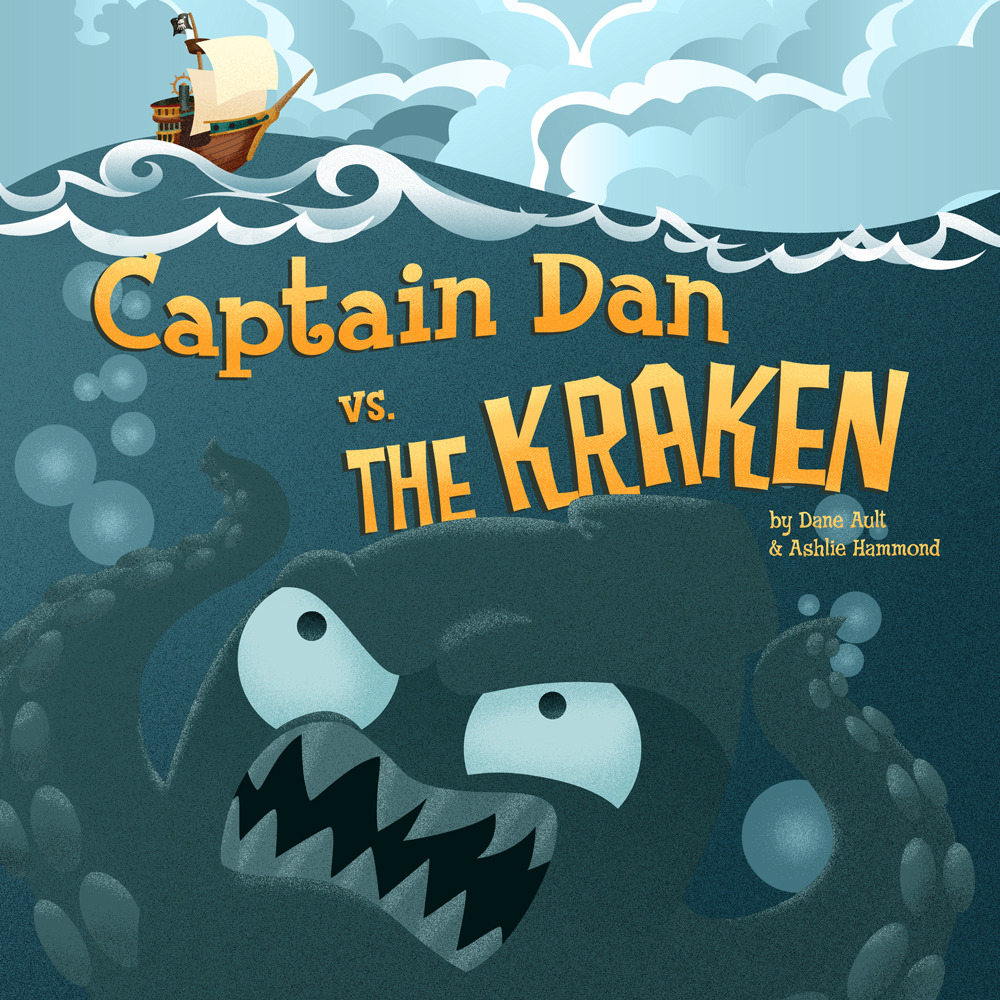
Ultimately, I decided to hire Dane Ault. You should definitely check out some of his earlier work over on his portfolio page.

By Dane Ault

By Dane Ault

Dane has done a lot of work for kids, and I love his aesthetic. I almost regret that I’m using photos instead of illustrations on Otters, since Dane’s illustration work rocks. But, since I want to get this game out before the end of the month, the photos are much faster to work with.

Want to play Otters?

While the graphic design isn’t finished yet, Otters is completely playable right now with my own (kinda crappy) graphic design. If you’re interested in trying it out, you can download a PDF with the cards (and my experimental “rules on one card”) right here! If you’d like some more detailed rules (which would probably help), you can download the rules here. I’d certainly love any feedback that you might have, especially if you try Otters with kids.

Photos by Paul Stevenson, Steven Zolneczko and Tambako The Jaguar

Photos by Paul Stevenson, Steven Zolneczko and Tambako The Jaguar

I’m aiming for a game that’s interesting for adults to play (with some strategic choices), but accessible for kids, probably ages 6 and up or so. Try it out, and if you have some feedback (good or bad), drop me a line at claycrucible@gmail.com

Thanks!

Michael Iachini – Clay Crucible Games

@ClayCrucible on Twitter

NaGaDeMon 2013 Part 2 – Otters – Creative Commons photos

In the spirit of completely making a game for NaGaDeMon 2013, I’ve decided to dive all the way in with Otters. You can read part 1, about the idea behind the game, here. As a recap, Otters is a simple, kid-friendly card game that’s mechanically inspired by Smash Up (but greatly simplified).

My initial play tests have left me pretty darn satisfied with Otters the way it is right now. So what’s next? Let’s publish!

To be clear, this is a little nutty, yes. Generally a game needs tons and tons of playtesting. But this one is very simple, and it just does what I want it to do as-is.

Now, if I’m going to get a published, purchasable game done by the end of November, I’m not going to have time to commission a bunch of illustrations for the cards. That’s okay, though, since part of the inspiration for Otters was how much I love looking at photos of otters online.

Of course, if I’m going to be able to use photos, I’ll have to license them. This is new to me.

Picking a photographer… unsuccessfully

I started by going to DeviantArt (an awesome web site when you’re looking for artists) and finding a photographer with otter photos that I liked. I sent a message via DeviantArt’s system and later followed the photographer on Facebook and sent another message… but no response.

Stock photos? No.

Since I’m trying to move quickly on this game, I had to try something else. Some other designers had suggested I consider stock photos, such as from iStockPhoto or Shutterstock. Unfortunately, Shutterstock does not allow their images to be used on merchandise, including game cards, and iStockPhoto only allows such use if you buy an Extended License, which appears to cost about $200 more per image.

Yeah, that’s not going to work.

Creative Commons – woo hoo!

Finally, I realized that the power of the open source movement could help me here – Creative Commons!

I’m no intellectual property attorney, but the basic idea behind the Creative Commons licenses (there are different versions out there) is that you can put a creative work in the world and allow people to use it for various things. In some cases, people will even let you use their Creative Commons licensed stuff (like photos, but also music and more) in commercial products. Frequently, there’s a requirement that you provide the creator with credit for their work.

And as it turns out, there are tons of awesome Creative Commons licensed otter photos out there! Many of them can be found on Flickr, but I did most of my searching using the Google Image Search tool; the Advanced Search options let you specify that you only want to find images that are available to do various things with (such as use and modify, even commercially).

Cute otters!

Fortunately, I don’t need a ridiculously large number of different otter pictures for my Otters game. There are cards with the number 1, 2 and 3 – so, three different otter pictures there.

Otter 1 by Paul Stevenson

Otter 1 by Paul Stevenson

Otter 2 by Steven Zolneczko

Otter 2 by Steven Zolneczko

Otter 3 by Tambako The Jaguar

Otter 3 by Tambako The Jaguar

There are special cards that let you play an extra card, play the top card of the deck or move a card from one spot to another.

Extra card otter by Peter G Trimming

Extra card otter by Peter G Trimming

Top card otter by Tambako the Jaguar

Top card otter by Tambako the Jaguar

Move an otter by Jay Gooby

Move an otter by Jay Gooby

There’s also an alligator card.

Alligator by John Magnus

And finally, there are otter playgrounds, so I needed beautiful lakes.

Lake in Canada by eleephotography

Lake in Canada by eleephotography

Peyto Lake by Jane Belinda Smith

Peyto Lake by Jane Belinda Smith

Lake Quinault by Tom Harpel

Lake Quinault by Tom Harpel

Next step: Graphic design

Now that I have the art for the cards completed, I need some graphic design help. Specifically, I need someone to:

  • Lay out the cards with the appropriate numbers and text
  • Design a logo for the game to put on the backs of the cards (along with anything we need for the background of the card back)
  • Lay out the rules (probably on a card, front and back, in order to use DriveThruCards for publication

I’m working on picking the graphic designer now. If all goes well, I’ll have final, laid-out files soon!

Michael Iachini – Clay Crucible Games

@ClayCrucible on Twitter

NaGaDeMon 2013 – Otters: Part 1

Last year I participated in National Game Design Month, better known as NaGaDeMon. In case you haven’t heard of it before, NaGaDeMon is inspired by NaNoWriMo – National Novel Writing Month. Instead of trying to write a 50,000 word novel in November, I’m trying to design a game.

My effort last year was called Gods & Champions. It was the second game I tried designing (after Chaos & Alchemy), and while I ended up with some fun stuff, I ultimately realized that the core mechanic I wanted to explore just wasn’t that fun. I could have a fun game, but it would involve going in a totally different direction, so I decided to move on to other games instead.

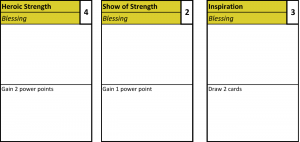
Example Blessings 01

This year, I’ve decided to work on a game entirely inspired by theme:

Otters!

Otter photo by Dmitry Azovtsev - http://www.daphoto.info

Otter photo by Dmitry Azovtsev – http://www.daphoto.info

Let’s face it: Otters (especially river otters) are freaking adorable. As a kid, I loved the Christmas special called Emmet Otter’s Jug-Band Christmas. It featured adorable otter Muppets that sang and played musical instruments. Later in life, I visited an aquarium and was captivated by the cute river otters.

So, for a few months now I’ve known I wanted to design a game themed around otters. I wanted it to be kid-friendly, and I wanted it to have adorable otter art.

What would be the mechanics of this otter game? I had no idea.

I started by researching otters and what they do. And while they’re adorable creatures, nothing about their lives really inspired any game mechanics in my mind. I let things just simmer.

Scavenging mechanics from other games

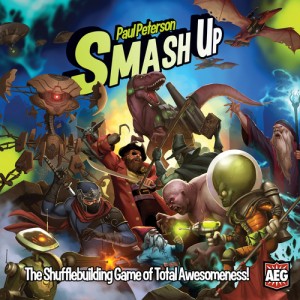
Then, a couple of weeks ago, I found myself playing a game that I really want to like but that I actually don’t enjoy much: Smash Up. The theme of Smash Up (pick two cool faction mini-decks, like ninjas and wizards, and shuffle them together) sounds like a lot of fun. The art is awesome. And yet the game has been a drag both times I’ve played it.

Smash Up by AEG

Smash Up by AEG

Smash Up seems like it wants to be a simple, quick, wacky game, but most of the factions have some fiddly mechanics that can lead to analysis paralysis. It’s also quite fiddly to keep track of everything on the board; with all of the abilities from the base cards plus the ongoing abilities from the creatures and actions that have been played to those bases, it can be really hard to even know what the total value of cards at a base currently is. The game ends up taking way too long for the amount of fun it contains, in my opinion.

Otters – The basic idea

So, my idea for the otter-themed game: Take the basic idea of Smash Up (playing cards from your hand to shared “bases” on the table in an effort to bring the total value of the otter cards on a base up to a target number) and simplify it, using cards with pictures of adorable otters.

Thematically, the “bases” will be playgrounds for otters (ponds, lakes and rivers). When you have enough otters in a playground to fill it up with fun, you score points for that playground.

Prototyping

Typically, I make quick and dirty prototypes for the earliest designs of my games. However, since Otters is all about adorable pictures of otters, I started using cards with art right from the beginning.

Now, I don’t personally own the rights to any otter photographs or illustrations, so I’m not going to show you what my prototype looks like here on my web site. Suffice it to say, I found adorable otter pictures online and popped them into a simple template.

Playtesting – you can help!

So far I’ve playtested Otters four or five times, with only small tweaks to the mechanics and rules along the way. It’s actually pretty much where I want it to be right now.

Otters is a quick (10 minute) 2-player game that’s easy for kids but still contains interesting decisions for adults. I might end up trying to expand it for 3 or 4 players, but I’m pretty happy with where it is as a 2-player game.

Furthermore, the only components are 54 cards. That’s it – no dice, no counters, no meeples, no board, not even some spare coins. Just a deck of cards. One of those cards is just a rules reference! I’m thinking I might ultimately make this game available via DriveThruCards or something like that.

If you’re interested in helping me to playtest Otters, send me an email at ClayCrucible@gmail.com, and I’ll send you a PDF with the 54 cards of the game. I personally recommend printing them on regular paper, cutting them up, and dropping them into sleeves with Magic cards or something similar.

I’ll continue to post about my progress on Otters throughout November. I may be able to go from zero to game-available-for-sale during the course of the month. That, of course, will rely on me working with a graphic designer to make the cards look nice as well as acquiring the rights to some adorable otter photography (plus an alligator image as well as some ponds, lakes and rivers). I think this can be done, though. (If you have any tips on where I might be able to get such rights, let me know.)

Wish me luck!

Michael Iachini – Clay Crucible Games

@ClayCrucible on Twitter

Board game club for high school: First meeting

Halloween 2013 saw the first meeting of the “nerd out” club at the local high school, which I have volunteered to help with. While the kids are talking about watching movies and sharing other nerdy fun at future meetings, the first meeting was all about board games.

And since it was Halloween, costumes were welcome! I went as a minion from Despicable Me.

When I arrived, the “meeting” was already in full swing. There were about 20 kids on hand, plus the teacher who is supervising the club. I spotted a game of Settlers of Catan getting underway along with a war game that I didn’t recognize. I had brought a stack of games like Carcassonne and Ra, along with a box containing my own designs.

The teacher introduced me to the class as a local game designer, and I had about six kids come over to the table where I was sitting, interested in trying out a game with the designer. I taught a bunch of them to play Chaos & Alchemy.

A couple of kids had to leave after a few minutes, while some others drifted in, so we had a bit of a fluid composition of players at the table. It turns out that Chaos & Alchemy was an excellent choice in that environment, since it’s easy for a player to leave and have someone else take their place (or just continue with fewer players if need be).

We played once with the base game, and then a couple of times with the Apprentices expansion I’ve been working on. It went great!

After that, I was down to just myself and one guy who wanted to play more of my games, so I broke out my super-early prototype of a game I’m calling Otters. It’s a quick and very simple card game, and I had only tried it solo before this, but it played pretty much the way I wanted it to. I’ll be writing more about this one soon, I promise; I think I might make it my National Game Design Month (NaGaDeMon) project.

The club meeting only ran from 3:00 to 4:30, but that was enough time to meet a bunch of the kids, share some love of gaming, and get some play testing done.

Next time, I’m probably not going to bother bringing games aside from my own designs; that’s what the kids seem most interested in. I’ll also go with a more structured plan in mind next time. I was expecting that I would be going around to different tables and teaching people to play different games, but the kids were already doing their own thing in many cases. I’ll go with the plan to teach / play test one particular game and let the kids who are interested in that game come to me.

Michael Iachini – Clay Crucible Games
@ClayCrucible on Twitter

Board game club for high school: Prep for first meeting

A few months ago, I noticed several online posts in the board game community where people were talking about their involvement with board game clubs at local high schools. Most of the time it was a teacher, but there were some cases where students were talking about these clubs, too.

My own high school years ended just before the era of modern board games began, but I would have loved this sort of thing when I was in school. I decided to see if any club like this existed at the high school near my home so that I could volunteer to help out. Helping to build the next generation of board gamers seems like a great idea!

Getting involved

The tricky part of this plan is that I’m not a teacher, nor am I even a parent. I discovered that you have to be sensitive when volunteering to help out at a school when you’re just a resident of the community (especially when you’re a man, I think).

Ultimately, I had some good luck. I called the local high school and was given the email address of their volunteer coordinator. After I emailed her, she wrote back to let me know that she had heard that one of the teachers had agreed to coordinate a new “nerd out” club at the school, which would include board gaming. She gave me the teacher’s email address and let me know that I would need to fill out a volunteer application (which included a background check and references; pretty intense, but okay with me).

I met with the teacher in his classroom one afternoon, along with a couple of the kids who were behind the idea for the club. Basically, the teacher didn’t really know anything about gaming, but the kids were so enthusiastic that he agreed to help out. I had brought a copy of my first game design, Chaos & Alchemy, and the kids wanted to play it on the spot. Fortunately, the game is quick, so they were able to try it and had a good time.

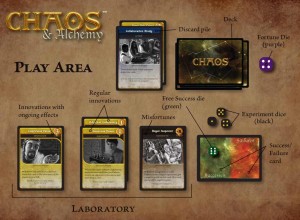
Chaos & Alchemy play area

Chaos & Alchemy play area

The date was set for the first real club meeting: Halloween 2013. That’s today!

Preparing for the first meeting

My main job at this point is to decide what games to bring. The kids are interested in my own designs, so I knew I would be bringing some of those. Beyond that, I want to bring games with certain features:

  • Quick to teach
  • Not too complicated rules-wise
  • Quick to play (90 minutes at the absolute maximum; preferably shorter)
  • Variety of styles (co-op, competitive, thematic, euro, etc.)
  • Portable (I have to carry all of these at one go)

I went through my collection and thought about games that I’ve taught to new gamers. I ultimately decided on this line-up:

Club games 1

I may trim this down by a game or two before I head to the school this afternoon, but this is my current planned line-up.

What do you think? Are any of these bad choices for new gamers? Any obvious choices I’ve left out?

Wish me luck!

I’m hoping that this ends up being a fun experience for the kids and a fulfilling experience for me. I’d love to teach young people about how much fun board games are, and if any of them are interested in learning to design their own games I’ll be happy to help teach them that, too.

Has anyone else out there been involved with kids and gaming, especially in schools? Any advice for me?

Michael Iachini – Clay Crucible Games

@ClayCrucible on Twitter

Kickstarter projects I’ve backed: Number 11 through 20 (chronologically)

Continuing my series, I’m going through the Kickstarter projects I’ve backed, in chronological order, noting why I backed each project, what level I backed at, and how it turned out. Part 1 of the series, covering the first 10 games I backed on Kickstarter, is here.

11. Roll20 Virtual Tabletop – April 2012

Why I pledged: At the time, I was still running a D&D game online using MapTool. I love MapTool, but Roll20 seemed like a cool attempt at a new, user-friendly virtual tabletop, and I wanted to see it become a reality.

My pledge: $25 for access to the closed beta and input on the development process (although I didn’t actually care about the reward all that much).

How it turned out: Roll20.net is a fantastic virtual tabletop, and I say this even though I don’t run D&D games online any more. I have only personally used Roll20 for playtesting the Substances expansion to Chaos & Alchemy, but the fact that the tool was flexible enough for that sort of thing is amazing.

12. Sentinels of the Multiverse Enhanced Edition – May 2012

Why I pledged: I had heard good things about the game, and it looked like a lot of fun. I also liked that it seemed the creators had put out a good-but-not-great package for their first edition and that this edition would be better.

My pledge: $50 for the new core game (no extra expansions)

How it turned out: Awesome! I was able to pick up my copy of the game at Gen Con 2012, and while I’ve only played it a few times so far, I think it’s a lot of fun.

13. Midgard Bestiary for 4th Edition – July 2012

Why I pledged: Partly because some people I follow online were associated with it, but mainly to show my support for 4th Edition D&D after D&D Next was announced.

My pledge: $10 for a PDF of the book

How it turned out: I received the PDF. I flipped through it a bit but have never actually used it. Still, I showed my support, and it was only $10, so I feel good about backing the project.

14. Project Ninja Panda Taco – July 2012

Why I pledged: Because I love the Jennisodes podcast, and I wanted to support Jenn. I also wanted to support Brian Patterson, the artist for the book who also draws d20 Monkey.

My pledge: $50 for a signed book (plus some bonus doo-dads that I don’t really care about).

How it turned out: Super cool! I read the book cover to cover, and I think it’s adorable. I haven’t actually played the game, and I likely never will, but this was money well spent.

15. Race to Adventure – July 2012

Why I pledged: I like Evil Hat, the game looked like fun, and I wanted to support Daniel Solis’s graphic design work.

My pledge: $40 for a copy of the game, plus some extras.

How it turned out: Ultimately disappointing. Among the extras were PDFs of Spirit of the Century and Dinocalypse Now, both of which were absolutely fantastic and completely unexpected. The game arrived in a timely manner, and it’s really beautiful and professionally produced. Unfortunately, the game is no fun at all. It’s just boring. I ended up giving it to my young niece and nephew, who seem to enjoy it.

16. Dungeon World – June 2012

Why I pledged: Mostly because everyone else was pledging, and heck, it was just five bucks to get the PDF – why not? As a side note, I’m listing the end dates for these campaigns, so even though Dungeon World says June 2012 while number 14 and 15 on my list say July, I actually backed Dungeon World after the other two.

My pledge: $5 for the PDF of the game

How it turned out: I believe I downloaded the preview version of the PDF when it was available. It seemed massive. I never actually read it, nor did I download the final version. But for five bucks, I’m fine with how things turned out.

17. Fantastiqa – August 2012

Why I pledged: I like deckbuilding games, and this one seemed like something that might appeal to more of the people I play with given its lighter theme. I loved the artwork, too.

My pledge: $72 for the game and its expansions

How it turned out: Disappointing. I know that this game generally gets good reviews, and I’ll admit that I’ve only played it a couple of times. But so far, it’s just not much fun. It feels like it has too many moving parts for a game that seems to hold itself out as being a little bit simpler than other deckbuilders. I think it stripped out the complexity that I enjoy in other deckbuilding games while adding complexity (fiddliness) that I don’t enjoy. I plan to find a new home for this one (anyone want to trade it for something cool?).

18. Consequential – August 2012

Why I pledged: I tried a demo of this game at Gen Con and thought it was really, really cool (despite the video stuff, not because of it). Also, I like Asmadi Games in general (particularly Innovation).

My pledge: $42 for a copy of the game

How it turned out: The project was canceled, unfortunately. This was a surprise to me. It also surprised me that they still haven’t re-launched it yet, although a recent BGG post from the designer says that they’ll be re-launching in September 2013. Hm, we’re in October now. Oh well; I’m guessing we’ll see it someday.

19. Viticulture – October 2012

Why I pledged: I love worker placement games. I love wine. And the project seemed really well put together.

My pledge: $49 for a copy of the game.

How it turned out: Awesome! First of all, the game itself is fantastic – one of the best marriages of theme and mechanics I’ve seen in a board game. Seriously, the way wines become more valuable as they age is super-elegant. Second, being involved with this project has led to a great working relationship with Jamey Stegmaier of Stonemaier Games, and it was a blast getting to meet him and his friends at Gen Con 2013.

20. Numenera – September 2012

Why I pledged: This is another one where following the herd played a role. So many people were talking about the game, I figured it was worth getting in for the PDF.

My pledge: $20 for PDFs of the core game and the Player’s Guide.

How it turned out: Honestly, I don’t know. I received an email with a link to download the player’s guide, but not the core book. I don’t care about the player’s guide. I should really follow up with the publisher to get the core book link, but I realized that I don’t actually care enough to track it down. I’m just not that into RPGs these days, and to the degree that I am into them, there are other games that I’m more interested in (at the moment, that’s D&D Next). I do hear good things about Numenera, though, so I’m not going to hold my personal RPG apathy against the game.

Scorecard for projects 11-20 that I backed:

  • Number that were actually funded: 9/10
  • Number that were eventually delivered: 9/9
  • Number that I feel were ultimately worth it in retrospect: 7/9 (the two exceptions being Race to Adventure and Fantastiqa)
  • Total money spent: $321
  • Money spent on not-worth-it projects: $102

What’s next?

I’m still at 49 total backed projects, and I’d like to keep revisiting them in this manner. I can definitely do numbers 21-30 soon, but after that I’ll need to pause to let some of the later-backed projects reach their expected delivery dates. Only three of the projects in the 31-40 range have been delivered, and mostly because I backed them fairly recently – the most recent being in July 2013 – not because of problems with the projects.

I’m still interested in hearing from others who have backed a number of Kickstarter projects – what made you back them, and are you happy with your decision in retrospect?

Michael the OnlineDM

@ClayCrucible on Twitter
Kickstarter recap: Chaos & Alchemy

Edit: This post originally went live on September 5 before it was finished. I fail at post scheduling sometimes. Sorry about that!

The Kickstarter campaign for my first game, Chaos & Alchemy, successfully finished on August 23. Today, I’m looking back at the campaign to share what I’ve learned and to thank the many, many of you who signed up to help my dream become a reality

The numbers

Let’s begin at the end: How did we do?

Game Salute (my publisher, who was running the campaign) was looking for $5,000 in order to publish Chaos & Alchemy. We ended up with $40,761 and, even more exciting to me, 1,066 backers.

That’s an unqualified success in my book! How did we get there?

Pre-pre-campaign

It’s worth noting the history of Chaos & Alchemy. I did a small (125 copies) self-published print run with black and white illustrations in mid 2012, which I sold through by last October. I then started planning my own Kickstarter campaign to fund full color artwork and a full size print run.

Example cards from first edition - black and white illustrations

Example cards from first edition – black and white illustrations

In preparation for that campaign, I sent copies of Chaos & Alchemy to several game reviewers and set up some advertising (primarily a video preview by Tom Vasel of the Dice Tower). I also got manufacturing quotes, started lining up illustrators, etc.

Then, Game Salute stepped in to publish my game. I no longer needed to worry about manufacturing and hiring illustrators, but the review copies and advertising would still come in handy (although I had to tell those folks to delay their reviews and ads, since Game Salute needed more time).

Also, having a hundred or so copies of Chaos & Alchemy in the hands of gamers who had bought the original print run definitely helped. I already had ratings on BoardGameGeek and some honest-to-goodness fans of my game out there. Most Kickstarters don’t have this luxury, but I can tell you that it helped.

Pre-campaign

It took about eight months from the signing of my contract with Game Salute until the launch of the campaign. The most important things that happened during this time were the new graphic design and illustration. Dann May did a great job with the former, and Enggar Adirasa is doing a great job with the latter.

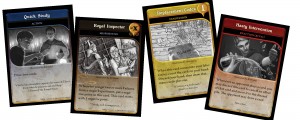
Examples of some of the new cards from the Game Salute edition

Examples of some of the new cards from the Game Salute edition

20 of the 43 cards were finalized before the Kickstarter campaign launched, which was hugely important. Being able to show backers what the game was going to look like, even if it wasn’t completely finished, mattered a ton.

Game Salute had some more review copies of Chaos & Alchemy printed and sent them to more reviewers in preparation for the campaign.

They also figured out the manufacturing cost and the plan for pricing the game. My original print run shipped with 26 dice, but that was going to be prohibitively expensive for Game Salute. We would either need to have an unacceptably high pledge level to get the game, or lower the cost somehow.

I campaigned hard for the latter, and we ended up going with a “pass the dice” approach. The game would come with 10 dice instead of 26, which is enough if players pass the experiment dice and free success marker around the table rather than giving each player their own. I think this was the right choice, as it made the pledge level to get Chaos & Alchemy $25 instead of $30 or more.

I also sought input on the campaign page from people whose opinions I value, including the BGG game designer forum and the Card and Board Game Designers Guild on Facebook. I highly recommend doing this for your Kickstarter campaign.

Campaign launch

For launch day, I had arranged to take a day off work. We launched around 10:00 AM Mountain time (I live in Colorado), and I spent most of the day spreading the word.

I went a little nuts with my excitement on Twitter; I recommend not overdoing it (but people will cut you some slack if you’re just overly excited).

I announced the campaign on my personal Facebook page as well as the Clay Crucible Games Facebook page.

I updated the Clay Crucible Games and Chaos & Alchemy web sites to include links to the Kickstarter.

I thanked the BGG and Facebook designers groups for their help with the campaign page, also mentioning that it was now live.

I sent emails to people who would be interested in the game. I went with personalized emails for most of these, though I had a copy-and-paste email for the people who had signed my sheet at Denver Comic Con to be notified of the Kickstarter.

I kept checking the Kickstarter page itself, keeping a close eye on the comments so that I could answer questions. Same goes for BoardGameGeek; I made sure to chime in on threads where people were discussing my game, especially where there were questions I could answer.

I stayed in close contact with Game Salute about the questions that I couldn’t answer – namely, anything to do with money.

And I stayed up late to watch the campaign hit its funding goal on the first day. Huzzah!

Ongoing campaign management

As the campaign rolled along, I spent a lot of energy talking to Game Salute about stretch goals. We had some goals in mind, but I don’t think Game Salute was expecting to need them quite so soon!

The initial stretch goal plan was not well received by backers. Basically, we started adding extra dice to the game every few thousand dollars. This went over like a lead balloon.

Plans were revamped. $15K became the level to get a cool cube to mark the Free Success. $20k would come with upgraded art for the success / failure tracker card. $25k would get upgraded card stock.

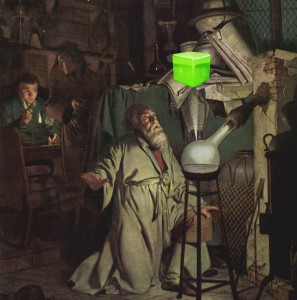
Success Cube

The big one, though, ended up coming at $18k: the Enhanced Edition. See, I had designed the Substances expansion last year, and it’s a lot of fun. I know that fans will love it, and the only question was at what level it would become economical to make it available.

Ultimately, with the campaign mired in the mid-campaign slump, Game Salute decided to pull the trigger and unleash the expansion. This was important not just because it made more content available, but also because it gave fans a way to pledge more than $25 if they wanted to support Chaos & Alchemy (the Enhanced Edition cost $39).

This is a important point: it’s really useful to have ways for fans to pledge at higher levels if they want to do so. Game Salute is very opposed to add-ons (custom dice bags, premium game box, play mats, sleeves, etc.), which is one common way of creating premium pledge levels. The Enhanced Edition gave us this option without adding too much administrative complexity.

Gen Con

One nice feature of the timing of this campaign was that it was running during Gen Con. Game Salute had scheduled six Chaos & Alchemy events, which all sold out pretty quickly even though the Kickstarter campaign came way later than the Gen Con event sign-up period. I asked my players at the GenCon events what led them to sign up to play this particular game, and it was largely because it was something new and it sounded interesting based on the name and description. A few even mentioned the good ratings on Board Game Geek!

Ultimately, though, Gen Con didn’t make a huge difference to the campaign because no one was demoing it in a booth. My Gen Con was really about pitching my new games to publishers, not about Chaos & Alchemy.

Final days

The Chaos & Alchemy campaign ended the Friday morning after Gen Con. This meant that the reminder emails for people who were interested in the campaign but not ready to back yet would go out Wednesday morning after Gen Con.

Most Kickstarter campaigns get a significant boost in the last few days, of course. This is partly because of that reminder email – people who glanced at the campaign a few weeks ago will take another look, see the stretch goals that have been reached, and decide to get on board. I think the boost is also in part because of human nature – many of us are procrastinators!

Looking at other gaming projects, I was trying to guess how much of a boost we might get in that final stretch. I was estimating that 20% of our funding could come in the last 2-3 days.

As it turns out, the final boost was much bigger – we got about 30% of our funding in the last three days.

Kicktraq chart. Note the huge increase in the last three days.

Kicktraq chart. Note the huge increase in the last three days.

I think a big part of the late-campaign success was the $35K stretch goal that was announced near the end of the campaign: custom dice.

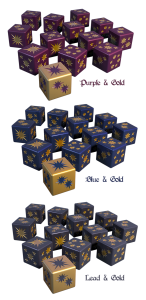
Blue Starry Dice

This at last was a stretch goal that people were really excited about, and I’m so glad we got them!

Done!

In the end, the Kickstarter campaign for Chaos & Alchemy was tremendously successful. We hit 800% of our funding goal and managed to unlock the expansions and the custom dice. My personal work is mostly done; I just need to finalize the design of the new Apprentices mini-expansion (let me know if you’re interested in playtesting!). I’m really looking forward to seeing the finished products in my hands – and in stores – next year.

Thank you so much to everyone who supported me!

Michael Iachini

Clay Crucible Games (@ClayCrucible on Twitter)