Last day for Otters! And how to run a humble Kickstarter campaign.

Today is the final day for my Otters Kickstarter campaign, so if you haven’t checked it out yet, please go do so! The project is almost 500% funded, which is wonderful and humbling.

Speaking of humbling, I also wrote a blog post on my board game site, Clay Crucible Games, about my experience in running what I’m calling a “humble” Kickstarter campaign. While it’s mainly written from the point of view of a board or card game publisher, it could be relevant for RPG folks as well.

Thanks all!

Michael Iachini

@ClayCrucible on Twitter

How to print on blank game cards: Prototyping tips

Many game designers are going to need to create prototype cards at some point. You have choices about how to do this.

Some people start with index cards and markers – a fine place to begin.

For me, I tend to start with a simple Excel template (no art) that lets me print out a page with a dozen cards, cut them up, and drop them into sleeves with Magic cards.
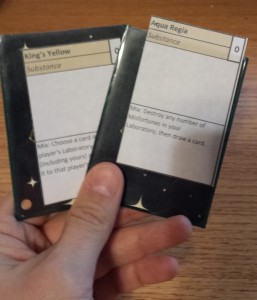
Paper slips printed in Excel, cut up, and dropped into sleeves with other cards

Paper slips printed in Excel, cut up, and dropped into sleeves with other cards (Chaos & Alchemy Substances playtest from last year)

Eventually, I get to a point where I want to make better-looking prototype cards, but not to the point where I want to order cards from The Game Crafter or anything like that. What to do?

Stickers – too expensive

For several months this year, I went with stickers. You can get Avery name badge labels that are just the right size to stick on a poker-size card (2.5″ by 3.5″ – the size of a Magic: The Gathering card, for instance). These come on sheets that are ready to run through your printer, and you can even get templates that size everything perfectly.
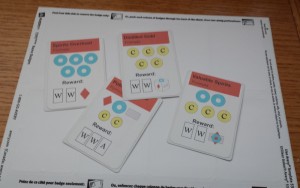
Old Alchemy Bazaar prototypes made with stickers

Old Alchemy Bazaar prototypes made with stickers

There are two problems with this approach, though. The first is cost: Each sticker will run you about 8 cents apiece based on the current Amazon price of $32 for a box of 400 labels (50 sheets, 8 labels to a sheet). That doesn’t even count the cost of ink to print on these cards.

Since I was using blank white cards from the Game Crafter (about 2 cents apiece when I bought them; looks like they’re 2.5 cents now), I wanted to print directly onto the cards. I couldn’t find anywhere that taught me how to do this, so I figured it out for myself. Now I’m teaching you.

Step 1: Create the file you’re going to print

Real designers will use things like PhotoShop and InDesign to make nice-looking cards. I do have an old version of PhotoShop Elements that I use near the end of this process (as you’ll see), but I like using Paint.NET. It’s a free program and I find it to be very user-friendly and flexible.

My template basically consists of a 3 by 3 grid layer to guide my positioning of the cards beneath. The file is at 150 ppi (so, not professional print quality, but plenty good for prototyping), and it’s 10 inches tall by 7.2 inches wide. This means that each card is 2.38 inches by 3.31 inches. I’ve found this to be a good size for cards that I want to drop into sleeves with Magic cards. However, I want them bigger when it comes to printing on the actual physical blank cards.
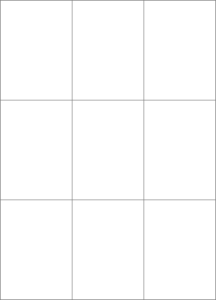
Grid to overlay card designs for prototyping

Grid to overlay card designs for prototyping

From there, I manually create cards by typing in text, coloring backgrounds, adding picture, etc. Here’s a sample page from the Apprentices mini-expansion for Chaos & Alchemy that I’m currently prototyping.
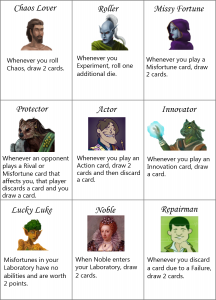
Sample cards for Chaos & Alchemy - Apprentices

Sample cards for Chaos & Alchemy – Apprentices

Now, the one thing I don’t love about Paint.NET is that I have a terrible time trying to print from it. Thus, I copy the merged image from Paint.NET into Adobe PhotoShop Elements and save it as a PDF. That’s what I’m going to print.

Also, to get a clean printout without grid lines, I want to save a version of my cards without grid lines (just hide the grid layer in your file).
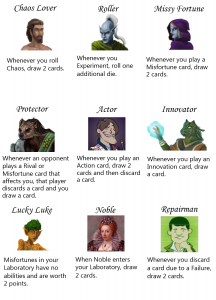
Same as above, but with the grid lines turned off

Same as above, but with the grid lines turned off

PDF of the blank grid

PDF of the card images

PDF of the cards WITHOUT the grid

Step 2: Print a template on card stock

So far when I’ve done this step, I’ve printed the actual full image with the words and pictures and everything, but I’ve since realized that I could instead just print the grid.

As I mentioned, I’ve sized this file so that it works if I want to print on regular paper, cut it up, and drop it into sleeves with Magic cards. But if I’m printing directly onto full-size poker cards, I want the image to be bigger.

Fortunately, I’ve found that if I just tell my printer to use the “Fit” option when printing from Adobe Acrobat Reader rather than the “Actual Size” option, things work perfectly.
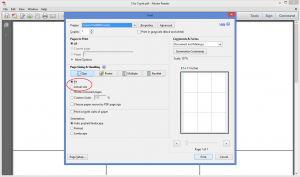
Note that the Fit option is selected, not Actual Size

Note that the Fit option is selected, not Actual Size

This leaves me with a piece of card stock with a blank grid on it. I made a little note to remember which side is the top; that’s the side that goes through my printer first (it’s more or less symmetrical, but better safe than sorry).

Printed grid, ready for glue

Printed grid, ready for glue

Step 3: Put a dab of 2-way glue in the four corners of each spot on the grid

This was the piece of the process that I struggled to find: Glue that would hold the cards in place on the template as they went through the printer, but would let them go cleanly afterward. I went to a craft store, and someone pointed me toward ZIG Memory System 2-Way Glue (I use the broad tip version).

When you put this glue on your card stock, it will be blue at first. But if you wait a few moments, it will turn clear. The beauty of this type of glue is that when it’s clear, it forms a temporary bond. Perfect!
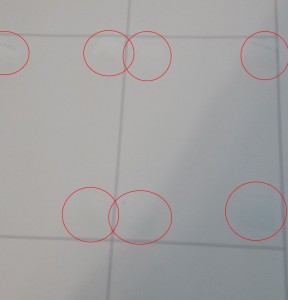
You can barely see the glue spots, so I've circled them

You can barely see the glue spots, so I’ve circled them

I’ll note that when I first tried this stuff, I smeared it all over the template. That turned out to be overkill; a bit in each corner of each card does the trick much more cleanly.

Step 4: Wait for the glue to turn clear, then position your cards on the template

Pretty straightforward. Make sure you press on each corner of each card a little bit so that it will hold.
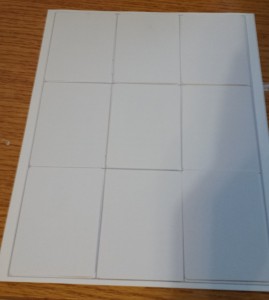
Ready for printing!

Ready for printing!

Step 5: Print the no-grid version of your cards – Use the Fit option again

If you’ve positioned everything properly, this should work like a charm.
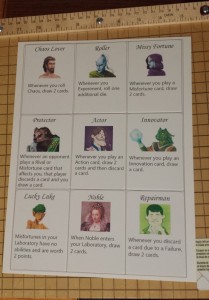
Tah dah!

Tah dah!

Step 6: Peel your finished cards off the template

Make sure you let the ink dry a bit first so that you don’t smudge it
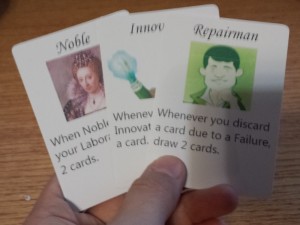
Finished Cards

Step 7: Position new cards on the template and repeat

No need for more glue! I’ve done five or six pages of cards in a row without having to worry about reapplying glue. I imagine you could do a lot more than that if you wanted to.

Caveats

First, let me clarify that this is only appropriate later in the development process, when you want some nicer-looking cards than the scraps of paper in sleeves approach.

Second, this is not the only approach. I know some folks will print cards on heavy card stock and then cut them out, even rounding the corners. I’m sure that’s a great approach; I haven’t done it myself.

Third, yes, you only get nine cards at a time this way. It’s still pretty quick to do, but the process is stick blank cards on the grid, print one page, peel the cards off, repeat. If you’re doing 200 cards, it will get old. 50 isn’t bad at all, though. And it’s no slower than stickers.

Fourth, this works best if you’re okay with a white background on your cards. I’ve tried it with borders, and it can work if you’re really careful, but that’s tricky to pull off. With white borders, even if your card is shifted a bit on the template, it’s not a problem.

Fifth, I recommend printing on “draft” or “fast” quality. Blank cards aren’t the same as photo paper, and even on “standard” rather than “high” quality, things can come out a bit muddy. Also, it takes longer for the ink to try if you go above “draft” quality, at least on my printer.

Sixth, I’ve only tried this with a color inkjet printer. I have no idea if this would work on a laser printer.

The finished product

In the end, I’m really happy with this approach. With stickers, the extra thickness made the cards a bit weird to shuffle; that doesn’t seem to be the case with this approach. It’s cheaper, and it feels less wasteful.

If anyone else tries this approach to making some nice-looking prototype cards, I’d love to hear about it!

Some sample cards from Otters - along with the star of this show, the glue

Some sample cards from Otters – along with the star of this show, the glue

P.S. I’m still eager for people to try the print-and-play version of Otters. Download the cards here, and download the rules here!

Michael Iachini – Clay Crucible Games

@ClayCrucible on Twitter

NaGaDeMon 2013 Part 3 – Otters – hiring a graphic designer

Recap: I’m participating in National Game Design Month (NaGaDeMon) again this year, making a kid-friendly card game called Otters. Previous posts:

Graphic design

Now that I have the mechanics of the game and the art for the cards, I need good graphic design to bring it all together. Specifically, I need:

  • Card layout
  • A game logo
  • Card back illustration (incorporating the logo)
  • Rules layout (probably on a card)
  • Maybe a box design (depending on how I make this game available for purchase)

For Chaos & Alchemy, I worked with a friend who is also a professional graphic designer, Bree Heiss. You can see my post about her awesome graphic design work on the game here.

Fortunately for her, Bree now works for Wizards of the Coast, doing awesome graphic design work on their games. That’s a bit unfortunate for me, though, since it means I need a new graphic designer.

Making my choice

I put out a call on Twitter, asking if anyone had any recommendations for graphic designers. Several recommendations came in, and I followed up with three different designers.

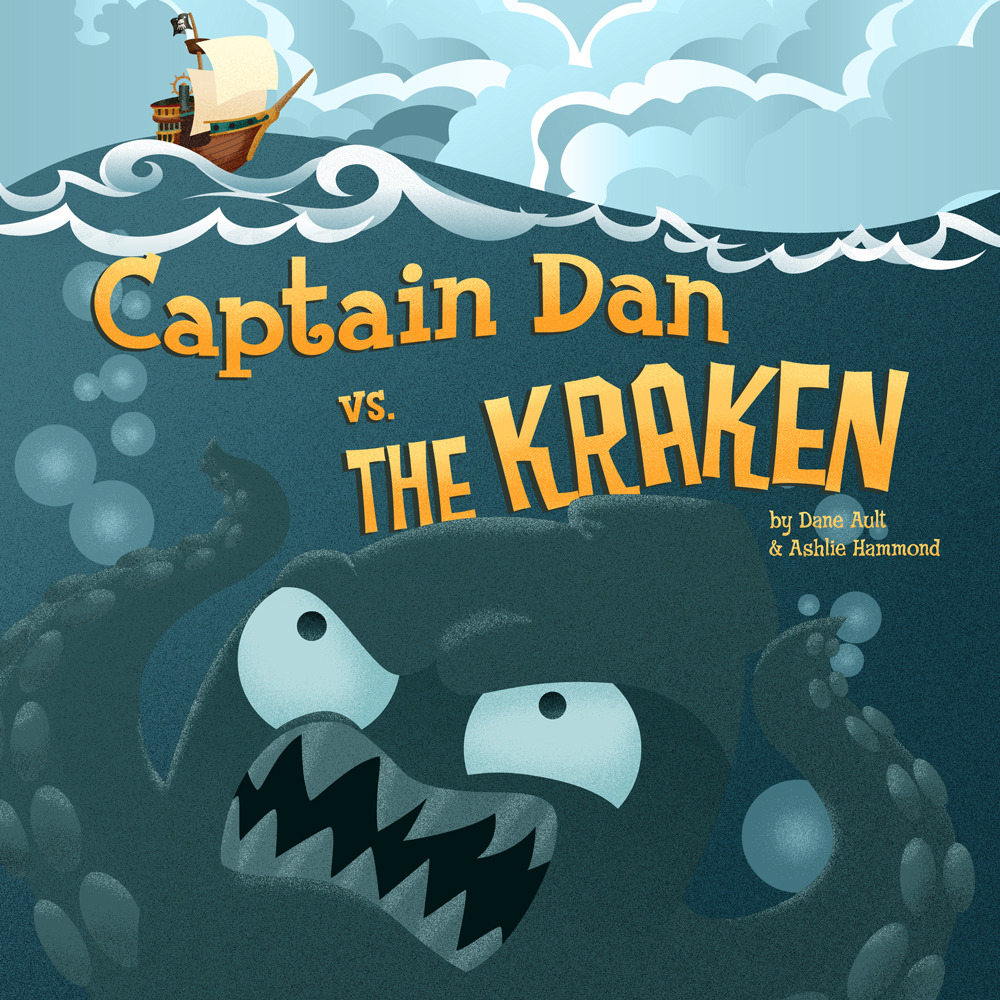
Ultimately, I decided to hire Dane Ault. You should definitely check out some of his earlier work over on his portfolio page.

By Dane Ault

By Dane Ault

Dane has done a lot of work for kids, and I love his aesthetic. I almost regret that I’m using photos instead of illustrations on Otters, since Dane’s illustration work rocks. But, since I want to get this game out before the end of the month, the photos are much faster to work with.

Want to play Otters?

While the graphic design isn’t finished yet, Otters is completely playable right now with my own (kinda crappy) graphic design. If you’re interested in trying it out, you can download a PDF with the cards (and my experimental “rules on one card”) right here! If you’d like some more detailed rules (which would probably help), you can download the rules here. I’d certainly love any feedback that you might have, especially if you try Otters with kids.

Photos by Paul Stevenson, Steven Zolneczko and Tambako The Jaguar

Photos by Paul Stevenson, Steven Zolneczko and Tambako The Jaguar

I’m aiming for a game that’s interesting for adults to play (with some strategic choices), but accessible for kids, probably ages 6 and up or so. Try it out, and if you have some feedback (good or bad), drop me a line at claycrucible@gmail.com

Thanks!

Michael Iachini – Clay Crucible Games

@ClayCrucible on Twitter

NaGaDeMon 2013 Part 2 – Otters – Creative Commons photos

In the spirit of completely making a game for NaGaDeMon 2013, I’ve decided to dive all the way in with Otters. You can read part 1, about the idea behind the game, here. As a recap, Otters is a simple, kid-friendly card game that’s mechanically inspired by Smash Up (but greatly simplified).

My initial play tests have left me pretty darn satisfied with Otters the way it is right now. So what’s next? Let’s publish!

To be clear, this is a little nutty, yes. Generally a game needs tons and tons of playtesting. But this one is very simple, and it just does what I want it to do as-is.

Now, if I’m going to get a published, purchasable game done by the end of November, I’m not going to have time to commission a bunch of illustrations for the cards. That’s okay, though, since part of the inspiration for Otters was how much I love looking at photos of otters online.

Of course, if I’m going to be able to use photos, I’ll have to license them. This is new to me.

Picking a photographer… unsuccessfully

I started by going to DeviantArt (an awesome web site when you’re looking for artists) and finding a photographer with otter photos that I liked. I sent a message via DeviantArt’s system and later followed the photographer on Facebook and sent another message… but no response.

Stock photos? No.

Since I’m trying to move quickly on this game, I had to try something else. Some other designers had suggested I consider stock photos, such as from iStockPhoto or Shutterstock. Unfortunately, Shutterstock does not allow their images to be used on merchandise, including game cards, and iStockPhoto only allows such use if you buy an Extended License, which appears to cost about $200 more per image.

Yeah, that’s not going to work.

Creative Commons – woo hoo!

Finally, I realized that the power of the open source movement could help me here – Creative Commons!

I’m no intellectual property attorney, but the basic idea behind the Creative Commons licenses (there are different versions out there) is that you can put a creative work in the world and allow people to use it for various things. In some cases, people will even let you use their Creative Commons licensed stuff (like photos, but also music and more) in commercial products. Frequently, there’s a requirement that you provide the creator with credit for their work.

And as it turns out, there are tons of awesome Creative Commons licensed otter photos out there! Many of them can be found on Flickr, but I did most of my searching using the Google Image Search tool; the Advanced Search options let you specify that you only want to find images that are available to do various things with (such as use and modify, even commercially).

Cute otters!

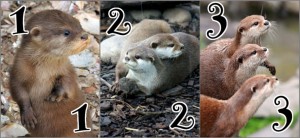
Fortunately, I don’t need a ridiculously large number of different otter pictures for my Otters game. There are cards with the number 1, 2 and 3 – so, three different otter pictures there.

Otter 1 by Paul Stevenson

Otter 1 by Paul Stevenson

Otter 2 by Steven Zolneczko

Otter 2 by Steven Zolneczko

Otter 3 by Tambako The Jaguar

Otter 3 by Tambako The Jaguar

There are special cards that let you play an extra card, play the top card of the deck or move a card from one spot to another.

Extra card otter by Peter G Trimming

Extra card otter by Peter G Trimming

Top card otter by Tambako the Jaguar

Top card otter by Tambako the Jaguar

Move an otter by Jay Gooby

Move an otter by Jay Gooby

There’s also an alligator card.

Alligator by John Magnus

And finally, there are otter playgrounds, so I needed beautiful lakes.

Lake in Canada by eleephotography

Lake in Canada by eleephotography

Peyto Lake by Jane Belinda Smith

Peyto Lake by Jane Belinda Smith

Lake Quinault by Tom Harpel

Lake Quinault by Tom Harpel

Next step: Graphic design

Now that I have the art for the cards completed, I need some graphic design help. Specifically, I need someone to:

  • Lay out the cards with the appropriate numbers and text
  • Design a logo for the game to put on the backs of the cards (along with anything we need for the background of the card back)
  • Lay out the rules (probably on a card, front and back, in order to use DriveThruCards for publication

I’m working on picking the graphic designer now. If all goes well, I’ll have final, laid-out files soon!

Michael Iachini – Clay Crucible Games

@ClayCrucible on Twitter

NaGaDeMon 2013 – Otters: Part 1

Last year I participated in National Game Design Month, better known as NaGaDeMon. In case you haven’t heard of it before, NaGaDeMon is inspired by NaNoWriMo – National Novel Writing Month. Instead of trying to write a 50,000 word novel in November, I’m trying to design a game.

My effort last year was called Gods & Champions. It was the second game I tried designing (after Chaos & Alchemy), and while I ended up with some fun stuff, I ultimately realized that the core mechanic I wanted to explore just wasn’t that fun. I could have a fun game, but it would involve going in a totally different direction, so I decided to move on to other games instead.

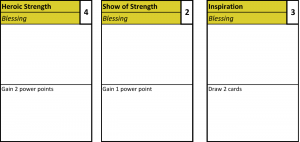
Example Blessings 01

This year, I’ve decided to work on a game entirely inspired by theme:

Otters!

Otter photo by Dmitry Azovtsev - http://www.daphoto.info

Otter photo by Dmitry Azovtsev – http://www.daphoto.info

Let’s face it: Otters (especially river otters) are freaking adorable. As a kid, I loved the Christmas special called Emmet Otter’s Jug-Band Christmas. It featured adorable otter Muppets that sang and played musical instruments. Later in life, I visited an aquarium and was captivated by the cute river otters.

So, for a few months now I’ve known I wanted to design a game themed around otters. I wanted it to be kid-friendly, and I wanted it to have adorable otter art.

What would be the mechanics of this otter game? I had no idea.

I started by researching otters and what they do. And while they’re adorable creatures, nothing about their lives really inspired any game mechanics in my mind. I let things just simmer.

Scavenging mechanics from other games

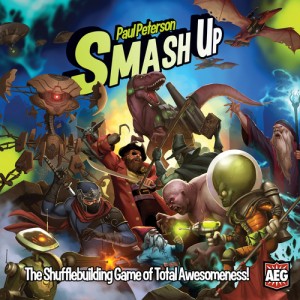
Then, a couple of weeks ago, I found myself playing a game that I really want to like but that I actually don’t enjoy much: Smash Up. The theme of Smash Up (pick two cool faction mini-decks, like ninjas and wizards, and shuffle them together) sounds like a lot of fun. The art is awesome. And yet the game has been a drag both times I’ve played it.

Smash Up by AEG

Smash Up by AEG

Smash Up seems like it wants to be a simple, quick, wacky game, but most of the factions have some fiddly mechanics that can lead to analysis paralysis. It’s also quite fiddly to keep track of everything on the board; with all of the abilities from the base cards plus the ongoing abilities from the creatures and actions that have been played to those bases, it can be really hard to even know what the total value of cards at a base currently is. The game ends up taking way too long for the amount of fun it contains, in my opinion.

Otters – The basic idea

So, my idea for the otter-themed game: Take the basic idea of Smash Up (playing cards from your hand to shared “bases” on the table in an effort to bring the total value of the otter cards on a base up to a target number) and simplify it, using cards with pictures of adorable otters.

Thematically, the “bases” will be playgrounds for otters (ponds, lakes and rivers). When you have enough otters in a playground to fill it up with fun, you score points for that playground.

Prototyping

Typically, I make quick and dirty prototypes for the earliest designs of my games. However, since Otters is all about adorable pictures of otters, I started using cards with art right from the beginning.

Now, I don’t personally own the rights to any otter photographs or illustrations, so I’m not going to show you what my prototype looks like here on my web site. Suffice it to say, I found adorable otter pictures online and popped them into a simple template.

Playtesting – you can help!

So far I’ve playtested Otters four or five times, with only small tweaks to the mechanics and rules along the way. It’s actually pretty much where I want it to be right now.

Otters is a quick (10 minute) 2-player game that’s easy for kids but still contains interesting decisions for adults. I might end up trying to expand it for 3 or 4 players, but I’m pretty happy with where it is as a 2-player game.

Furthermore, the only components are 54 cards. That’s it – no dice, no counters, no meeples, no board, not even some spare coins. Just a deck of cards. One of those cards is just a rules reference! I’m thinking I might ultimately make this game available via DriveThruCards or something like that.

If you’re interested in helping me to playtest Otters, send me an email at ClayCrucible@gmail.com, and I’ll send you a PDF with the 54 cards of the game. I personally recommend printing them on regular paper, cutting them up, and dropping them into sleeves with Magic cards or something similar.

I’ll continue to post about my progress on Otters throughout November. I may be able to go from zero to game-available-for-sale during the course of the month. That, of course, will rely on me working with a graphic designer to make the cards look nice as well as acquiring the rights to some adorable otter photography (plus an alligator image as well as some ponds, lakes and rivers). I think this can be done, though. (If you have any tips on where I might be able to get such rights, let me know.)

Wish me luck!

Michael Iachini – Clay Crucible Games

@ClayCrucible on Twitter