As I mentioned in my last post, I’ll be a first-time DM for a Living Forgotten Realms (LFR) session at my local store on July 24, 2010. I’ve gotten the adventure module (WATE1-1 Heirloom) and read through it once, which is a good start. The things I haven’t been certain about are what to do about maps and what to do about tokens. I’m pretty sure I’ll follow Ismael_DM’s suggestion in the comments of using the tutorial on Newbie DM’s blog to make flat tokens using metal washers. More on that as I actually give it a shot. (Thanks for the tip, Ismael_DM!)
As for maps, I’m pretty sure I’m going to stick with what I know: MapTool! While I’d love to set up a projector with my laptop to project a MapTool screen onto the tabletop (and there is a person at the local store who does exactly this), I’m not ready to lay out the cash required to build that sort of thing.
I’m pretty sure, though, that I can build my maps in MapTool and then print them out as “posters” to put on the table for my players to use. DM Samuel has talked on his blog about doing this, building the maps in a program called GridMapper (which I probably would have loved a few weeks ago before I learned how to really use MapTool) and then printing them out to scale using a program called PosteRazor. I haven’t tried the printing part yet, but I figured I’d start by building the maps in MapTool. Printing can come later.
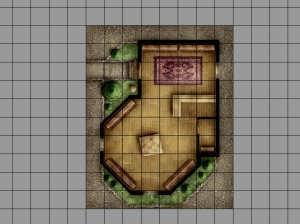
There are three combat encounters in the module I’ll be running (no real spoilers here). There’s a battle outside of a random inn on a random street, a battle inside a shop and the room beneath it, and a battle that can take place either in a room in an inn, next to a stable, or on the city streets depending on what has happened earlier in the adventure.
The adventure describes how to build each encounter area using Dungeon Tiles. Now, I don’t have any Dungeon Tiles myself, but Wizards of the Coast has a program called Dungeon Tiles Mapper that you can download for free and which contains images for a bunch of different tiles (not all of them, but a good variety). Combining that with the big MapTool image download that I have, I was able to recreate the maps pretty well (in my humble opinion). In some cases I tried to be as faithful as possible to the original, but there were some cases where I decided to make my own improvements.
First, I created a map that serves as both the inn exterior for the first battle as well as for the last battle (the downstairs part of the inn). I used a texture to paint the cobblestone streets, a Dungeon Tile image for the inn itself, a stairs object from the big MapTool download and a roof object from that same download to represent the building next door.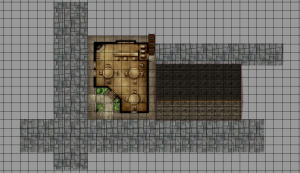
Next, I created the main room of the shop from the second encounter. This was dead simple – one Dungeon Tile image.
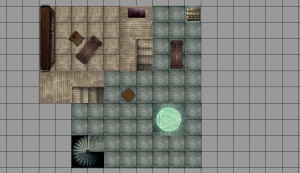
After that, I created the hideout beneath the shop. This one was much more involved. I used some Dungeon Tiles for the spiral staircase, the blue rune, the wooden stairs and the trap door. I used some flooring from the Dungeon Tiles to paint the stone floor as well as the wooden platform floor. I used images from the MapTool download for everything else (tables, bookshelves, chair, chest). I think it turned out really nicely.
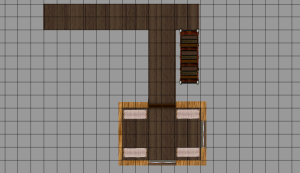
Next up was the room in the inn. Nothing here was from Dungeon Tiles. The stairs, beds and windows were from the MapTool download and the floors and walls were painted using various wood textures from that download.
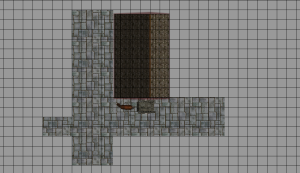
Finally, the exterior of the stable. It’s a lot like the inn exterior with the streets and the roof. The horse and cart came from the big MapTool download.
My next task will be to try to print these out using the correct scale in PosteRazor. Wish me luck! And as always, I’d love to hear your feedback, whether about the maps themselves or about the general idea of printing these out to use at the table (probably on card stock).

