
First, a quick RPG note: I did play and run some D&D (4th Edition) at an event called Gator Con a few weeks ago. This was a fund raiser for a high school gaming club here in Colorado, which I thought was pretty cool. I ended up playing my first-ever paragon Living Forgotten Realms game with my first LFR character, Rhogar the half-elf paladin.
I then ran two games, one of which was from my MyRealms series and one of which was a random LFR adventure that my players hadn’t played before. A good time was had by all, but it was a long day!
Now to the topic for this post: Banner stands.
You may recall that many months ago I reviewed a web site called Banners on the Cheap. They were apparently looking to get the word out about their site, so they offered a number of bloggers (including me) some store credit if we would review what we received. I liked what I got (a horizontal banner for Chaos & Alchemy) and reviewed the site accordingly.

My original banner from Gen Con 2012
Now I’m getting ready for Denver Comic Con, at which I will be demoing my games (mostly Chaos & Alchemy, but I’m hoping to demo Alchemy Bazaar as well). I’ll have a table as well as space to set up a vertical banner.
I decided to go back to Banners on the Cheap to order the actual banner, which I’m happy with (image file below).

Banner for Denver Comic Con 2013
But the next step was to get a banner stand. Frankly, I haven’t been able to find good information about the pros and cons of different types of stands, so I ultimately decided to take the do-it-yourself (DIY) approach.
Using my projector rig
Those of you who have been following my D&D posts for a long time probably know that I run games in-person using MapTool and my projector rig. It’s been a fantastic investment for me over the past few years, and I don’t know if I’ll run D&D any other way.
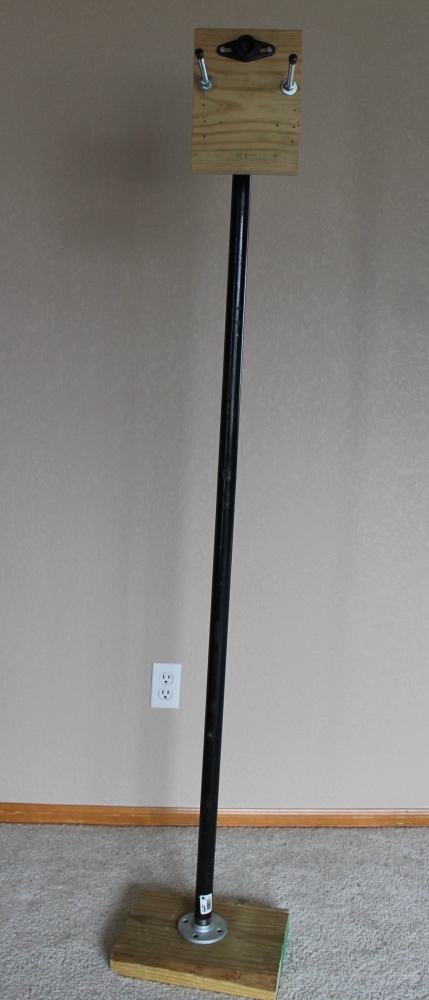 The projector rig, without the projector attached |
 Projector mount – rear view |
The vertical pipe from my projector rig is 5 feet tall, and my banner is 6 feet tall. So, all I needed to do was to get a junction, a 12 inch extension, a tee and a dowel, and I would have a rig ready to hold a banner!
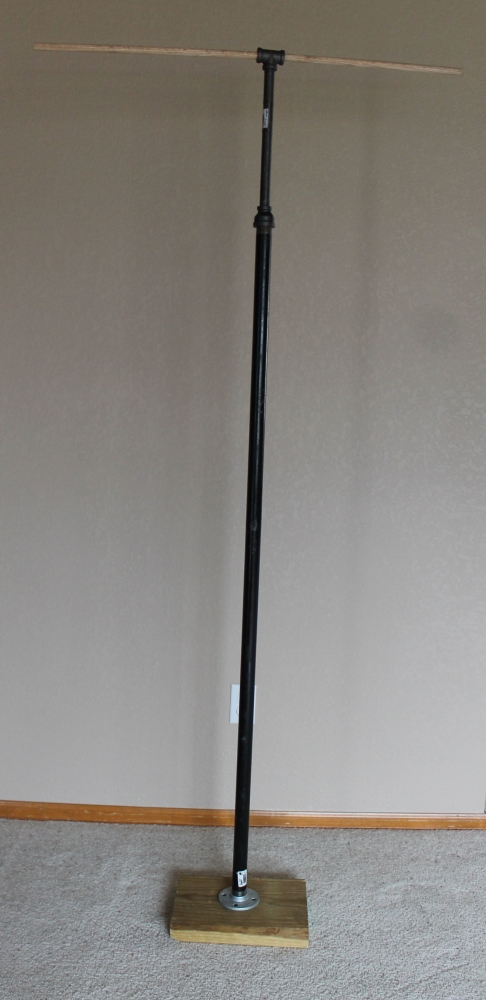
The banner stand, without the banner attached
As you can see in the picture above, I’ve replaced the elbow, the pipe nipple, the flange and the board from the top of the projector stand with a reducer coupling (going from 1 inch diameter to 1/2 inch diameter), a 12-inch piece of pipe, a pipe tee and a 5/8″ diameter wooden dowel. You can see a closer view of the top of the new stand below.
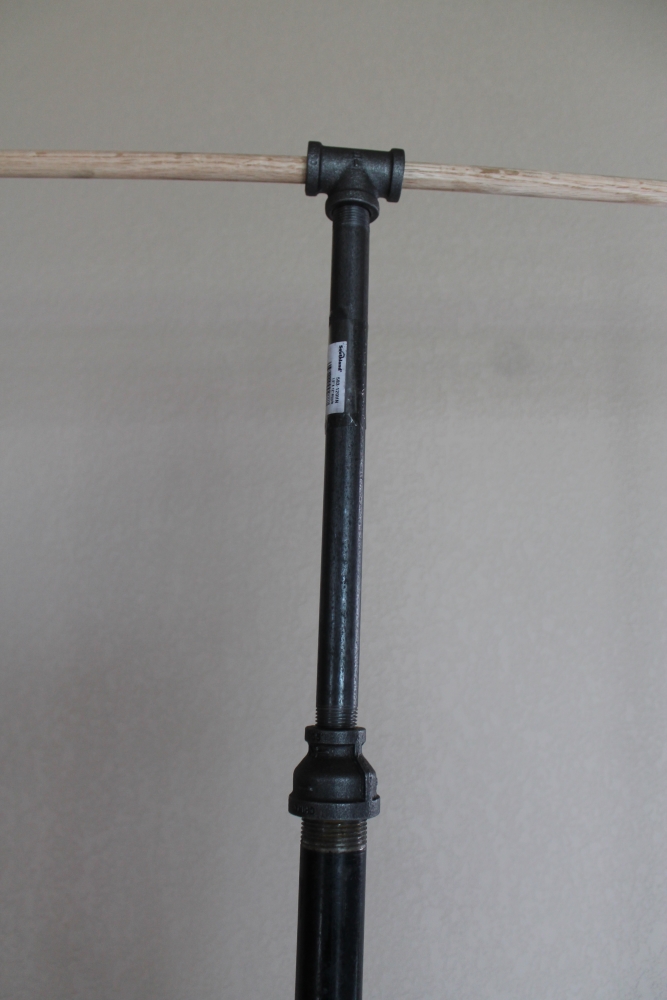
Top section of the banner stand
Now all I needed was a way to actually attach the banner to the dowel at the top. There are “proper” ways to do this, but I decided to go with a “simple” way: binder clips. Would you believe that the office supply store carries them in gold? Heck yeah!
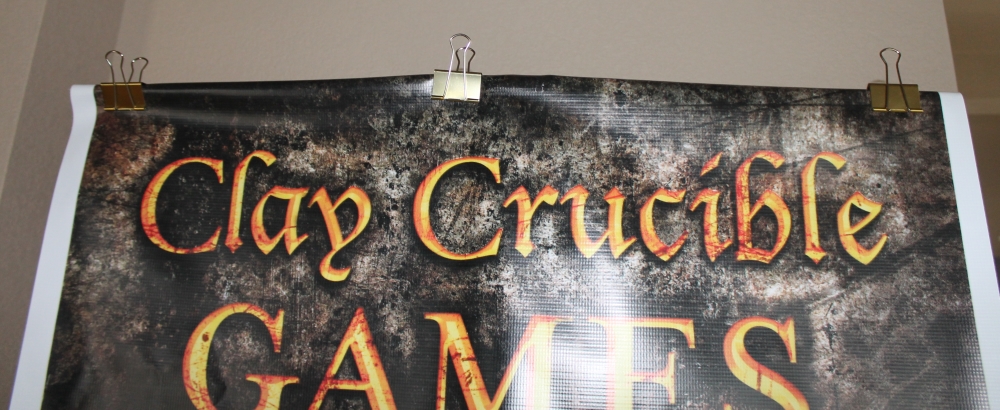
Note the awesome gold binder clips
I discovered that just letting the banner hang this way caused the bottom of the banner to wrinkle up, so I clipped another dowel to the bottom, with the bottom edge of the banner wrapped around it.

Now everything was hanging the way I wanted.

Complete banner stand with banner on display
I have to say, I’m really happy with the way this turned out. I spent $12 on hardware and another $4 on the binder clips, so a total of $16 to adapt my projector rig into a banner stand. I might end up taping back the white borders on the side or something like that, but either way, this is going to work.
If you want to build this type of stand yourself, you can skip the big pipe coupled to a small pipe and just go with the following:
- Base board (about 1 inch thick, about 12 inches by 12 inches)
- Pipe flange (1/2 inch diameter should be fine) with appropriate screws
- 6-foot long section of pipe (1/2 inch diameter) – or whatever length you need for your banner
- Tee junction
- A pair of 3-foot long dowel rods (5/8 inch diameter) – or whatever width you need for your banner
- 6 binder clips (large size)
That’s it! I’m guessing this will cost you about $25 or so, all in. Not bad for a DIY banner stand.
Anyway, if you’re going to be at Denver Comic Con 2013 on Saturday or Sunday, June 1-2, come look for me and try out some games.
-Michael Iachini, the OnlineDM
Great stand, and the best part is you can assemble the whole thing with no more than a cordless drill, am I right? I have always wanted to get a projector for my games but the cost has been prohibitive.
Jason,
Yep, that’s right, and the drill is really only required for the holes that the angle adjustment bolts go through. Once you’ve built it, you can disassemble it into its components completely by hand in a minute. I typically unscrew the top section from the elbow onward, then unscrew the 5 foot pole from the base flange and toss the three pieces in the trunk of my car.
Have fun!
Michael Iachini
OnlineDM