Review: Cairn of the Winter King (Monster Vault adventure)

Tonight I finished running my family through the Cairn of the Winter King adventure from the Monster Vault. Overall, they seemed to really enjoy the adventure, even more than Reavers of Harkenwold. Of course, this is a party of players who can best be described as Slayers – they want to fight monsters and take their stuff, rather than spending a lot of time on story and such.

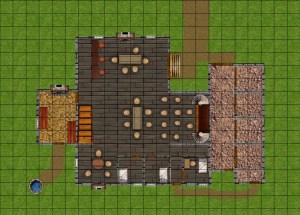
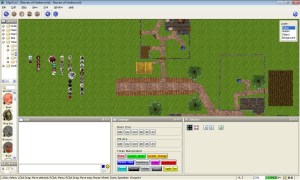
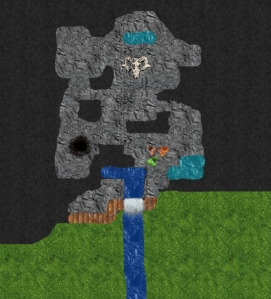
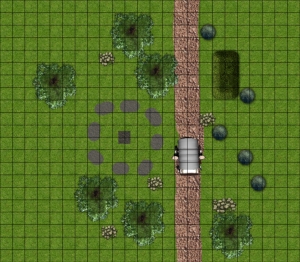
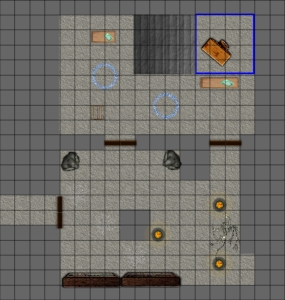
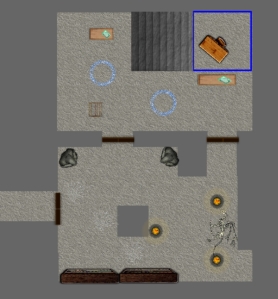
We ran this adventure over the course of three sessions, spanning about 12 hours of play. We played the game via MapTool and Skype (my brother in law and sister in law live in Texas while my wife and I live in Colorado). If you’re looking for the MapTool file we used, you can find it here. If you’re looking for my version of the adventure maps, those are here.

Like Reavers of Harkenwold, Cairn of the Winter King is rather non-linear, though for different reasons. Reavers involved political wrangling, traveling around an overland region performing tasks for various groups (in whatever order the party wished) in order to gain their help against an evil overlord before engaging in a big battle and an assault on the overlord’s keep. Cairn, by contrast, is a traditional dungeon delve in which the party is free to explore in any direction they wish. They can run into the various encounters in a variety of orders (though certain encounters are likely to come up later simply by being farther from the entrance).

SPOILERS AHEAD

Critical review

The skill challenge of flying the ship was well done. I like skill challenges that use scenes like this.

There were some cool set piece battles in the adventure, particularly against the tiefling lieutenant in a room with fiery forges. The fight against the gnome illusionists and the otyugh was also quite cool. I also liked the kitchen fight, where the transmuter could slide PCs over to the otyugh’s pit and occasionally turn a character into a piglet or a newt or whatever came to my mind (though this attack seldom worked).

I appreciated that the adventure allowed for some alternatives to combat, although I would have liked a little more discussion of how to handle the Winter King encounter for a party that simply gives him the Scepter and tries to leave (this wasn’t fully explained in the written text).

I wasn’t happy with the extended rest situation. It’s clear that the party is expected to take at least one extended rest and likely two while inside the dungeon, but at the same time there are patrols walking the halls. How do the patrols not find them? Also, technically PCs aren’t allowed an extended rest unless they’ve been adventuring for many hours. That just doesn’t happen here.

Players who want a lot of story probably won’t enjoy Cairn of the Winter King. Players who like cool fights and dungeon exploration will love it.

Narrative review

Cairn of the Winter King begins with the party visiting Fallcrest in the Nentir Vale, where it’s discovered that the whole region (and beyond) has been gripped by an unnatural and vicious winter for weeks. During a meeting to discuss what to do, a dragon-headed ship full of undead creatures flies out of the sky and the creatures start attacking villagers. The dragon head demands the Ice Scepter, and it is soon discovered to have been stolen by a half-elf passing through the area. The adventurers are to take the Scepter, board the dragon ship and fly to the lair of the Winter King to convince him to end the endless winter.

My party grabbed the Scepter and flew off without worrying about bringing the half-elf or anyone else. A skill challenge to pilot the ship to the Winter King’s lair followed. I enjoyed this particular skill challenge, since it’s presented as various scenes that the characters can respond to as they see fit (endure a hailstorm, fix a torn line, etc.). I much prefer this over static skill challenges that say things like, “The PCs must pilot the magical ship. Primary skills include Nature, Athletics, Endurance…”

Once they arrived at the lair, they saw the Cairn itself – a frozen pile of skulls that stands over a cave entrance. The first dungeon combat followed, against a big man who claimed to be the Winter King and who invited the PCs in for a feast. It was soon revealed that there was much illusion in the room – the man’s hunting hounds were Dire Wolves, his attendant was a gnome illusionist, and the feast table was actually covered with dead bodies. A fight broke out, which almost killed my PCs (scaling things intended for a quintet of level 4 PCs down to a trio of level 5 PCs is tricky for me). The gnome escaped, and the party decided they needed a rest, so they bedded down in the comfy beds in this first chamber. They had some bad nightmares, which were supposed to have a negative effect in future battles, but which I let slide.

From there, the party began exploring the lair. They came upon some wraiths that badly hurt them, followed by a run-in with a pair of gnome illusionists who claimed to be the Winter Queen and her attendant. Once the ruse was revealed, the gnomes attacked along with a zombie and a pet owlbear. This encounter was a lot of fun, as the gnomes made triplicates of themselves when they were thinking about fleeing (but the PCs beat them down anyway).

After this battle, the PCs heard some footsteps in the hallway and found themselves fighting a guard patrol (a relatively quick battle). They decided to try to take another long rest after this fight, going back to the beds in the first chamber. I allowed it, even though they really hadn’t been adventuring long enough at this point. After the second rest in the cursed beds, they found themselves suffering a -2 penalty to attack rolls in future battles.

That next battle was in the lair’s kitchen, fighting a human transmuter, a dwarf brawler, and an otyugh in a garbage pit. The transmuter was happy to chat for a while, but when the party was unwilling to just hand over the Scepter he started fighting them. His area burst slide ability was useful for moving the PCs next to the otyugh’s pit, at which point the tentacled beast started feasting on the warpriest. Yum! The party did ultimately prevail with good teamwork (eventually).

Wanting to eliminate the nightmare effect, the party had to take an extended rest elsewhere, but this time I ruled that they hadn’t been adventuring long enough. They decided to just hang out for a few hours in an alchemist’s chamber they had found, which I ruled would get rid of the -2 to attack rolls but not let them recover any surges or daily powers.

Next up was an encounter with a dragon. The frozen dragon had an ice key on a rope around his neck, and the PCs had already found an icy temple door with a ghostly dwarf trying to get them to unlock it. They snagged the key and then turned to fight the now-unfrozen dragon. Eventually they worked their way to the icy door during the fight and used the key, at which point the key melted. Some negotiation with the dragon followed (fortunately, two of the three PCs spoke Draconic) and they convinced the dragon that he could find better food by leaving the dungeon and hunting outside.

From here, the party found a room filled with frozen traps, but they were too nervous to enter. Instead, they explored a ruined library, and the warpriest was excited to discover a potion that would allow her to breathe fire for an encounter. THAT was a big hit in the next battle, where an ettin and two barbarians faced the party in a hallway. This battle normally would have taken place in the trap room, but since the party skipped that room I decided to have the bad guys jump them elsewhere.

At this point the party had gone through three fights since their last true extended rest, so I allowed them to take another one, after which they faced off against the Winter King’s tiefling lieutenant and his ogre and blazing skeleton allies. The party loved discovering that they could dip their weapons into the blue flames of the forge in this room to make them deal extra damage – that was another big hit. They happened to totally rock this battle, too, with only the warpriest taking any damage.

Discovering a fire key on a chain around the tiefling’s neck, the swordmage brought out a javelin and hooked the key’s chain around the end of it (the key was hot and would burn anyone who held it for long) and took it to the temple door that had previously been unlocked with the dragon’s ice key. The temple was filled with ice, but the ice had a keyhole that perfectly suited the fire key, which evaporated the ice. The ghost of the dwarf priest in this room bowed to the party and gave the warpriest back the two healing surges she had lost while fighting the tiefling before fading away in peace.

At this point, the party explored the remaining empty chambers and even tried getting into the vault beyond the trap room (none of them spoke dwarven, so they couldn’t figure out the puzzle) before finally entering the Winter King’s chamber (listening at the door revealed some spooky whispers, so they saved that room for last).

The hunter and warpriest navigated the icy bridge with no trouble, but the swordmage fell off twice. Finally, the warpriest walked up to the frozen skeleton in the throne and slipped the ice scepter into its hand…

Whereupon the Winter King burst from his ice and commanded the PCs to kneel before him. They refused to kneel and tried to reason with him, explaining that they just wanted him to end the winter and let them go. The Winter King spent a few rounds threatening and yelling at the characters, who wisely chose not to attack, instead continuing to talk to him. They got to the icy skeleton after a while (winning the skill challenge), who commanded them to leave and never come back. The swordmage asked him to melt the icy bridge to make her exit easier, which royally (pun intended) ticked off the Winter King, who threw a bolt of ice at the swordmage as a parting shot. Never ask the Winter King to melt ice!

At this point the magical cold from the outside world began rushing into the Winter King’s lair, and the party hightailed it out of there, hopped on the now-icy dragon ship and flew back to Fallcrest. The winter was over – mission accomplished.

As I said, the group had fun with the adventure. Give my party lots of fights and they’ll be happy. A story-loving party might not have as much fun, but there was nifty stuff for most types of players in the Cairn of the Winter King.

MapTool campaign file: Cairn of the Winter King

Since I’m running my family campaign through the Cairn of the Winter King adventure from the Monster Vault, I prepared everything in MapTool (my wife and I are in Colorado; her brother and his wife are in Texas, so we play online). I figured I might as well put the adventure out there to share.

This campaign file was created in version 1.3.b66 of MapTool. If you’re looking for the maps independently of the campaign file, you can find them here. Enjoy!

Download the campaign file here.

MapTool geek-out update: Flexible monster creation

Update: The new campaign file now has a cool Edit Monster macro that lets you tweak things on the fly, including Solo/Elite/Minion status. Thank you to JonathanTheBlack over on the MapTool forums!

After I put my initial pass at new damage tables and MapTool monster templates out there for the world to see, I saw some niggling problems that I wanted to correct.

First, my original damage tables had a couple of flat spots where the damage expression stayed the same from one level to the next. Since average damage is supposed to increase by 1 per level, this bugged me and I wanted to fix it.

Second, I knew I should be able to make monsters tweakable more easily with some additional properties.

Third, I wanted to handle limited damage expressions more elegantly.

Updated damage tables

My damage table now increases at every level. It also has a slightly wider range than the official tables, even at low level, but I’m okay with that. My crits will hurt a little more and my lousy damage rolls will hurt a little less than with official monsters. At the lowest levels, my expressions still have less overall variance because I’m rolling two dice right from the start (the official expressions only roll one for level 1-3). And at the highest levels I have some more variance because I’m only rolling two dice instead of four; that’s a good feature in my opinion.

I also fleshed out the table to include damage expressions for multi-target attacks (about 25% less than standard attacks) as well as limited damage expressions (25% more and 50% more than standard attacks). These took some fiddling to get right, but I’m pretty happy with where they ended up.

Tweakable monsters

I added a property for the attack bonus versus non-AC defenses (NADs); it’s just the normal attack bonus minus 2, but it makes it easier to tweak attack macros en masse. If you want a particular monster to have an easier time hitting NADs (as Soldiers do), just tweak the one property rather than editing every attack macro.

The same goes for having the 125% and 150% damage expressions; it’s easier to do something like tweak the Brute by changing the normal damage to the 125% numbers and the 125% numbers to the 150% numbers in the monster’s properties rather than in each individual attack macro.

Limited damage expressions

High-damage attacks are not perfectly formulaic; the official guidelines say to increase the damage for encounter or recharge powers by 25 to 50 percent.

I decided to add a formula. My generic monsters’ recharge powers do 25% extra damage, while their encounter powers do 50% extra damage. If it’s a multi-target recharge attack I use the standard single-target damage expressions; a multi-target encounter attack gets the 125% damage expressions.

A word on artillery monsters

The official guidelines say that artillery monsters should have +1 or +2 to hit for ranged or area attacks. This is entirely too vague for me, and messy to implement. So, I just gave them +2 to hit versus both AC and NADs. Sure, maybe they’re a little more accurate than they “should” be; I can live with that.

Putting it all together

If you want to download a template campaign file with the sample monsters and properties, you can download it here. The file was created in version 1.3.b66 of MapTool. The properties themselves have been pasted below.

#---StatsToSetManually-----
#Level:1
#Role:Skirmisher
#HPModifier:8
#Spd:6
#NativeSize:Medium
#ActPts:0
#SaveBonus:0
#HeShe:It
#ArmorClassRoleMod:0
#InitiativeRoleMod:0
#Leader:0
#MinionHP:0
#SubType:Standard
#SubTypeHPMod:1
#----StatsThatCanBeDefaulted---------
#MaxHP:{((HPModifier + Constitution + (Level * HPModifier)) * SubTypeHPMod) + MinionHP}
#ArmorClass:{Level+14+ArmorClassRoleMod+ACAdj}
#Fortitude:{Level+12+FortAdj}
#Reflex:{Level+12+RefAdj}
#Will:{Level+12+WillAdj}
#Init:{HalfLevel+DexMod-ArmorPenalty+InitAdj}
#Strength:{10+HalfLevel+StrAdj}
#Constitution:{10+HalfLevel+ConAdj}
#Dexterity:{10+HalfLevel+DexAdj}
#Intelligence:{10+HalfLevel+IntAdj}
#Wisdom:{10+HalfLevel+WisAdj}
#Charisma:{10+HalfLevel+ChaAdj}
#DefaultAttackBonusVsAC:{Level+5}
#DefaultAttackBonusVsNAD:{Level+3}
#SingleTargetDamageBonus:{DamageBonus100}
#SingleTargetDamageDie:{DamageDie100}
#MultiTargetDamageDie:{DamageDie75}
#MultiTargetDamageBonus:{DamageBonus75}
#DamageBonus100:{1+CEILING(Level*2/3)}
#DamageDie100:{6+FLOOR(Level/3)}
#DamageDie75:{SingleTargetDamageDie-2-FLOOR((Level+3)/9)}
#DamageBonus75:{SingleTargetDamageBonus-1-FLOOR((Level+1)/9)}
#DamageDie125:{8+FLOOR(Level/3)}
#DamageBonus125:{1+CEILING(Level*2/3)+FLOOR((Level+1)/4)}
#DamageDie150:{9+FLOOR(Level/3)+FLOOR((Level+3)/6)}
#DamageBonus150:{2+CEILING(Level*2/3)+FLOOR((Level+1)/3)}
#MinionDamage:{4+FLOOR(Level/2)}
#-----CalculatedOrStaticStats-----
#HitPoints:{MaxHP}
#TempHP:0
#BloodiedHP:{FLOOR(MaxHP/2)}
#DeathFails:0
*#HP:{Hitpoints}/{MaxHP} + {TempHP}
*#AC/Fort/Ref/Will:{ArmorClass} / {Fortitude} / {Reflex} / {Will}
*#Type:Level {Level} {Role}
*#Speed:{Spd}
*#Initiative:{Init}
*#ActionPoints:{ActPts}
*#Str/Con/Dex:{Strength} / {Constitution} / {Dexterity}
*#Int/Wis/Cha:{Intelligence} / {Wisdom} / {Charisma}
#E1:1
#E2:1
#E3:1
#E4:1
#E5:1
#R1:1
#R2:1
#R3:1
#R4:1
#R5:1
#PowerCharged:1
---------------------------Skills-------------------------------------
#ArmorPenalty:0
#Acrobatics:{HalfLevel+DexMod-ArmorPenalty+5*AcrTrained}
#Arcana:{HalfLevel+IntMod+5*ArcTrained}
#Athletics:{HalfLevel+StrMod-ArmorPenalty+5*AthTrained}
#Bluff:{HalfLevel+ChaMod+5*BlfTrained}
#Diplomacy:{HalfLevel+ChaMod+5*DipTrained}
#Dungeoneering:{HalfLevel+WisMod+5*DunTrained}
#Endurance:{HalfLevel+ConMod-ArmorPenalty+5*EndTrained}
#Heal:{HalfLevel+WisMod+5*HeaTrained}
#History:{HalfLevel+IntMod+5*HisTrained}
#Insight:{HalfLevel+WisMod+5*InsTrained}
#Intimidate:{HalfLevel+ChaMod+5*IntTrained}
#Nature:{HalfLevel+WisMod+5*NatTrained}
#Perception:{HalfLevel+WisMod+5*PerTrained}
#Religion:{HalfLevel+IntMod+5*RelTrained}
#Stealth:{HalfLevel+DexMod-ArmorPenalty+5*StlTrained}
#Streetwise:{HalfLevel+ChaMod+5*StrTrained}
#Thievery:{HalfLevel+DexMod-ArmorPenalty+5*ThvTrained}
#AcrTrained:0
#ArcTrained:0
#AthTrained:0
#BlfTrained:0
#DipTrained:0
#DunTrained:0
#EndTrained:0
#HeaTrained:0
#HisTrained:0
#InsTrained:0
#IntTrained:0
#NatTrained:0
#PerTrained:0
#RelTrained:0
#StlTrained:0
#StrTrained:0
#ThvTrained:0
------------------AbilityMods-------------------------------
#StrMod:{FLOOR((Strength-10)/2)}
#ConMod:{FLOOR((Constitution-10)/2)}
#DexMod:{FLOOR((Dexterity-10)/2)}
#IntMod:{FLOOR((Intelligence-10)/2)}
#WisMod:{FLOOR((Wisdom-10)/2)}
#ChaMod:{FLOOR((Charisma-10)/2)}
#HalfLevel:{FLOOR(Level/2)}
-----------------Adjustments-------------------
#StrAdj:0
#ConAdj:0
#DexAdj:0
#IntAdj:0
#WisAdj:0
#ChaAdj:0
#ACAdj:0
#FortAdj:0
#RefAdj:0
#WillAdj:0
#InitAdj:0
---------------Other-----------------------------------------
Elevation:0
AttackState:0
DefenseState:0

MapTool file for free adventure: Tallinn’s Tower

Since I’m such a fan of running adventures in MapTool, I thought I’d share the MapTool file for the free adventure I posted recently, Tallinn’s Tower. For the adventure itself, check out my earlier post (it’s a cool adventure, I promise) or download it directly right here. For the MapTool file to let you run it quickly and easily, click here.

Note that this campaign file was created in version 1.3.b66 of MapTool, so I’m not certain of its compatibility with other versions.

Running an online game for new players

I love it when a plan comes together. A couple of weeks ago I received a comment on my blog from a player who had never played a tabletop role-playing game before but who was interested in trying it out. Since I love to introduce new players to the hobby, I wanted to at least run one game for this prospective new player. So, I advertised here on the blog as well as over on EN World that I would be running a one-shot game for new players.

Getting this game set up went the way I originally expected setting up an online game to go when I first did it last July. For that game, I wanted five players so I recruited seven, figuring that a couple wouldn’t be able to make it. I ended up with eight. Oops.

This time I ended up recruiting six and only four were able to make it work (scheduling was problematic). That’s okay, though – four was plenty!

We gathered Friday evening on MapTool and Skype in the time slot that I normally run my long-running War of the Burning Sky campaign (my regular players were very understanding – thanks, guys!). I gave the new players some choice about what adventure we ran, and I ended up running a Living Forgotten Realms game – CORM 1-1 The Black Knight of Arabel (available here as part of a big archive file if you’re interested). This was, coincidentally, the first LFR game I had ever gone through as a player and one of the first I had run as a DM.

I specifically wanted to run an adventure I had run before in order to keep my prep time to a minimum (time was tight last week). Most of the prep time for this game went into getting the four PCs set up in MapTool. I did change the monsters in the adventure, too. First, I updated the damage expressions and defenses and everything to the post-Monster Manual 3 numbers. Second, since this particular adventure has the possibility of three fights with the same shadow creatures over and over, I mixed things up by bringing in some monsters from the Dark Legacy of Evard season of D&D Encounters that I’m running.

The group that gathered on Friday consisted of two new players (one of them in England – I somehow manage to attract players who are willing to play in the middle of the night!), one player who was rusty, and one player who at least hadn’t played online before (but he was looking for a game and I needed the fourth player to fill out the party). We had some minor technical difficulties at first, but soon enough we were all on MapTool.

I had created characters for the two new players based on descriptions they gave me – a tiefling cleric and a half-orc barbarian. The more experienced players created their own characters – an elf mage and a goliath warden. I started with some basics about how the MapTool program works and how the rules of the game work for the new players, and then we dove in.

SPOILERS AHEAD FOR THE BLACK KNIGHT OF ARABEL

The adventure began with the party on their way to Arabel to investigate reports of a black rider and shadow creatures. Near nightfall the party was approaching the city and came upon a wagon driver frantically trying to repair a wagon wheel before darkness came. The party offered to help, but just then the sun dipped below the horizon and some shadow creatures emerged. A battle ensued, using the Shadow Hulk and Shadow Seeker from the adventure, but using the Leeching Shadows from Dark Legacy of Evard instead of the Shadow Motes that were written. The fight was a little intense and the cleric ended up unconscious at the end, but the party stabilized her. They had seen the dark rider on a ridge in the distance during the fight and decided to go after him.

At this point, the party started tracking the rider through the woods and came to a steep downhill slope that was tricky for their horses. The barbarian ended up basically carrying his horse and then the cleric’s horse down the slope. It was awesome.

When the group came upon the rider’s horse, dead from shadow attacks, they started suspecting that the dark figure wasn’t commanding the shadow creatures after all. Eventually they found the dark creature and talked to him rather than fought. They learned that he was an exiled knight and that he was trying to fight the shadows, but that the townspeople thought he was commanding them. He also mentioned that his father had cursed him to an evil god. The PCs teamed up with him and tried to clear his name.

Next came a trip into town to confront his father, who wasn’t at his pub – but this didn’t stop the barbarian and the warden from starting a bar fight! I decided to roll with it and threw some brawlers at them. They fought for a couple of rounds and prevailed easily. Of course, they had to skedaddle because the barmaid went to fetch the guards (they DID start the fight, after all).

Ultimately, the group ended up at the theater where the cult of the evil god was meeting. They convinced the cultists (confused townspeople) that the cult leader was leading them astray as he wanted to sacrifice a baby to the evil god. The cultists left, leaving the party to fight the leader and more shadow creatures. This time I did use the original Shadow Motes but I paired them with the Dusk Beasts from Dark Legacy of Evard.

This ended up being an awesome battle, ranging all over the place. The mage used Mage Hand to pluck the baby off the altar, but the Dusk Beasts knocked him unconscious. The barbarian started raging and charging all over the place, twice getting knocked down to just one hit point. The cleric eventually grabbed the baby and took it up into a balcony for safekeeping, whereupon the warden smashed the ladder to the balcony to keep the cult leader from getting to it. Lots of damage, lots of heroism… it was a great fight, and the good guys just barely pulled it out in the end.

Everyone had a fun time, and I’m happy to say that one of the players has volunteered to DM the group through an ongoing campaign. Success!

This “game for new players” is something I would love to do on a regular basis, maybe once every few months. So, if you’re reading this post and are interested in learning to play D&D via an online game, drop me a line!

Anyone interested in a one-shot online game for new players?

The comments on my previous post about my experiences reading the Pathfinder Core Rulebook were interesting. Kayti chimed in to express interest in learning to play Pathfinder and asked if I would be running a game. I’m still just learning that game, but I know D&D 4th Edition, and I always want to encourage new players whenever possible.

So, I’m putting out a call: Are there any people out there who would be interested in joining Kayti in a one-shot D&D 4th Edition game aimed at new players? I’d run the game online using MapTool and Skype (of course), and I’d ideally love to have a table of all-new players. I wish I could agree to run an ongoing campaign, but I’m already a bit overcommited. A one-shot, though, I can handle.

If you have any friends who might be interested in playing, send them my way! Once I have enough players (I’m aiming for 4-5) I’ll get in touch with all of them about scheduling the game, figuring out what they want to do about characters, etc. I’ll be sure to blog about the experience, too!

Resizing maps to a 50-pixel grid

One of my few complaints about MapTool is that you can’t really export a map from one campaign to another. You can duplicate a map within a campaign, but there’s no good way to get it into another campaign. Also, if you want to create maps to share with other virtual table top users, it’s nice if you can have them pre-formatted to a certain size.

Thanks to a useful video and message board post from Eugene of the Fantasy Grounds forums (as well as from EN World), I learned a straightforward way to take maps that I’ve created in MapTool and turn them into JPGs both with and without grids so that they can be easily used by others and by myself in other campaigns.

0. Open up MapTool, Paint.NET, and this Excel tool (or a calculator).

1. In MapTool, center your screen on the map you want to export.

2. Choose the Measure Distance Along Path tool. This has two useful purposes: It makes the Layer window disappear, and it lets you count the number of squares on your map (this will be useful later).

3. Make your MapTool window full-screen by hitting CTRL + ALT + ENTER

4. Zoom in as far as you can without losing any of your map.

5. Hit the Print Screen key.

6. Alt Tab over to Paint.net and choose Edit – Paste Into New Image

7. Alt Tab back to MapTool, hit CTRL +G to make the grid go away, and hit Print Screen. Then Alt Tab back to Paint.net and again choose Edit – Paste Into New Image (you’ll have two separate image files in Paint.net – one with the grid and one without).

8. In the Paint.net image file with the grid, choose the Rectangle Select tool, zoom in pretty far, and scroll to the far left side of the map. Click (and hold) on the vertical grid line on the left side of the farthest-left complete square.

9. Drag the mouse all the way over to the right edge of the map, selecting all the way until you get to the vertical grid line on the right side of the farthest-right complete square. Release the mouse having selected right up until (but not counting) that rightmost grid line.

10. Look at the bottom of the screen and note the horizontal dimension (the first number) of the Bounding Rectangle Size. Look to the right of that at the bottom of the screen (not ALL the way to the right, as that’s the current X/Y position of the cursor) and note the horizontal dimension of the total image size.

11. Alt Tab back to MapTool and hit CTRL+G to turn the grid back on. Using the Measure Distance Along Path tool that is currently active, click and drag along a row to count the number of complete squares on the screen. You’ll need to add 1 to the running total (since the first square counts as zero).

12. In the Excel file, enter the first number you noted in Paint.net in the Selected Pixels box, the number of squares you got out of MapTool in the Selected Squares box, and the second number you got out of Paint.net in the Total Image Size box. The big number at the bottom tells you the new image size you’re looking for. The formula is:

New Image Size = Total Image Size * Number of squares selected * Desired grid size / Selected pixels
OR
New Image Size = Total Image Size * 50 / (current number of pixels per square)

13. In Paint.net, go to the gridded image and choose Image – Resize. Enter the New Image Size in the Width box (making sure the Maintain Aspect Ratio box is checked) and click OK. The image will resize.

14. Crop the image as you wish, then save it as a JPG file in a directory that you’ve taught MapTool to look for.

15. Repeat 13 and 14 for the gridless image file (the new dimension will be the same as for the gridded file).

16. Enjoy your new map files!

Reavers of Harkenwold – complete MapTool file

Since I ended up putting all of my Reavers of Harkenwold maps into an easy-to-import format and since I had saved almost all of the MapTool monster tokens I had created for the adventure, I figured I might as well bring it all together in a complete MapTool campaign file.

The linked file (which was created in MapTool version 1.3.b66) contains:

  • A big map with all of the individual encounter maps on it (feel free to copy these to separate maps within MapTool if you prefer
  • One copy of each monster and NPC token that I created for the adventure (CTRL+C and CTRL+V will make more)
  • Complete stats and attack macros for all of the monsters on their tokens
  • A generic monster token and a generic player character token
  • Campaign macros for basic things like dice rolling and toggling conditions on and off the tokens

Now, I’ll admit that there are a few things it doesn’t contain

  • A couple of maps are not present, as I didn’t use them in my run-through of Reavers of Harkenwold
  • A couple of monsters are missing (I believe the underground goblin leader is one, and there may be a couple of others) – I simply failed to save them after I’d created them
  • Not every monster is quite as fleshed out as I’d like (senses, equipment, etc.) but they’re totally ready to use (they’ve got hit points, defenses and attack macros, which is the important stuff).

Note that this by no means replaces the adventure itself. If you want to run Reavers of Harkenwold, you still need to get your hands on a copy of the adventure (there’s no background information or even information about which monsters appear in which encounter). This is just a tool to help you run it online.

If you happen to run Reavers using this campaign file, I would LOVE to hear about it! I had a ton of fun with the adventure, and this file should let you pick it up and go (assuming you’ve at least read through the adventure so that you know what the plot is!).

Download the Reavers of Harkenwold MapTool campaign file here.

A player character turns to the dark side

I had an interesting session in the online D&D 4th Edition game I was running this evening. This is my main online campaign of the War of the Burning Sky that I’ve been running using MapTool and Skype most Friday nights since last July. It’s a great group of people, and tonight we had the whole group – the original five players plus the two new players we added over time when some of the original folks were unavailable.

The interesting part of the session was about a character who really didn’t get to do much during the session tonight. Fudrick the Gnome started off the campaign as a Shaman, but it became clear to Fudrick’s player at some point that Fudrick was really a darker character. So, when we hit someplace around level 9 and were reshuffling the lineup of players, I offered everyone the chance to significantly change their characters if they wished, and Fudrick decided to become a dark pact Warlock.

This was fine. Fudrick wasn’t evil exactly, but perhaps a bit more ethically flexible than the rest of the party. Hilarity ensued when the two new characters in the campaign were both lawful good and had to put up with Fudrick.

Fast forward to our previous session. The party was in a big city and had an audience with the king, after which they were taunted by the ambassador from their enemy country. Fudrick decided that he wanted to try to infiltrate the embassy from this enemy country, Ragesia, so he paid them a visit. No one was home when he first knocked, but he came back later, alone, and was invited inside.

He convinced the Ragesian ambassador that he wanted to switch sides, and so the ambassador had him go through some dark initiation rituals involving blood and chanting and so on (I think I did a pretty good job of improvising that part). He was welcomed into the fold and went to bed in the embassy.

Meanwhile, the rest of the party was attacked in their inn during the night by non-Ragesians and were more or less forced to flee the city. They made a rescue mission first, though – go get Fudrick. Some awesome stealth on the part of the naturally sneaky tiefling and naturally not-so-sneaky minotaur led the two of them to Fudrick’s room. They woke Fudrick up and got his stuff and started heading downstairs… whereupon Fudrick flubbed a Stealth check badly.

The three of them heard the bad guys stirring upstairs and decided to run. But then Fudrick decided to try a bluff – he wanted the bad guys to think he was on their side and chasing off intruders, so he yelled out that there were intruders in the house and took a shot at the tiefling and minotaur, intentionally missing – but bluffing well enough that the tiefling and minotaur (and the bad guys) believed he was really trying to kill them. They left, and the party left the city, with Fudrick in the welcoming arms of the bad guys. He’s an NPC now.

To be clear, I’m not punishing Fudrick’s player or anything like that. I talked to him between sessions to see how he wanted things to go, and he basically wanted to go with the flow. It was his decision during this session to bluff the bad guys into thinking he was still with them, having his allies run away. And he’s not necessarily a lost cause, either – after all, he’s ostensibly a double agent. But there’s that ritual and oath that he underwent…

In the end, Fudrick’s player will be creating another character to join the party, and Fudrick has the potential to become an interesting villain (with his alter ego provided by an accidental typo from another player, FUDKIRC). I didn’t expect the campaign to go in quite this direction, but I’m completely fine with it.

Have you had any experiences with PCs joining the bad guys? How did you handle it when it came up?

Reavers of Harkenwold Maps

Edit: This post was updated on 5/14/2011 to change the maps to a 50 pixel per inch scale and to provide gridless versions of the maps (which, frankly, are the better choice for dragging into MapTool or Fantasy Grounds or whatever you use). Also, if you want the full MapTool file for this adventure, go here.

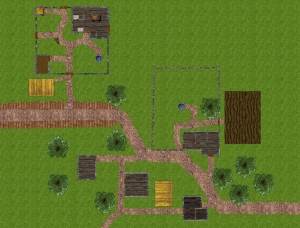
I ran the Reavers of Harkenwold adventure from the Dungeon Master’s Kit using MapTool over the past few months and had a great time with it. In the process, I needed to create MapTool versions of these maps, and I thought that others who are running the adventure using online tools might be able to make use of them. Enjoy!

Each map can be clicked for a larger version, and the printable PDF links for each map will bring you to a version that is formatted in printable one-inch square scale

Main overland map (printable PDF)

Road with wagon (printable PDF)

Toadwallow Caverns (printable PDF)


Ring of Stones (printable PDF)

Underground Lab (printable PDF)


Iron Keep main level (printable PDF)


Iron Keep second and third floors (printable PDF)

Third Floor