D&D Encounters – Dark Legacy of Evard Week 7

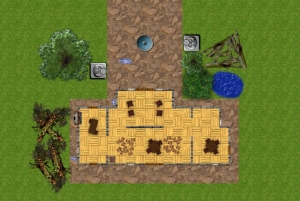
I was out of town last week, so I wasn’t running or playing in D&D Encounters. But hey, since I had already put the maps together for Week 6, I figured I might as well share them here.

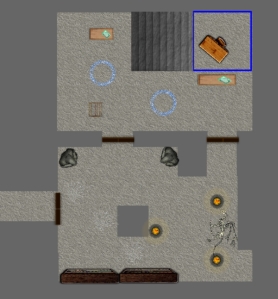
For Week 7 tonight, I had a table of seven players. Six of them had apparently played together last week (including David, the die-hard who was brand new to Encounters but who’s been there every week so far – rock on!). The party last week had fought a bunch of tieflings who had apparently taken up residence in the home of the long-dead wizard Vontarin, and this week they were delving into the house’s basement via a trap door.

Below the trap door was a long, skinny staircase with an imp statue at the end of it. Our warpriest had a high enough passive perception to realize that there was a trap at hand, triggered by a very faint glyph on the floor at the foot of the stairs. The party’s thief tried to disarm the trap, failed horribly, and set off flames all over himself and the warpriest (oops). The hunter in the party then remembered the password they had discovered upstairs and said it… and then stood there, rather than walking past the statue. Nothing happened.

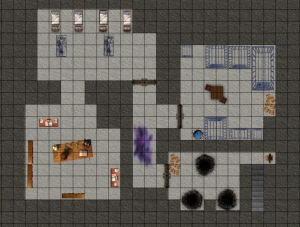
The thief took another crack at disabling the trap and succeeded this time, so the party moved into a room with three pits – dry cisterns. This is something new that I loved about this evening’s session – for the first time, the party had a chance to do some exploring of a location where each opened door didn’t lead immediately to a fight.

Beyond the cistern room lay a hallway with a big cloud of purple smoke. It turned out to be remnants from an already-triggered trap. At the far end of the hall were two sets of iron doors – one to the east, and another to the north. The northern doors showed signs of having previously been chained and sealed with a bronze plaque to Pelor. The eastern doors were unchained. The adventurers decided to go east.

To the east was a room filled with empty cages, but very lively tieflings, two of whom soon turned into clouds of smoke. The party started beating on this room of enemies…

Only to be surprised when the northern doors burst open and a tiefling warlock started wrecking them with flames. Bwah ha ha!

The hunter did some quick thinking and dropped a zone of mist in the hallway intersection that provided the party with a lot of protection. He then took a shot at the warlock and hit – but the warlock’s infernal wrath dropped the hunter to unconsciousness. The party’s knight fell soon after, but they were taking turns with unconsciousness, letting the warpriest bring them both back.

I had a ton of fun running this fight. I loved the “round one – bad guys to the east; round two – bad guys to the north” which gave the battle a good flow. Lots of moving around, lots of careful thinking. Minions that deal damage on a miss were also intriguing – I’ve never seen that before. The battle ended with the hunter completely out of surges; some of the party expected that this was the last encounter before an extended rest. Oh no no no…

I was also happy that the adventure designers are finally handing out some loot to the PCs. This battle gave out a magic staff, magic armor, and a bunch of cash. Now back to town to spend it, trying to figure out where the possessed wizard has gone.

Free map – winter bridge

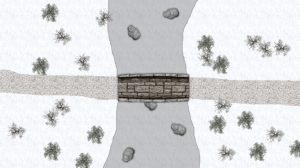
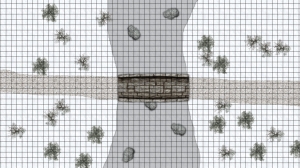
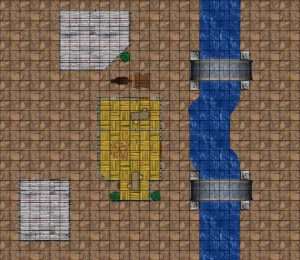
Here is a map that I put together for an upcoming War of the Burning Sky game. Usually I’ve been using the official maps from the WotBS adventures, but there’s one encounter whose description in the main body of the adventure has one map, but the actual tactical encounter write-up has a completely different map.

I liked the map that was described in the main body of the adventure, so I created a version myself. It’s a pretty simple map – a road crosses a stone bridge over a chasm in a wintry scene. It was pretty quick to draw, but I thought it was worth sharing. Both of these versions have been rescaled to a grid size of 50 pixels for easy use in MapTool or Fantasy Grounds. The top map is gridless while the bottom map contains a grid.

D&D Encounters – Dark Legacy of Evard Week 4

I wasn’t expecting to be running D&D Encounters this week. Our local store has tried to set up a rotation so that no DM is running two weeks in a row (to prevent burnout). Thus, I ran the first 5:00 PM table on week 1, Andy ran it week 2, I ran it week 3, and Andy was scheduled to run it week 4 (this week). Wes has been the second table DM for all three weeks, but we haven’t had a second 5:00 PM table yet (we had only six players for each of the first three weeks).

However, I got an email from the store owner today asking me if I could be available to run a second table in case it was needed; Wes was unavailable. We haven’t had a second table yet, but hey, school’s out now – you never know.

So, I showed up at the store at 4:30 (I’m so glad to have a job with some flexible hours!) and set up my projector rig, just in case. It was a good thing that I did: We had 14 players! That meant two overly-full tables of seven players each. Woo hoo!

My table consisted of one player who had been attending most of this season of Encounters, one player who’s attended past seasons of Encounters, and five first-time Encounters players (two of whom were very new to D&D altogether – awesome!). The party was:

  • Hiver the Dwarf Fighter
  • Steven the Half-Elf Sentinel (our regular)
  • Chilliax the Drow Executioner (thanks again to Wielding a Bohemian Ear Spoon!)
  • Keira the Elf Thief
  • Balin the Elf Mage (a red box character!)
  • Fargrim the OTHER Dwarf Fighter
  • Thetari the Dwarf Cleric of Death

The session began with some recapping of the prior three sessions (since only one of the players had been present for any of them). This meant that it was tough to do much role playing; we pretty much just got the mission from the local cleric to head to the graveyard, since he believed all of the shadow troubles began there.

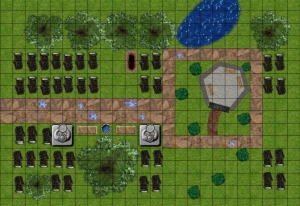
The players all made Perception checks as they entered the graveyard, none of which were especially great. This meant that the party saw some zombies shambling toward them, but they DIDN’T see the ghouls or shadows lying in wait. The ghouls actually acted very early in the initiative order, successfully attacking from hiding and throwing two characters to the ground and grabbing them. The rest of the party rushed to the rescue, with one ghoul getting pushed away by Smite Undead from the cleric and the other being Hypnotized by the Mage and forced to walk away, breaking both grabs (nice teamwork!).

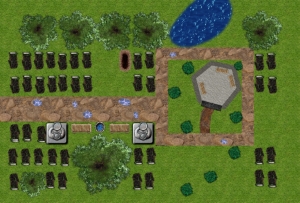
Graveyard map for session 4 of Dark Legacy of Evard - with grid

Graveyard map for session 4 of Dark Legacy of Evard - no grid

When the shadows oozed out of the trees near the end of the first round, the brief panic around the table was awesome – “There are MORE monsters?!” The shadows did what they do, melding with PCs and draining their life for several turns. Zombies grabbed characters and started smashing them.

In the end, though, this party of largely fresh characters will full healing surges, action points and daily powers made short work of a graveyard full of undead monsters. Since I had more than the five PCs that the encounter was written for, I followed the guidelines and added one more zombie. Normally I would have added two, or perhaps even a zombie and a ghoul, but since so many players were new to the game I didn’t want to overdo it. I needn’t have worried – they rocked the encounter.

After the monsters were dead, we had a little more time for role playing. The adventurers examined the mausoleum of Evard’s tomb and saw that the main sarcophagus had been forced open and that some kind of magical curse had blasted whoever opened it. It was clear that the zombies were recently-killed workers who had helped to break into the tomb, but the wizard Nathaire and his halfling assistant were nowhere to be found. The group did, however, find a journal written in code that belonged to the halfling. The plot thickens!

After the party left the mausoleum, the sun came up and Duponde shifted back out of the Shadowfell. Ah, but for how long?

Previous sessions:

Week 1

Week 2

Week 3

D&D Encounters – Dark Legacy of Evard Week 3

I had the pleasure of stepping back into the role of Dungeon Master for Week 3 of the current D&D Encounters season. When the start time for the game rolled around, only one player had showed up, but five more came in the next few minutes and away we went!

Tonight’s group consisted of:

  • David (the brand-new 4e player from week 1) playing his drow hunter (the only character to have shown up in all three encounters so far)
  • Dan with his half-orc knight
  • Chris with his half-elf warpriest (his replacement character after I killed off his revenant in week 1)
  • Chris’s daughter Allison with the pre-generated human mage Jaren,
  • Two new Encounters players, starting with Nick and his pre-gen vampire Constanz (thanks to Wielding a Bohemian Ear Spoon for generating these!)
  • And finishing with Nick’s friend Ofir and his Bohemian Ear Spoon pre-gen blackguard Klaxu

The party members who had played last week (the hunter, warpriest and mage) had defended the armory, so this week we continued that story with the town guard captain begging the group to search Duponde for shadow monsters and to protect the panicking citizens.

To the skill challenge!

This was the first skill challenge of this Encounters season, and I think it was the first time most of the players had been in one. I tend to be a “don’t tell the players they’re in a skill challenge” kind of DM; I prefer to lay out the situation and ask them how they want to deal with it, asking for skill checks as appropriate.

The group came up with some creative skill uses (History to see if they remembered any maps of the city to help them figure out what areas might be vulnerable to attack; Athletics plus darkvision to climb onto a roof to look for trouble, Heal to help out injured townspeople). Sometimes I let this give someone else a +2 to their next roll, and sometimes I let it count as a skill check of its own.

Ultimately, this group had one of the most efficient skill challenges I’ve seen, in that they racked up three failures in a hurry! I believe they had only two successes (out of six) when they hit their third failure. Even though the adventure didn’t specifically call for it in this particular skill challenge (it did for the other branch skill challenge for this session), I gave out cards from the Despair Deck from the Shadowfell: Gloomwrought and Beyond box set whenever characters failed a skill check. I described it as the PC heading down an alley, seeing a horrible shadow apparition that quickly faded, and being freaked out by it. One ended up Craven, one Jittery and one Delusional.

Town Map - Dark Legacy of Evard Session 3, with grid

Town Map - Dark Session of Evard Session 3, no grid

Once the battle started, with the monsters getting a surprise round and the PCs not getting an attack bonus thanks to the failed skill challenge, the Craven PC (the hunter) spent the first round climbing onto the roof of a building. I felt that was appropriately Craven behavior, so I handed him a bonus point token.

I only had the Dusk Beasts visibly act during the surprise round. One of them charged the warpriest, one moved close to the front of the party, and one started coming around behind them. In the second round, the two Leeching Shadows revealed themselves, and one glued itself to the blackguard and literally stayed on him for the entire encounter (that shadow was the last enemy to go, because the blackguard failed four saves in a row). When the Shadow Bolter popped out from around a building and shot the warpriest in the gut, the group started worrying about a potential TPK.

The second and third rounds got better, though. Even though both the knight and the blackguard ended up unconscious, the party started taking care of the bad guys. A shadow minion dropped, and the Dusk Beasts started getting bloodied and finally dying. Once one dropped, the others fell in short order. The warpriest was planning to revive the blackguard, but when the blackguard’s player said “Halleluja!” the warpriest’s player said, “I’m sorry, I’m a priest of death and I can’t support that kind of thing – I’ll save the knight instead.” He was kidding, but I promised him a bonus point if he would actually do that because of his character, so he did. I later awarded him renown points for a Moment of Greatness there.

The Shadow Bolter was planning to flee, but the revived knight stepped in, hit him and slowed him, dashing that plan. A gang-up on the bad guy ensued, and the warpriest dropped the monster with non-lethal damage.

Once the blackguard finally shook off his shadow and the party squashed it, they turned to questioning the Bolter. This was some fun impromptu role playing (for me at least). The party wanted to know how the shadow man got to Duponde, who he worked for, etc. He was confused, though, because from his perspective Duponde and its people had invaded his land and he was just defending himself against the horrid light-bearers.

I really am enjoying DMing this season of Encounters. It’s a fun adventure so far, and I’ve got a fun group of players at the table. I’ll live with the every other week role I’m given (Andy, it’s only fair to let you run some of these – you’re an awesome DM!), but I can definitely see myself wanting to run this adventure for another group in the future in a home campaign.

D&D Encounters Dark Legacy of Evard – Week 2

My friendly local game store has set things up so that DMs are alternating weeks of running D&D Encounters this season, rather than having the same DM run the game every single week. That’s fine by me, although since I think I’ll probably want to run this adventure again someday, I’m preparing all of the encounters in MapTool. I’ll  be ready to go any week. As of this writing, I’m prepared through week 5.

But for week 2, I was a player rather than a DM. I threw together a character at the last minute – a dwarf warpriest named Gronk (I know that the table only had one leader last week and I thought a second might help). When I got to the table, we initially had a party of three leaders and three controllers. Okay…

Given that I’m not passionately invested in D&D Encounters as a player, I agreed to run a pre-generated character of a different role, so I ended up playing Brandis the paladin. One of the people who had brought a controller had a striker in reserve, so he switched to that, and off we went.

Week 2 of Dark Legacy of Evard was cool in that the players had a choice – they could either chase after a suspicious halfling who had tried to kill the captain of the guard, or they could try to get monsters out of the town armory so that the townsfolk could equip themselves against the evil onslaught of badness. Our group went with the armory.

The encounter itself turned out to be a fight against some spider swarms, deathjump spiders and shadow minions. I’m really enjoying the “meld with the target” ability of these shadow creatures – very spooky and flavorful. My paladin got the snot beat out of him, as was his job, but the two leaders in the party kept him coming back for more, and we ultimately defeated the enemies.

The new player from week 1 who was running a Hunter and who had only two healing surges after the first week’s combat managed to stay out of the melee and shoot things from afar this time, sustaining no damage. The party worked well as a group, and victory was achieved.

Even though I didn’t end up using the maps I had created for this encounter in MapTool (since I wasn’t DMing), I thought I’d share them here anyway, just in case anyone else would like to use them. There are two different maps – one for the armory and one for chasing the halfling through the woods. Each map is presented both with and without a grid and is formatted to a 50-pixel grid.

Halfling pursuit forest map - with grid

Halfling pursuit forest map - no grid

Armory with bridges map - with grid

Armory with bridges map - no grid

Reavers of Harkenwold Maps: The official versions

Well, I feel a little bit stupid now. I was so proud of the JPG maps that I created for the Reavers of Harkenwold adventure for use in MapTool or other virtual tabletop programs. They’re good-looking adaptations of the poster maps that came in the Dungeon Master Kit for use with the adventure. I put a fair amount of time into them, include the time to format them to a 50-pixel grid scale for sharing on my blog.

Then earlier this week I saw a link on the Dungeons and Dragons home page to maps from The Shadowfell: Gloomwrought and Beyond box set. Hey – that’s cool! I can use those maps for my game if I run any Shadowfell adventures. All I have to do is download them and resize them, and they’re good to go.

This got me thinking… if they had distributed maps for this box set, what about Reavers of Harkenwold from the DM Kit?

Yep. They have those maps, too.

Now, these are only available to D&D Insider subscribers, but I am such a subscriber. All the work I did to recreate those poster maps myself in MapTool was a bit of a waste – I could have just downloaded and resized the official, nice-looking versions from Wizards of the Coast directly.

The down side is that I feel like I wasted some time. The upside is twofold. First, I can redistribute the maps I drew myself on my blog, but I’m sure I’m not allowed to redistribute the official maps (you have to subscribe to DDI if you want those). Second, I discovered a whole BUNCH of official maps from other Wizards of the Coast adventures – Dungeon magazine adventures, Keep on the Shadowfell, Orcs of Stonefang Pass, etc. I can probably use those in future adventures.

For any of you DDI subscribers who want access to all of the official Wizards of the Coast maps, the gallery link is here. I guess when it comes to discovering this resource, better late than never!

Resizing maps to a 50-pixel grid

One of my few complaints about MapTool is that you can’t really export a map from one campaign to another. You can duplicate a map within a campaign, but there’s no good way to get it into another campaign. Also, if you want to create maps to share with other virtual table top users, it’s nice if you can have them pre-formatted to a certain size.

Thanks to a useful video and message board post from Eugene of the Fantasy Grounds forums (as well as from EN World), I learned a straightforward way to take maps that I’ve created in MapTool and turn them into JPGs both with and without grids so that they can be easily used by others and by myself in other campaigns.

0. Open up MapTool, Paint.NET, and this Excel tool (or a calculator).

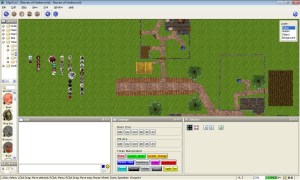
1. In MapTool, center your screen on the map you want to export.

2. Choose the Measure Distance Along Path tool. This has two useful purposes: It makes the Layer window disappear, and it lets you count the number of squares on your map (this will be useful later).

3. Make your MapTool window full-screen by hitting CTRL + ALT + ENTER

4. Zoom in as far as you can without losing any of your map.

5. Hit the Print Screen key.

6. Alt Tab over to Paint.net and choose Edit – Paste Into New Image

7. Alt Tab back to MapTool, hit CTRL +G to make the grid go away, and hit Print Screen. Then Alt Tab back to Paint.net and again choose Edit – Paste Into New Image (you’ll have two separate image files in Paint.net – one with the grid and one without).

8. In the Paint.net image file with the grid, choose the Rectangle Select tool, zoom in pretty far, and scroll to the far left side of the map. Click (and hold) on the vertical grid line on the left side of the farthest-left complete square.

9. Drag the mouse all the way over to the right edge of the map, selecting all the way until you get to the vertical grid line on the right side of the farthest-right complete square. Release the mouse having selected right up until (but not counting) that rightmost grid line.

10. Look at the bottom of the screen and note the horizontal dimension (the first number) of the Bounding Rectangle Size. Look to the right of that at the bottom of the screen (not ALL the way to the right, as that’s the current X/Y position of the cursor) and note the horizontal dimension of the total image size.

11. Alt Tab back to MapTool and hit CTRL+G to turn the grid back on. Using the Measure Distance Along Path tool that is currently active, click and drag along a row to count the number of complete squares on the screen. You’ll need to add 1 to the running total (since the first square counts as zero).

12. In the Excel file, enter the first number you noted in Paint.net in the Selected Pixels box, the number of squares you got out of MapTool in the Selected Squares box, and the second number you got out of Paint.net in the Total Image Size box. The big number at the bottom tells you the new image size you’re looking for. The formula is:

New Image Size = Total Image Size * Number of squares selected * Desired grid size / Selected pixels
OR
New Image Size = Total Image Size * 50 / (current number of pixels per square)

13. In Paint.net, go to the gridded image and choose Image – Resize. Enter the New Image Size in the Width box (making sure the Maintain Aspect Ratio box is checked) and click OK. The image will resize.

14. Crop the image as you wish, then save it as a JPG file in a directory that you’ve taught MapTool to look for.

15. Repeat 13 and 14 for the gridless image file (the new dimension will be the same as for the gridded file).

16. Enjoy your new map files!

Reavers of Harkenwold – complete MapTool file

Since I ended up putting all of my Reavers of Harkenwold maps into an easy-to-import format and since I had saved almost all of the MapTool monster tokens I had created for the adventure, I figured I might as well bring it all together in a complete MapTool campaign file.

The linked file (which was created in MapTool version 1.3.b66) contains:

  • A big map with all of the individual encounter maps on it (feel free to copy these to separate maps within MapTool if you prefer
  • One copy of each monster and NPC token that I created for the adventure (CTRL+C and CTRL+V will make more)
  • Complete stats and attack macros for all of the monsters on their tokens
  • A generic monster token and a generic player character token
  • Campaign macros for basic things like dice rolling and toggling conditions on and off the tokens

Now, I’ll admit that there are a few things it doesn’t contain

  • A couple of maps are not present, as I didn’t use them in my run-through of Reavers of Harkenwold
  • A couple of monsters are missing (I believe the underground goblin leader is one, and there may be a couple of others) – I simply failed to save them after I’d created them
  • Not every monster is quite as fleshed out as I’d like (senses, equipment, etc.) but they’re totally ready to use (they’ve got hit points, defenses and attack macros, which is the important stuff).

Note that this by no means replaces the adventure itself. If you want to run Reavers of Harkenwold, you still need to get your hands on a copy of the adventure (there’s no background information or even information about which monsters appear in which encounter). This is just a tool to help you run it online.

If you happen to run Reavers using this campaign file, I would LOVE to hear about it! I had a ton of fun with the adventure, and this file should let you pick it up and go (assuming you’ve at least read through the adventure so that you know what the plot is!).

Download the Reavers of Harkenwold MapTool campaign file here.

D&D Encounters Dark Legacy of Evard – Week 1

I’ve volunteered to run D&D Encounters for the Dark Legacy of Evard season that began today. I’ve only played one session of Encounters before, but the store owner, Jeff, was trying to recruit enough DMs so that we could run four tables per night and still be able to have DMs alternate weeks (so, eight DMs total). One encounter a week shouldn’t be too hard to prepare, so I gave it a go.

Setup

I got the adventure last Friday and gave the first chapter a read-through. The Encounters adventure comes with poster maps and tokens, but if you’ve been following my blog, you know that I love to run games using my projector setup and MapTool. So, I began creating maps in MapTool and programming up the monsters.

Players

For tonight’s session, we had six players, which meant that we were only going to run one table. I was the first DM there, so I was fortunate to be able to run my game. Four of the players were Encounters veterans, but two were not.

The first of these newcomers was my wife, Barbara! We’ve played D&D together many times over the past year and a half that I’ve been involved with the game, but this is the first time she’s participated in public play. Huzzah!

The second newcomer was David, a complete newcomer to D&D4e. He had played a little bit of D&D 3.0 years ago, but he was really coming to the game fresh. Excellent!

The story – SPOILERS AHEAD

Tonight’s session started off with the party introducing themselves to one another. They were on a weeks-long journey to take some messages from the leader of Fallcrest to far-off Sarthel. Some of the players decided that they were actual couriers while others were either guards or hangers-on. One was a Revenant who, it was decided, had been found by the party near the side of the road a few days prior with no memory of his previous life.

It was a quiet evening in the Old Owl Inn in the town of Duponde, and the adventurers were resting and waiting a few days for the bridges over the Nentir River to be repaired so that they could continue on toward Sarthel. They spent some time chatting with other travelers and locals about the spooky weather and hearing rumors about the ghost of the shadow wizard Evard whose grave is in Duponde. The innkeeper and a visiting scholar told them some of the tales, and the group eventually went to bed.

In the middle of the night, everyone woke up to a strange feeling of being pulled in odd directions, the temperature dropped, and lights began functioning poorly. A scream came from downstairs in the common room. The adventurers geared up and went down to investigate

The battle

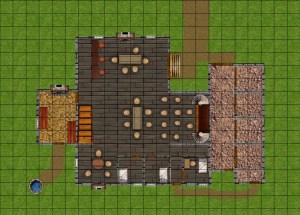
They arrived to find the old bartender knocked out behind the bar while a quartet of gargoyles, animated incarnations of the statues that adorned the front of the inn, flew around the room wreaking havoc. Battle ensued.

The encounter map (no grid)

The Shade Executioner in the group snuck up behind one of the statues and grabbed it with his garrotte, nearly killing it outright. Our Half-Orc Knight waded into combat to challenge a pair of monsters. The Revenant Hexblade found himself on the wrong end of a gargoyle attack and was knocked to the ground and dazed – and bloodied. He fought back from the ground with his single action on his turn. Our Drow Hunter finished off the gargoyle that had been garrotted.

At the end of the round, a pair of shadow creatures emerged from the darkness and attacked. One of them melded into the shadow of the Knight, dealing him some necrotic damage, while the other melded with the prone Revenant, taking his hit points into negative territory, but not dropping him to unconsciousness yet (Revenants get to keep fighting until they fail a death saving throw).

These shadow creatures turned out to be pretty tough – hard to hit when they were melded with characters, and insubstantial unless hit with radiant damage (which no one in the party could deal). The gargoyles started dropping, but one of them ignored the Knight’s mark to go after the prone Revenant (who, remember, was at negative hit points, but still fighting) – and killed him outright. Negative bloodied value, dead-dead. (This is only the second time I’ve killed a PC as a dungeon master.)

Truly scared now, the remaining five party members did what they could to finish the fight quickly. Our Drow Hunter provoked an opportunity attack from a shadow (a hit – the first against him – bloodied the Hunter) and succeeded in dazing the monster. That shadow was soon finished off, but its partner came after the Drow and knocked him unconscious. The Knight had been brought back from unconsciousness by the Half-Elf Sentinel already, and then fell yet again to the shadows before the Sentinel eventually stabilized him.

Ultimately, our Shade Binder dealt the killing blow to the last shadow monster, and the survivors could catch their breath.

Thoughts

This was a brutal encounter. We lost one PC, although had it been anything other than a Revenant who kept fighting while at negative hit points, we might not have actually lost anyone. Two other PCs ended the fight unconscious, and one was bloodied. The Shade Binder somehow escaped the fight unscathed (my wife’s character, but I swear I didn’t go easy on her – she just stayed out of the way). The Drow Hunter (David, the first-time player) spent four healing surges at the end of the fight and now has a grand total of two remaining for the next three encounters. The Knight took a total of over 60 damage during the fight (hey, achievement!). Brutal, brutal, brutal.

In talking to the players who had played D&D Encounters before, it sounded like the only similarly tough first session was Dark Sun (which I had read about, and I understand that Dark Sun was supposed to be vicious). This felt like a pretty random battle, but man, was it tough. I guess the Shadowfell is meant to be an unhospitable place.

All that said, I think that this party’s particular makeup was not well suited to this encounter. We had multiple controllers, but there were no minions. We had only one defender, and he took a ton of punishment. We had only one leader, and extra healing would have been really helpful (rest in peace, Revenant). And of course, we had no divine characters, so no one could deal radiant damage. A cleric would have rocked against those shadow creatures, but the party had to slog it out the hard way, dealing with the insubstantiality of the shadows.

Wrap-up

All that said, the players legitimately seemed to have a good time, and the newcomer said that he plans to come back next week, bringing a friend. I had fun running the encounter, and I’m looking forward to the next one. I already have set up the first three encounters in MapTool, and I hope to get all 13 in there over the next few weeks. The adventure looks like a lot of fun, and I could definitely see running it again for a home campaign.

The encounter map, with a grid

Reavers of Harkenwold Maps

Edit: This post was updated on 5/14/2011 to change the maps to a 50 pixel per inch scale and to provide gridless versions of the maps (which, frankly, are the better choice for dragging into MapTool or Fantasy Grounds or whatever you use). Also, if you want the full MapTool file for this adventure, go here.

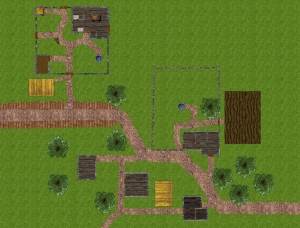
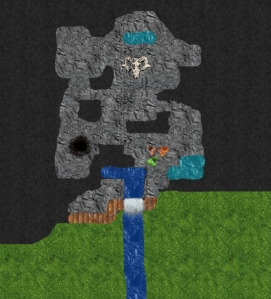
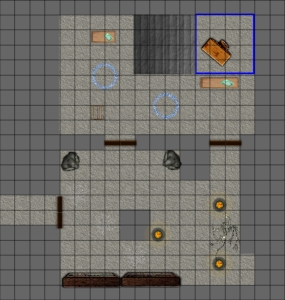
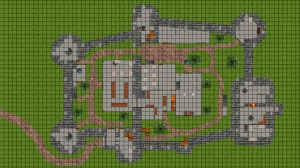
I ran the Reavers of Harkenwold adventure from the Dungeon Master’s Kit using MapTool over the past few months and had a great time with it. In the process, I needed to create MapTool versions of these maps, and I thought that others who are running the adventure using online tools might be able to make use of them. Enjoy!

Each map can be clicked for a larger version, and the printable PDF links for each map will bring you to a version that is formatted in printable one-inch square scale

Main overland map (printable PDF)

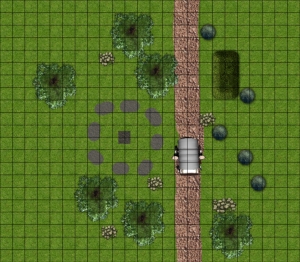
Road with wagon (printable PDF)

Toadwallow Caverns (printable PDF)


Ring of Stones (printable PDF)

Underground Lab (printable PDF)


Iron Keep main level (printable PDF)


Iron Keep second and third floors (printable PDF)

Third Floor