MapTool campaign file: Cairn of the Winter King

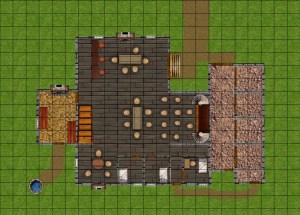
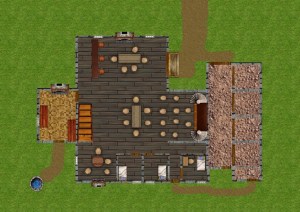
Since I’m running my family campaign through the Cairn of the Winter King adventure from the Monster Vault, I prepared everything in MapTool (my wife and I are in Colorado; her brother and his wife are in Texas, so we play online). I figured I might as well put the adventure out there to share.

This campaign file was created in version 1.3.b66 of MapTool. If you’re looking for the maps independently of the campaign file, you can find them here. Enjoy!

Download the campaign file here.

Maps: Cairn of the Winter King

I’m excited that my brother-in-law is done with a multi-month training course he had to finish for work and we can now get back to our online D&D game starting this afternoon. The players in the game are my wife, her brother, and his wife. We play via MapTool and Skype. This is the group that I originally ran through Reavers of Harkenwold.

So, next up is Cairn of the Winter King, the adventure from the Monster Vault. I had prepared part of the adventure a few months ago before my brother-in-law had to leave for training, and I spent time yesterday putting the rest of the maps together. I’m still finishing up the monsters, but I thought I’d go ahead and share the maps since they’re ready to go.

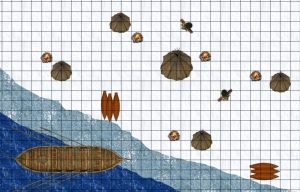
As always, I’ve provided versions both with and without the grid, all sized to a 50-pixel per square scale. For the Cairn itself I’ve provided an overview map (not appropriately scaled – just for reference) and then one map for the southern half of the Cairn and a second map for the northern half (they can be stuck together in MapTool).

Frozen Riverside map - Gridded

Frozen Riverside map - No Grid

Cairn of the Winter King - Overview Map

Cairn of the Winter King - Southern half map - Gridded

Cairn of the Winter King - Southern half map - No Grid

Cairn of the Winter King - Northern half map - Gridded

Cairn of the Winter King - Northern half map - No Grid


MapTool geek-out update: Flexible monster creation

Update: The new campaign file now has a cool Edit Monster macro that lets you tweak things on the fly, including Solo/Elite/Minion status. Thank you to JonathanTheBlack over on the MapTool forums!

After I put my initial pass at new damage tables and MapTool monster templates out there for the world to see, I saw some niggling problems that I wanted to correct.

First, my original damage tables had a couple of flat spots where the damage expression stayed the same from one level to the next. Since average damage is supposed to increase by 1 per level, this bugged me and I wanted to fix it.

Second, I knew I should be able to make monsters tweakable more easily with some additional properties.

Third, I wanted to handle limited damage expressions more elegantly.

Updated damage tables

My damage table now increases at every level. It also has a slightly wider range than the official tables, even at low level, but I’m okay with that. My crits will hurt a little more and my lousy damage rolls will hurt a little less than with official monsters. At the lowest levels, my expressions still have less overall variance because I’m rolling two dice right from the start (the official expressions only roll one for level 1-3). And at the highest levels I have some more variance because I’m only rolling two dice instead of four; that’s a good feature in my opinion.

I also fleshed out the table to include damage expressions for multi-target attacks (about 25% less than standard attacks) as well as limited damage expressions (25% more and 50% more than standard attacks). These took some fiddling to get right, but I’m pretty happy with where they ended up.

Tweakable monsters

I added a property for the attack bonus versus non-AC defenses (NADs); it’s just the normal attack bonus minus 2, but it makes it easier to tweak attack macros en masse. If you want a particular monster to have an easier time hitting NADs (as Soldiers do), just tweak the one property rather than editing every attack macro.

The same goes for having the 125% and 150% damage expressions; it’s easier to do something like tweak the Brute by changing the normal damage to the 125% numbers and the 125% numbers to the 150% numbers in the monster’s properties rather than in each individual attack macro.

Limited damage expressions

High-damage attacks are not perfectly formulaic; the official guidelines say to increase the damage for encounter or recharge powers by 25 to 50 percent.

I decided to add a formula. My generic monsters’ recharge powers do 25% extra damage, while their encounter powers do 50% extra damage. If it’s a multi-target recharge attack I use the standard single-target damage expressions; a multi-target encounter attack gets the 125% damage expressions.

A word on artillery monsters

The official guidelines say that artillery monsters should have +1 or +2 to hit for ranged or area attacks. This is entirely too vague for me, and messy to implement. So, I just gave them +2 to hit versus both AC and NADs. Sure, maybe they’re a little more accurate than they “should” be; I can live with that.

Putting it all together

If you want to download a template campaign file with the sample monsters and properties, you can download it here. The file was created in version 1.3.b66 of MapTool. The properties themselves have been pasted below.

#---StatsToSetManually-----
#Level:1
#Role:Skirmisher
#HPModifier:8
#Spd:6
#NativeSize:Medium
#ActPts:0
#SaveBonus:0
#HeShe:It
#ArmorClassRoleMod:0
#InitiativeRoleMod:0
#Leader:0
#MinionHP:0
#SubType:Standard
#SubTypeHPMod:1
#----StatsThatCanBeDefaulted---------
#MaxHP:{((HPModifier + Constitution + (Level * HPModifier)) * SubTypeHPMod) + MinionHP}
#ArmorClass:{Level+14+ArmorClassRoleMod+ACAdj}
#Fortitude:{Level+12+FortAdj}
#Reflex:{Level+12+RefAdj}
#Will:{Level+12+WillAdj}
#Init:{HalfLevel+DexMod-ArmorPenalty+InitAdj}
#Strength:{10+HalfLevel+StrAdj}
#Constitution:{10+HalfLevel+ConAdj}
#Dexterity:{10+HalfLevel+DexAdj}
#Intelligence:{10+HalfLevel+IntAdj}
#Wisdom:{10+HalfLevel+WisAdj}
#Charisma:{10+HalfLevel+ChaAdj}
#DefaultAttackBonusVsAC:{Level+5}
#DefaultAttackBonusVsNAD:{Level+3}
#SingleTargetDamageBonus:{DamageBonus100}
#SingleTargetDamageDie:{DamageDie100}
#MultiTargetDamageDie:{DamageDie75}
#MultiTargetDamageBonus:{DamageBonus75}
#DamageBonus100:{1+CEILING(Level*2/3)}
#DamageDie100:{6+FLOOR(Level/3)}
#DamageDie75:{SingleTargetDamageDie-2-FLOOR((Level+3)/9)}
#DamageBonus75:{SingleTargetDamageBonus-1-FLOOR((Level+1)/9)}
#DamageDie125:{8+FLOOR(Level/3)}
#DamageBonus125:{1+CEILING(Level*2/3)+FLOOR((Level+1)/4)}
#DamageDie150:{9+FLOOR(Level/3)+FLOOR((Level+3)/6)}
#DamageBonus150:{2+CEILING(Level*2/3)+FLOOR((Level+1)/3)}
#MinionDamage:{4+FLOOR(Level/2)}
#-----CalculatedOrStaticStats-----
#HitPoints:{MaxHP}
#TempHP:0
#BloodiedHP:{FLOOR(MaxHP/2)}
#DeathFails:0
*#HP:{Hitpoints}/{MaxHP} + {TempHP}
*#AC/Fort/Ref/Will:{ArmorClass} / {Fortitude} / {Reflex} / {Will}
*#Type:Level {Level} {Role}
*#Speed:{Spd}
*#Initiative:{Init}
*#ActionPoints:{ActPts}
*#Str/Con/Dex:{Strength} / {Constitution} / {Dexterity}
*#Int/Wis/Cha:{Intelligence} / {Wisdom} / {Charisma}
#E1:1
#E2:1
#E3:1
#E4:1
#E5:1
#R1:1
#R2:1
#R3:1
#R4:1
#R5:1
#PowerCharged:1
---------------------------Skills-------------------------------------
#ArmorPenalty:0
#Acrobatics:{HalfLevel+DexMod-ArmorPenalty+5*AcrTrained}
#Arcana:{HalfLevel+IntMod+5*ArcTrained}
#Athletics:{HalfLevel+StrMod-ArmorPenalty+5*AthTrained}
#Bluff:{HalfLevel+ChaMod+5*BlfTrained}
#Diplomacy:{HalfLevel+ChaMod+5*DipTrained}
#Dungeoneering:{HalfLevel+WisMod+5*DunTrained}
#Endurance:{HalfLevel+ConMod-ArmorPenalty+5*EndTrained}
#Heal:{HalfLevel+WisMod+5*HeaTrained}
#History:{HalfLevel+IntMod+5*HisTrained}
#Insight:{HalfLevel+WisMod+5*InsTrained}
#Intimidate:{HalfLevel+ChaMod+5*IntTrained}
#Nature:{HalfLevel+WisMod+5*NatTrained}
#Perception:{HalfLevel+WisMod+5*PerTrained}
#Religion:{HalfLevel+IntMod+5*RelTrained}
#Stealth:{HalfLevel+DexMod-ArmorPenalty+5*StlTrained}
#Streetwise:{HalfLevel+ChaMod+5*StrTrained}
#Thievery:{HalfLevel+DexMod-ArmorPenalty+5*ThvTrained}
#AcrTrained:0
#ArcTrained:0
#AthTrained:0
#BlfTrained:0
#DipTrained:0
#DunTrained:0
#EndTrained:0
#HeaTrained:0
#HisTrained:0
#InsTrained:0
#IntTrained:0
#NatTrained:0
#PerTrained:0
#RelTrained:0
#StlTrained:0
#StrTrained:0
#ThvTrained:0
------------------AbilityMods-------------------------------
#StrMod:{FLOOR((Strength-10)/2)}
#ConMod:{FLOOR((Constitution-10)/2)}
#DexMod:{FLOOR((Dexterity-10)/2)}
#IntMod:{FLOOR((Intelligence-10)/2)}
#WisMod:{FLOOR((Wisdom-10)/2)}
#ChaMod:{FLOOR((Charisma-10)/2)}
#HalfLevel:{FLOOR(Level/2)}
-----------------Adjustments-------------------
#StrAdj:0
#ConAdj:0
#DexAdj:0
#IntAdj:0
#WisAdj:0
#ChaAdj:0
#ACAdj:0
#FortAdj:0
#RefAdj:0
#WillAdj:0
#InitAdj:0
---------------Other-----------------------------------------
Elevation:0
AttackState:0
DefenseState:0

MapTool geek-out: Creating flexible monsters FAST

Edit 7/15/2011: I put up a revised version of this post with a better set of damage tables and everything a day after the original went live. I’ve left the original below for posterity.

I run all of my D&D games using MapTool, whether online in the traditional MapTool way or in-person using my projector rig. I don’t use a pre-made campaign framework for my games, since I enjoy learning new things and I enjoy computer programming (as a hobbyist, not a professional). More of my posts about my learnings with MapTool can be found in my MapTool Education Central.

Today I spent a fair part of the afternoon creating flexible monster templates. This came about because I’m working on finishing up the third adventure in my Staff of Suha trilogy (part 1 is here, and part 2 is here), and I want to use custom monsters and to make it as easy as possible to run the adventure at multiple levels (adventure level 2, 4, 6, 8 and 10). I’m already updating older monsters to use the most current monster math, so I thought, why not create flexible templates for each monster role?

My goal was to make it so that I could create a new monster in very little time. All I wanted to have to do was pick a role, pick a level, and then write down any special abilities. All of the math should be baked in based on the level and role. This meant that I needed to change around my monster properties.

I’ll paste the full properties at the end of the post, but what follows is a discussion of the math you’ll see there.

The math

HP modifier is either 6, 8 or 10. Artillery and Lurkers get 6 hit points per level; Skirmishers, Soldiers and Controllers get 8; Brutes get 10. MaxHP follows the formula laid out by Wizards of the Coast post-MM3 (HP modifier times Level+1, plus Constitution).

Defenses are tied to level and role. By default, Armor Class is Level+14 and the non-AC defenses (NADs) are Level+12. Soldiers have AC of Level+16; Brutes and Artillery have AC of Level+12.

The AttackBonus is Level+5. Versus NADs it’s Level+3, but I handle that in the attack macros instead of here in the properties (maybe I should do the latter).

Ability scores default to 10+Half Level each. I tweak these based on monster flavor, of course. I haven’t seen this explicitly spelled out anywhere, but glancing through recent monsters, it appears to be about right.

Initiative is basically a Dexterity check – Dex mod plus half level. Brutes reduce this by 2, Skirmishers increase it by 2 and Soldiers increase it by 4.

The most interesting part comes with damage. The table laid out by Wizards of the Coast is nice in that it scales pretty steadily in terms of average damage (Level+8 on average for a single target attack). It’s a bit tricky, though, in that it uses varying numbers of d6s and d8s at different levels. I wanted an easy-to-program solution to this problem that would give me similar average damage and a similar-shaped damage distribution to the official numbers.

What I ultimately came up with was to always roll two damage dice and add a bonus. The size of the die varies with level. It starts as a d6 and increases by 1 every fourth level. No, that doesn’t mean it goes to a d8 at level 5 – it goes to a d7! I’m leveraging the power of MapTool here; it’s happy to roll a d7 or d17 or whatever you like, just as easily as a d6 or d8.

Thus, every attack rolls a pair of damage dice, ranging from d6s at 1st-4th level to d13s at 29th-20th level.

The static damage bonus goes up every level or every other level, starting at 2 and ending at 23. Thus, a first-level monster deals 2d6+2 damage on a normal attack and a 30th-level monster deals 2d13+23.

The distribution of results is going to be a bit different from the official results, especially at higher levels, but I like it. My damage expressions have a slightly narrower range (at 30th level, WotC’s minimum damage is 24 and maximum 52 while mine ranges from 25 to 49). However, my distributions have more variability within that range (if you roll four dice instead of two, it’s much less likely that you’ll get extreme results). Honestly, I think the shape of my damage distribution curve at higher levels is more fun; higher variance in a slightly narrower range.

Also, due to rounding I have a couple of spots on my table where the damage from one level to the next is actually the same; I’m not overly concerned, honestly.

Multi-target attacks deal a bit less damage; I won’t go into the details.

Recharge and encounter powers (and Brute attacks) also deal extra damage, which I handle in either the token properties for the Brute (altering the static damage) or in the individual attack macros for recharge and encounter powers.

The templates in action

Once I had finished putting these new properties together and creating token templates for each role, I started putting an encounter together.

Wow, was it fast! I knew I wanted a level 7 skirmisher, a level 8 soldier and a level 8 artillery. I copied the appropriate token templates, set the levels, tweaked a few stats (a bit more Reflex and a bit less Fortitude on the artillery; low Intelligence on the beast skirmisher, etc.) and then got to the meat of monster building – abilities.

I was able to focus all of my attention on what would be a cool ability for a monster to have. For instance, my Skirmisher is a beast called a Digger. It can grab an enemy with its Pincers. It can use a special move action to drag the enemy up to half its speed without requiring a check. It has a recharge power that lets it burrow under an enemy, trying to make the enemy fall into the newly created channel.

It literally took about five minutes. I gave no thought to math. I just thought about flavor and abilities.

I built this Digger with an eye on the level 8 version of the adventure, but when it comes time to run it at Adventure Level 2, all I need to do is change the level. One stat; that’s all.

The download

I figure that the best way to share this is in a campaign file that has all of the necessary properties and a set of the tokens. You can download that template file here. Note that this file was created in MapTool version 1.33.b66.

The properties

#---StatsToSetManually-----
#Level:1
#Role:Skirmisher
#HPModifier:8
#Spd:6
#NativeSize:Medium
#ActPts:0
#SaveBonus:0
#HeShe:It
#----StatsThatCanBeDefaulted---------
#MaxHP:{HPModifier+Constitution+(Level*HPModifier)}
#ArmorClass:{Level+14}
#Fortitude:{Level+12}
#Reflex:{Level+12}
#Will:{Level+12}
#AttackBonus:{Level+5}
#DamageBonus:{1+Level-FLOOR((Level+2)/4)}
#DamageDie:{5+FLOOR((Level+3)/4)}
#MultiTargetDamageBonus:{1+Level-FLOOR((Level+2)/4)-(1+FLOOR(Level/4))}
#MultiTargetDamageDie:{4+FLOOR((Level+3)/4)}
#Init:{HalfLevel+DexMod-ArmorPenalty+0}
#Strength:{10+HalfLevel}
#Constitution:{10+HalfLevel}
#Dexterity:{10+HalfLevel}
#Intelligence:{10+HalfLevel}
#Wisdom:{10+HalfLevel}
#Charisma:{10+HalfLevel}
#-----CalculatedOrStaticStats-----
#HitPoints:{MaxHP}
#TempHP:0
#BloodiedHP:{FLOOR(MaxHP/2)}
#DeathFails:0
*#HP:{Hitpoints}/{MaxHP} + {TempHP}
*#AC/Fort/Ref/Will:{ArmorClass} / {Fortitude} / {Reflex} / {Will}
*#Type:Level {Level} {Role}
*#Speed:{Spd}
*#Initiative:{Init}
*#ActionPoints:{ActPts}
*#Str/Con/Dex:{Strength} / {Constitution} / {Dexterity}
*#Int/Wis/Cha:{Intelligence} / {Wisdom} / {Charisma}
#E1:1
#E2:1
#E3:1
#E4:1
#E5:1
#R1:1
#R2:1
#R3:1
#R4:1
#R5:1
#PowerCharged:1
---------------------------Skills-------------------------------------
#ArmorPenalty:0
#Acrobatics:{HalfLevel+DexMod-ArmorPenalty+0}
#Arcana:{HalfLevel+IntMod+0}
#Athletics:{HalfLevel+StrMod-ArmorPenalty+0}
#Bluff:{HalfLevel+ChaMod+0}
#Diplomacy:{HalfLevel+ChaMod+0}
#Dungeoneering:{HalfLevel+WisMod+0}
#Endurance:{HalfLevel+ConMod-ArmorPenalty+0}
#Heal:{HalfLevel+WisMod+0}
#History:{HalfLevel+IntMod+0}
#Insight:{HalfLevel+WisMod+0}
#Intimidate:{HalfLevel+ChaMod+0}
#Nature:{HalfLevel+WisMod+0}
#Perception:{HalfLevel+WisMod+0}
#Religion:{HalfLevel+IntMod+0}
#Stealth:{HalfLevel+DexMod-ArmorPenalty+0}
#Streetwise:{HalfLevel+ChaMod+0}
#Thievery:{HalfLevel+DexMod-ArmorPenalty+0}
------------------AbilityMods-------------------------------
#StrMod:{FLOOR((Strength-10)/2)}
#ConMod:{FLOOR((Constitution-10)/2)}
#DexMod:{FLOOR((Dexterity-10)/2)}
#IntMod:{FLOOR((Intelligence-10)/2)}
#WisMod:{FLOOR((Wisdom-10)/2)}
#ChaMod:{FLOOR((Charisma-10)/2)}
#HalfLevel:{FLOOR(Level/2)}
---------------Other-----------------------------------------
Elevation:0

D&D Encounters – Dark Legacy of Evard Week 10

The third and final chapter of this season of Encounters began tonight. I was running my usual 5:00 table, but I’d also been asked to run a second table at 7:00 (I guess there’s been some kind of DM shortage).

For the 5:00 table I had lots of my regulars – the first timer from week 1 along with the friend he’s been bringing, the father and son new players from last week, another father and son pair, and two other guys who’ve been coming pretty regularly.

Yes, if you’re counting, that’s eight players. We’d normally split up into two groups of four each, but we didn’t have another dungeon master, so I bit the bullet and ran with eight.

No one was at third level yet – I believe there were three people at level 2 and five at level 1. The encounter as written assumes a party of five characters of level 2-3, so scaling was interesting.

The party had the chance to take an extended rest back at the Old Owl Inn after dawn. In the afternoon, Grimbold (the captain of the Duponde town guard) came to the players to ask them to investigate a monastery a few hours’ walk to the west of town. The skeletons that had menaced the town the previous night were dressed in cassocks consistent with the long-abandoned Saint Avarthil Monastery. It seemed that someone had been reanimating the dead monks’ bones and turning them into monsters. Sure sounds like the evil wizard who’s on the loose!

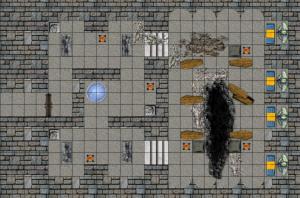
Off they went to Saint Avarthil’s. The door to the crypt was open, and the adventurers trooped on in. The inside was well-lit by magical braziers, and lots of niches in the walls that once held buried monks had been broken open and stood empty. Soon enough, a couple of cassocked skeletons were found, and the battle began.

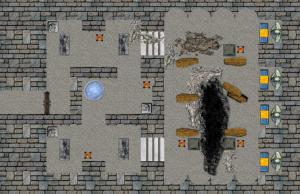
Saint Avarthil Crypt Map - Gridded

Saint Avarthil Crypt Map - No Grid

The 5:00 table of eight players ended up facing off against about 12 skeleton minions, a blazing skeleton (hello old friend from last week!) and a trio of dark ones – little shadowy guys with hooves and nasty short swords. We had a bit of a bottleneck at the top of the stairs until the minions were finished off, and then the dark ones started wrecking PCs with their double sword attacks. One of them kept getting knocked into the crevasse, though, which made for fun times. The player characters took a pretty good beating (a first-level thief foolishly rushed into the middle of melee and paid for it) but prevailed.

The 7:00 table had four players (one of whom was a fellow player from my Monday night Pathfinder game), and they were all third level (now that’s dedication!). Since they were a little higher level than expected for the encounter and there were only four of them instead of five, I decided to run it as written with eight skeletal minions, one blazing skeleton and two dark ones. This table rocked the encounter with little difficulty, despite a long series of failed saving throws against ongoing fire damage from the party’s vampire.

I had fun running this encounter, especially getting to do it a second time when I was a little better at making it interesting. I had one of the dark ones sneak around behind the party as they went into the main crypt, which was fun for me at least. I also really like the map. It was fun to re-create in MapTool, and I think it turned out quite nicely.

I’m also happy to report that I’m done putting the adventure together in MapTool. I’ve been trying to work a week or two ahead throughout the season, and I’m finally finished with all thirteen encounters. The map for week 12 is also awesome and I’m looking forward to showing off my version of it here on the blog.

I’ll be running next week twice, and possibly week 12 (Andy will be back to run a table that week, but it seems clear that we might need a second DM). Week 13 I won’t be here – I’ll be at GenCon! I’m a little sad that I won’t be able to finish the adventure with my awesome players, but let’s face it – I’m not going to be too broken up about the fact that I’ll be stuck at the greatest four days in gaming for the first time ever. I’m excited!

Previous weeks:

No week 6 – I was out of town

MapTool file for free adventure: Tallinn’s Tower

Since I’m such a fan of running adventures in MapTool, I thought I’d share the MapTool file for the free adventure I posted recently, Tallinn’s Tower. For the adventure itself, check out my earlier post (it’s a cool adventure, I promise) or download it directly right here. For the MapTool file to let you run it quickly and easily, click here.

Note that this campaign file was created in version 1.3.b66 of MapTool, so I’m not certain of its compatibility with other versions.

Running an online game for new players

I love it when a plan comes together. A couple of weeks ago I received a comment on my blog from a player who had never played a tabletop role-playing game before but who was interested in trying it out. Since I love to introduce new players to the hobby, I wanted to at least run one game for this prospective new player. So, I advertised here on the blog as well as over on EN World that I would be running a one-shot game for new players.

Getting this game set up went the way I originally expected setting up an online game to go when I first did it last July. For that game, I wanted five players so I recruited seven, figuring that a couple wouldn’t be able to make it. I ended up with eight. Oops.

This time I ended up recruiting six and only four were able to make it work (scheduling was problematic). That’s okay, though – four was plenty!

We gathered Friday evening on MapTool and Skype in the time slot that I normally run my long-running War of the Burning Sky campaign (my regular players were very understanding – thanks, guys!). I gave the new players some choice about what adventure we ran, and I ended up running a Living Forgotten Realms game – CORM 1-1 The Black Knight of Arabel (available here as part of a big archive file if you’re interested). This was, coincidentally, the first LFR game I had ever gone through as a player and one of the first I had run as a DM.

I specifically wanted to run an adventure I had run before in order to keep my prep time to a minimum (time was tight last week). Most of the prep time for this game went into getting the four PCs set up in MapTool. I did change the monsters in the adventure, too. First, I updated the damage expressions and defenses and everything to the post-Monster Manual 3 numbers. Second, since this particular adventure has the possibility of three fights with the same shadow creatures over and over, I mixed things up by bringing in some monsters from the Dark Legacy of Evard season of D&D Encounters that I’m running.

The group that gathered on Friday consisted of two new players (one of them in England – I somehow manage to attract players who are willing to play in the middle of the night!), one player who was rusty, and one player who at least hadn’t played online before (but he was looking for a game and I needed the fourth player to fill out the party). We had some minor technical difficulties at first, but soon enough we were all on MapTool.

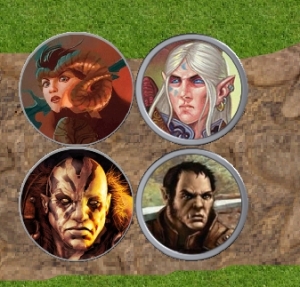
I had created characters for the two new players based on descriptions they gave me – a tiefling cleric and a half-orc barbarian. The more experienced players created their own characters – an elf mage and a goliath warden. I started with some basics about how the MapTool program works and how the rules of the game work for the new players, and then we dove in.

SPOILERS AHEAD FOR THE BLACK KNIGHT OF ARABEL

The adventure began with the party on their way to Arabel to investigate reports of a black rider and shadow creatures. Near nightfall the party was approaching the city and came upon a wagon driver frantically trying to repair a wagon wheel before darkness came. The party offered to help, but just then the sun dipped below the horizon and some shadow creatures emerged. A battle ensued, using the Shadow Hulk and Shadow Seeker from the adventure, but using the Leeching Shadows from Dark Legacy of Evard instead of the Shadow Motes that were written. The fight was a little intense and the cleric ended up unconscious at the end, but the party stabilized her. They had seen the dark rider on a ridge in the distance during the fight and decided to go after him.

At this point, the party started tracking the rider through the woods and came to a steep downhill slope that was tricky for their horses. The barbarian ended up basically carrying his horse and then the cleric’s horse down the slope. It was awesome.

When the group came upon the rider’s horse, dead from shadow attacks, they started suspecting that the dark figure wasn’t commanding the shadow creatures after all. Eventually they found the dark creature and talked to him rather than fought. They learned that he was an exiled knight and that he was trying to fight the shadows, but that the townspeople thought he was commanding them. He also mentioned that his father had cursed him to an evil god. The PCs teamed up with him and tried to clear his name.

Next came a trip into town to confront his father, who wasn’t at his pub – but this didn’t stop the barbarian and the warden from starting a bar fight! I decided to roll with it and threw some brawlers at them. They fought for a couple of rounds and prevailed easily. Of course, they had to skedaddle because the barmaid went to fetch the guards (they DID start the fight, after all).

Ultimately, the group ended up at the theater where the cult of the evil god was meeting. They convinced the cultists (confused townspeople) that the cult leader was leading them astray as he wanted to sacrifice a baby to the evil god. The cultists left, leaving the party to fight the leader and more shadow creatures. This time I did use the original Shadow Motes but I paired them with the Dusk Beasts from Dark Legacy of Evard.

This ended up being an awesome battle, ranging all over the place. The mage used Mage Hand to pluck the baby off the altar, but the Dusk Beasts knocked him unconscious. The barbarian started raging and charging all over the place, twice getting knocked down to just one hit point. The cleric eventually grabbed the baby and took it up into a balcony for safekeeping, whereupon the warden smashed the ladder to the balcony to keep the cult leader from getting to it. Lots of damage, lots of heroism… it was a great fight, and the good guys just barely pulled it out in the end.

Everyone had a fun time, and I’m happy to say that one of the players has volunteered to DM the group through an ongoing campaign. Success!

This “game for new players” is something I would love to do on a regular basis, maybe once every few months. So, if you’re reading this post and are interested in learning to play D&D via an online game, drop me a line!

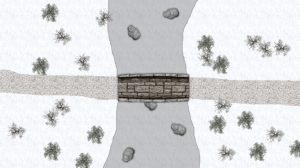
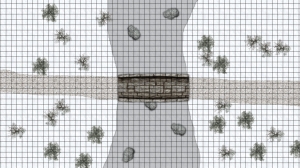
Free map – winter bridge

Here is a map that I put together for an upcoming War of the Burning Sky game. Usually I’ve been using the official maps from the WotBS adventures, but there’s one encounter whose description in the main body of the adventure has one map, but the actual tactical encounter write-up has a completely different map.

I liked the map that was described in the main body of the adventure, so I created a version myself. It’s a pretty simple map – a road crosses a stone bridge over a chasm in a wintry scene. It was pretty quick to draw, but I thought it was worth sharing. Both of these versions have been rescaled to a grid size of 50 pixels for easy use in MapTool or Fantasy Grounds. The top map is gridless while the bottom map contains a grid.

Reavers of Harkenwold Maps: The official versions

Well, I feel a little bit stupid now. I was so proud of the JPG maps that I created for the Reavers of Harkenwold adventure for use in MapTool or other virtual tabletop programs. They’re good-looking adaptations of the poster maps that came in the Dungeon Master Kit for use with the adventure. I put a fair amount of time into them, include the time to format them to a 50-pixel grid scale for sharing on my blog.

Then earlier this week I saw a link on the Dungeons and Dragons home page to maps from The Shadowfell: Gloomwrought and Beyond box set. Hey – that’s cool! I can use those maps for my game if I run any Shadowfell adventures. All I have to do is download them and resize them, and they’re good to go.

This got me thinking… if they had distributed maps for this box set, what about Reavers of Harkenwold from the DM Kit?

Yep. They have those maps, too.

Now, these are only available to D&D Insider subscribers, but I am such a subscriber. All the work I did to recreate those poster maps myself in MapTool was a bit of a waste – I could have just downloaded and resized the official, nice-looking versions from Wizards of the Coast directly.

The down side is that I feel like I wasted some time. The upside is twofold. First, I can redistribute the maps I drew myself on my blog, but I’m sure I’m not allowed to redistribute the official maps (you have to subscribe to DDI if you want those). Second, I discovered a whole BUNCH of official maps from other Wizards of the Coast adventures – Dungeon magazine adventures, Keep on the Shadowfell, Orcs of Stonefang Pass, etc. I can probably use those in future adventures.

For any of you DDI subscribers who want access to all of the official Wizards of the Coast maps, the gallery link is here. I guess when it comes to discovering this resource, better late than never!

Resizing maps to a 50-pixel grid

One of my few complaints about MapTool is that you can’t really export a map from one campaign to another. You can duplicate a map within a campaign, but there’s no good way to get it into another campaign. Also, if you want to create maps to share with other virtual table top users, it’s nice if you can have them pre-formatted to a certain size.

Thanks to a useful video and message board post from Eugene of the Fantasy Grounds forums (as well as from EN World), I learned a straightforward way to take maps that I’ve created in MapTool and turn them into JPGs both with and without grids so that they can be easily used by others and by myself in other campaigns.

0. Open up MapTool, Paint.NET, and this Excel tool (or a calculator).

1. In MapTool, center your screen on the map you want to export.

2. Choose the Measure Distance Along Path tool. This has two useful purposes: It makes the Layer window disappear, and it lets you count the number of squares on your map (this will be useful later).

3. Make your MapTool window full-screen by hitting CTRL + ALT + ENTER

4. Zoom in as far as you can without losing any of your map.

5. Hit the Print Screen key.

6. Alt Tab over to Paint.net and choose Edit – Paste Into New Image

7. Alt Tab back to MapTool, hit CTRL +G to make the grid go away, and hit Print Screen. Then Alt Tab back to Paint.net and again choose Edit – Paste Into New Image (you’ll have two separate image files in Paint.net – one with the grid and one without).

8. In the Paint.net image file with the grid, choose the Rectangle Select tool, zoom in pretty far, and scroll to the far left side of the map. Click (and hold) on the vertical grid line on the left side of the farthest-left complete square.

9. Drag the mouse all the way over to the right edge of the map, selecting all the way until you get to the vertical grid line on the right side of the farthest-right complete square. Release the mouse having selected right up until (but not counting) that rightmost grid line.

10. Look at the bottom of the screen and note the horizontal dimension (the first number) of the Bounding Rectangle Size. Look to the right of that at the bottom of the screen (not ALL the way to the right, as that’s the current X/Y position of the cursor) and note the horizontal dimension of the total image size.

11. Alt Tab back to MapTool and hit CTRL+G to turn the grid back on. Using the Measure Distance Along Path tool that is currently active, click and drag along a row to count the number of complete squares on the screen. You’ll need to add 1 to the running total (since the first square counts as zero).

12. In the Excel file, enter the first number you noted in Paint.net in the Selected Pixels box, the number of squares you got out of MapTool in the Selected Squares box, and the second number you got out of Paint.net in the Total Image Size box. The big number at the bottom tells you the new image size you’re looking for. The formula is:

New Image Size = Total Image Size * Number of squares selected * Desired grid size / Selected pixels
OR
New Image Size = Total Image Size * 50 / (current number of pixels per square)

13. In Paint.net, go to the gridded image and choose Image – Resize. Enter the New Image Size in the Width box (making sure the Maintain Aspect Ratio box is checked) and click OK. The image will resize.

14. Crop the image as you wish, then save it as a JPG file in a directory that you’ve taught MapTool to look for.

15. Repeat 13 and 14 for the gridless image file (the new dimension will be the same as for the gridded file).

16. Enjoy your new map files!