TactiCon Day 2 (Friday)

My blogging of the TactiCon experience continues with day 2: Friday.  This was the first full day of the convention, and I learned that it doesn’t really hit its complete stride until Saturday.

I was up late last night, so I didn’t make it to the convention site until a little after 10:00 this morning.  That ended up working out just fine.  The vendor hall still wasn’t open yet (it turns out that it was opening at 3:00 PM on FRIDAY, not Thursday), so I went down to the RPG area to watch for a bit.  I watched a little bit of a Savage Worlds game, which looked like fun.  I also watched some D&D players whom I knew, playing an LFR game for 7th-11th level characters on a cool pirate ship battlemap with a full model of a ship for them to run around on.

I then went to the registration desk to sign up for an LFR game in the afternoon.  They had one open for the 2:00 PM session, which fit perfectly.  Since it was pretty quiet at registration at the time, I chatted with the lady there, explaining that this was my first convention and that I was looking for suggestions and advice.  She advised me to pick up a couple of generic tickets for future games (either board games or RPGs).

When I asked about miniature painting (I had seen a sign for this), she told me to try the free (!) paint and take activity.  You just sign up for a slot, and they’ll give you a free metal mini, use of their paints, and some tips on how to do it.  The next slot was right away, at 11:00, so I signed up and went right over to miniature painting.

The guy who helped me was a very cool gentleman named Chris.  He gave me a choice of three different metal minis (apparently they’re 95% lead and 5% tin, so it’s too much lead to call them pewter).  I picked the one with armor and a sword, as he seemed like a perfect fit to be Rohgar, my half-elf paladin for LFR games.

The basics of miniature painting, as Chris explained to me, are:

  • Shake your paint pots thoroughly
  • Take some paint out of the pot and onto your styrofoam plate palette using a brush
  • Add a little water and mix to thin the paint
  • Start by painting the interior layers (face, underarmor) and work your way out
  • Have fun!

I ended up with the following mini:

Rohgar is completely and totally awesome-looking now! No, he’s not perfect – you can see where I missed some spots.  But he looks really, really good.  It took me about 90 minutes for the whole process, and I’m surprised to say that I had a good time.  I could definitely see myself painting minis for any character I plan on playing regularly.  I wouldn’t do it for armies of monsters, of course, but for a few PCs, yes, I think I would.

After mini painting, I grabbed a burger in the hotel restaurant. I still had an hour to kill before my 2:00 LFR game, so I dropped into the board game area.  A couple of guys were looking for more players for a game called Fresco, which I had never tried before.  Always being up for a new game, I sat down and learned to play.

I haven’t talked about this much on my blog, but I love board games, especially “Euro games” or “German-style board games” or whatever you want to call them.  Fresco is apparently pretty new, and I like it a lot.  The niftiest part is the mechanic to begin each “day” in the game, where each player decides what time they want to wake up.  If you wake up early (5:00 or 6:00), you get the best selection at the market and first choice of the available parts of the fresco to restore in the cathedral, but you make your apprentices unhappy and one might refuse to work.  If you sleep in, you have fewer market choices and you go last, but it makes your apprentices happy and you may attract another apprentice to work for you.  I also love the mixing of paints to make more valuable works.  It’s a cool game, and I think I might try to pick up a copy for myself at some point.

At 2:00, my afternoon LFR game began.  This one was a lot of fun.  The DM let me play Rohgar as a third-level character even though he was technically 10 points shy of level 3.  This meant that I got to use his +2 Vicious Longsword and his Cloak of Resistance +2 that he’d been carrying around since his first and second sessions, unable to use them until he hit level 3.  Woo hoo! The session was CORE 1-3 Sense of Wonder, which involved being transported into the middle of a bar fight by a gnome who thought he was summoning a living construct called a Gondling.  We then helped the gnome locate a temple of Gond that had been lost beneath the sea and fought our way through the temple, past some vicious guard robots, eventually ending at a very cool little puzzle.  The puzzle involved each player having a vision (written on paper), then comparing visions to figure out the right order to do things in order to open a vault of treasure.  Way fun, and the DM was awesome and enthusiastic.

Also, Timothy and Sheryl, the couple from last night, were at this game as well.  Sheryl was still just watching, but we chatted again.

I then stopped by the exhibitor hall to get some minis. I picked up a few cheap, generic minis that I can use in case a player needs one, but I also got one just for my wife Barbara:

I don’t know exactly what this is supposed to be, but it’s a dual-sword wielding cat creature.  Barbara loves cats – whenever she plays in the Daggerfall/Morrowind/Oblivion universe of video games, she loves to play a Khajiit, and her first D&D 4th Edition character was a Shifter.  She doesn’t have a character like that at the moment, but I’ve already told her that if I run an in-person campaign that she plays in, we can house-rule a Khajiit type of race for her to play.

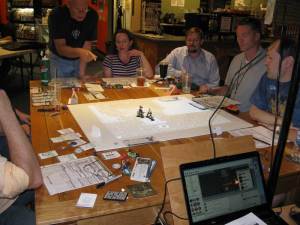
I popped out to grab some dinner, then came back in time for the 7:00 PM LFR sessions.  I was planning to use my generic ticket to jump into whatever was open, but it became clear that things were getting messy for the organizer, Linda.  I had anticipated that this might happen, so I had brought my projector rig and left it in the car.  I volunteered to run a session of CORM 1-1 The Black Knight of Arabel (the same one I had just run on Tuesday), and Linda gratefully accepted my offer.

A couple of my players helped me get the stuff from my car to the hotel room where we were playing, which was kind of them.  We ended up starting the game around 7:30, and because of the late start I decided to run the battles as written, without making them more difficult.  That ended up being a little bit of a mistake, as the party mowed down everything in their path.  They seemed to have a good time doing it, though, and the role playing was fun, so I’m not complaining.

The best part for me was that Timothy and Sheryl were there again – and Sheryl played in this game! She mostly asked Timothy to drive, but she rolled her own dice.  By the last encounter, where the party came upon the cult leader getting ready to sacrifice a baby on the altar, she made her own decision: Rather than fight or talk, she wanted to move up there and grab the baby.  She ended up needing some help from the wizard, who used Mage Hand to get the baby to her (technically the baby was probably too heavy, but the Rule of Cool applied here), and then they passed the poor kid back and forth like a football, but the good guys won the day.

I’m continuing to have a blast at TactiCon, and I’m looking forward to running two games tomorrow.  I’m hoping I can get Barbara to come at some point, as I’m sure she would love some of the stuff in the vendor hall.  We need to get her a dragonborn mini to paint for Zaaria, her Runepriest.

The projector setup is a success!

It’s late.  I have to go to work in the morning.  I don’t care, though – I’m excited, and I need to write about it!

This evening I put my projector setup into action for the first time.  I ran a Living Forgotten Realms session at the local store, Enchanted Grounds.  I had seven players turn up for a session of CORM 1-1 The Black Knight of Arabel.  I had played this module in the first LFR game I had ever experienced as a player, so I was pretty comfortable running it as a DM.

I arrived at the store about 40 minutes before the game’s scheduled start time so that I would have plenty of time to find a good table, set up the rig, adjust the projector’s focus and so on.  All of that went totally smoothly.  By the time 6:00 rolled around, I was ready to go.

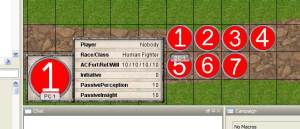
This would be the first time that I was using MapTool for the monsters and the map but not for the player tokens – the players brought their own minis for that.  I had realized when putting the adventure together that, if I wanted to keep track of initiative within MapTool, I would need to have something to at least represent each player for that purpose.  So, I created a set of seven generic PC tokens with their own set of properties.  The image for each token was a number (1 through 7) which I assigned based on the players’ seating arrangement around the table.  The name of each token is the character name.  Their properties include the player’s name, their race and class, their defenses, their initiative modifier (for tiebreaking) and their passive Insight and Perception scores.  It was great for helping me remember everyone’s name, character name, and character type.  The defenses didn’t come up much, nor did the passive insight or perception, but it was nice to have in case I needed it.

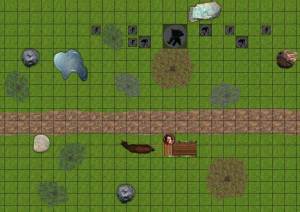
The adventure began with a little back story of how the party came to be traveling to the town of Arabel – charged by the king in the capital city to investigate rumored Netherese activity involving shadow creatures and reports of a black knight.  They began by helping a man repair his wagon, when they were set upon by shadow creatures.

The first battle was quite easy for the party, even though I made the minions into two-hit minions.  They dispatched the shadow creatures with little fanfare, helped the wagon driver repair his vehicle, and set off after the dark rider they had spotten on a distant ridge.

At this point I turned off the projector as the party entered a skill challenge to track down the rider.  This was a well-written skill challenge, and the players role-played it well, too.  They ultimately came upon the rider in his camp and started disagreeing about whether to attack or talk.  I allowed a little talk from those who wanted to do so, but the “attack” camp grew restless, so I called for initiative.

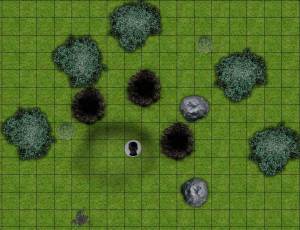
The not-so-bright fighter in the party (good role-playing, not a dumb player) decided to charge Dark Skull, narrowly avoiding some traps.  Other players tried to convince Dark Skull to drop his weapon, and he said that he didn’t want to hurt anyone, but he wasn’t willing to drop his guard with the fighter standing next to him.  So, the parlaying character decided to bull rush the fighter out of the way.  Great plan – except that in her quest to get to the fighter, she ran over a pit trap!  Oops.

Dark Skull teleported into the shadows, and the cooler heads in the party were eventually able to start a dialogue that led to an alliance with the falsely-accused knight (the skull was just a mask). They decided to go back to Arabel to find out who was really behind the dark goings-on. Since we were going into role-playing, I turned the projector back off.

Since we were doing fine on time, I decided to  run a little bit of the Arabel skill challenge.  The party repaired a broken obelisk in the town square, then went to the tavern where the innocent “black knight’s” father worked.  The father had cursed his son, leading to his shadow powers, and so the party questioned the father.  They asked about his family, and the father didn’t mention any adult son but told them that his wife and infant son were at his house some distance away (I made this up on the spot).  The PCs decided to go to that house to question the wife.  They found the house to be dark and broke in – no one was home, but the door to the basement was locked.  They picked the lock – and found an empty basement.  Clearly the father had lied.

The group returned to the tavern to confront the father about the lie, and found that he had left, heading toward the town square.  Some streetwise checks confirmed that people had seen him go that way, with some young lovers (also made up on the spot) in the square pointing toward the theater as being the father’s destination.

Upon entering the theater, the party saw a bunch of cultists of Shar looking at the stage, where the father was making a speech and getting ready to sacrifice a baby.  Again, some of the party wanted to talk, but others charged into action – the battle was on!

This is an interestingly-designed encounter, with the players having the option of either convincing the crowd to disperse, in which case they fight the leader and some shadow creatures, or not convincing the crowd to disperse, in which case they fight the leader and the crowd.  Since the party had mowed down everything in their path, I decided to have them fight BOTH the crowd and the shadow creatures!  Happily, the shadow creatures rolled low for initiative, so their entrance from behind the party made for a nice little surprise.

Even with the two-front battle, the players were able to win the day.  They mowed down cultists with no trouble, and the shadow creatures simply didn’t deal enough damage to be a threat.  The most interesting part of the battle was in round four, where I had the leader give up on fighting off the party and start trying to sacrifice the baby.  He picked up the baby and got ready to slaughter it, so the players tried hard to stop him.  One of the physically weaker characters in the party leapt down from the balcony and bull rushed the leader to make him drop the baby.  Unfortunately, this left the baby next to the party wizard’s flaming sphere!

One of the fighters, who was prone at the base of the stage, made a DC 20 athletics check to pull herself up onto the stage from prone and charge over to bull rush the baby out of harm’s way, diving to the ground again to do so.  The cult leader naturally picked the baby back up again, getting ready for the slaughter, so the party wizard hit him with an attack that caused him to lose the ability to take opportunity actions.  There’s a little-known rule that says if you can’t take opportunity actions, you lose any grabs you were making.  The baby gets dropped again (fortunately, I ruled that it was wearing a tiny little Amulet of Feather Fall as part of the ritual), and ultimately the cult leader was wiped out.

The session was loads of fun, and the technology ran without a hitch.  The only minor issue is that even the 2,500 lumens aren’t quite bright enough in some cases – the altar on the stage was tough to see (black on brown).  The solution there is probably for me to think a little more about contrast when I put the maps together.

I’ll tweak a couple of things for the convention on Saturday, but for the most part I am ecstatic about this rig.  It’s loads of fun to run, and it makes the game go very smoothly.  Thank you to my players for coming out to give this a whirl – especially to Andy, who told me that he reads my blog.  That’s the first time I’ve ever met one of my readers without having known them in person first.  It was a pleasure gaming with you, Andy, and with everyone else, too!

P.S. If anyone wants the MapTool campaign file that I used for this game (with my updated tweaks added), it can be downloaded here.

Online campaign session 6: Meet Gary Sidequest

My online party gathered Friday evening for out sixth session as a group.  One of the players was unable to attend, and since the party was about to finish the first adventure of the War of the Burning Sky campaign and move into the second, I thought it was important to have everyone there.  I called an audible and ran a side quest.

The party had finished the previous session by battling a gnoll and some hyenas in a tough battle outside some ruins.  They began this session by looking for an extended rest (it was night time at this point) and decided to delve into the ruins to get out of the snow.  I had decided that the published adventure missed an opportunity here by not fleshing out the ruins at all, so I created a two-room dungeon down there.

The first small room was the gnoll’s hideout with a pallet and some rotting meat.  The door between this room and the rest of the ruins was barricaded with broken wood and stones, and a warning was scratched into the door: “Grave robbers beware: It’s not worth it!”  The party bedded down there for the night, then woke up and robbed a grave.

On the far side of the door, they found lots of dead bodies and a suspicious looking pit.  All was well until one of the party members got too close to the edge of the pit and it attacked.  Yes, this was a trap, and when it went off the dead bodies got up (zombies, naturally) and started fighting.

I’ve attached the PDF of this homebrew encounter here, but the general idea is that we have three big zombies and six two-hit minion zombies, all of which had some push and/or slide abilities to try to get the players back to the stairs or into the pit.  The pit attacks anyone who lands in it or ends their turn adjacent to it, damaging them, grabbing them and pulling them deeper into the pit.  The zombies and pit are animated by a dark tome that is in the coffin in the northern chamber – reading it is dangerous, destroying it is safer.  The encounter was fun (for me at least) and led to some cool role playing upon discovering the tome.

After this encounter, I had the party be greeted by Gary Sidequest, a dragonborn who invited them to solve the mystery of the organized kobolds.  This is one of the Living Forgotten Realms adventures that I’ll be running at TactiCon – specifically TYMA2-1 Old Enemies Unite.  I skipped the skill challenge and went straight for combat.  The first combat with organized kobolds was pretty threatening – who knew that kobolds could be scary when they fight smart?  The second combat, in a chamber of traps, was just boring in my opinion.  I’m not sure how I’m going to jazz it up for the convention, but I’ll come up with something.

There’s still one more encounter in the LFR module, and I figure that we might as well run through it when we regroup, but after that we’ll be heading into the Fire Forest of Innenotdar – the second adventure in the War of the Burning Sky.  We’re taking this weekend off, since I’ll be at TactiCon using my new projector setup.  I’ve also signed up to run an LFR game tomorrow evening at my local store, just so I can try out the projector before I go to the convention.  Wish me luck!

Building a better portable projector rig

I originally put most of this information in an earlier post that described a similar mount that sat on my table.  This information is pretty much the same, except that it’s floor-mounted and the angle of the projector is much more adjustable in the updated version.

At long last, I have built a working, portable projector setup for playing D&D using MapTool to run the game.

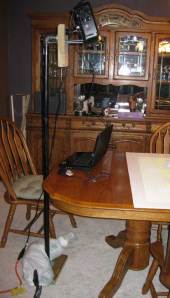
First, let’s see the finished rig in all its glory:

Maybe it’s not the most beautiful rig in the world, but by golly it works!

I’ll say right here that I’m a little surprised that I ended up going with a single-pole rig anchored with a sandbag.  I originally expected to build a big cube rig out of aluminum (like Sean Pecor’s), then thought I’d build a wooden tripod, but I settled on this design after receiving lots of great feedback here on the blog and on EN World.  It feels quite stable, too – heavy wood, heavy pipes and a heavy sandbag all combine to result in a rig that makes me feel comfortable that my projector is in no danger of falling.  I plan to carry the laptop, projector, cords/mouse and sandbag in an old roll-aboard suitcase and the rest of the rig in one piece in my other hand whenever I take this on the road.

Would you like to build something similar?  Here’s how to do it.

Parts

  • 1 heavy board at least 2 feet long.  Mine was a four-foot long 10 by 2 (actually 9.5″ by 1.5″) that I found in the scrap bin of Home Depot for 51 cents.  I believe it’s pressure-treated – it’s quite dense.  Cost: 51 cents.
  • 2 floor flanges for 1″ galvanized pipe. Cost: $6.38 each, $12.76 total
  • A five-foot length of 1″ diameter galvanized pipe (black), threaded at both ends (technically called a nipple). Cost: $16.12
  • A 90 degree elbow for 1″ galvanized pipe. Cost: $2.36
  • A two-inch long nipple for 1″ diameter galvanized pipe. Cost: $1.22
  • Eight wood screws, 1″ in length. Cost: I had these in my toolbox, but we’ll call it 25 cents.
  • Two carriage bolts, 3/8″ diameter, 8″ in length.  Cost: $1.49 each, $2.98 total.
  • Two fender washers and two hex nuts for the carriage bolts.  Cost: 13 cents apiece, 52 cents total.
  • A 60-pound  bag of tube sand. Cost: $3.99
  • Two pieces of 30″ by 20″ white foam board from Michael’s (I would have preferred a single bigger piece, but this is what they had). Cost: $1.50 each, $3.00 total.
  • Some duct tape. Cost: I’ll assume you have this on hand already.
  • A projector mount. I got mine via Amazon from a company called Projector Ceiling Mounts Direct. Cost: $26.40 (with shipping)
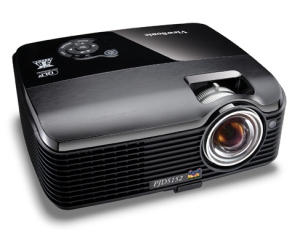
  • A projector.  I went with the ViewSonic PJD5152 and purchased it from Buy.com via Amazon. Cost: $463.99 (free shipping)
  • An extension cord and probably a splitter / surge protector. Cost: Already on hand.
  • A laptop – but I’ll assume you have that already.

Total cost:

  • Projector: $463.99
  • Rig: $70.11
  • Projector and rig together: $534.10

Tools

  • A table saw (or some other way of cutting the board – you could also probably get it pre-cut at the hardware store)
  • A drill with a screwdriver bit (you could technically get by with a regular screwdriver, but the drill makes it go faster

Assembly instructions

This version ended up being dead simple to put together, much easier than my tripod – and better, too.  You could knock this together in less than an hour if you had all of the parts ready to go.

  • Cut a 12″ length and a 7″ length from your long board using a table saw. The 12″ length will be the base of your rig and the 7″ piece will be the top plate that the mount connects to.
  • Screw one of the flanges to the middle of the 12″ board using four of the wood screws and your drill or screwdriver.
  • Screw the other flange to the middle of the 7″ board using the other four wood screws and your drill or screwdriver.
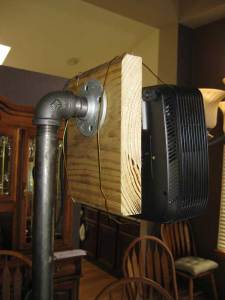
  • Screw the part of the projector mount that would ordinarily go into your ceiling onto the opposite side of the 7″ board from the flange.  I put mine high up on the far side, with the mounting screws just barely coming through the board, right next to the top of the flange.
  • Drill two 3/8″ diameter holes through the 7″ board, about 2.5″ down from the center of the projector mount and about 1″ in from each edge of the board (this is approximate, not exact).
  • Manually screw the five-foot pipe into the flange on the 12″ board.
  • Manually screw the 90 degree elbow onto the top of the five-foot pipe.
  • Manually screw the 2″ nipple onto the other end of the 90 degree elbow.
  • Take the 7″ board with the other flange and screw that board/flange assembly onto the other end of the 2″ nipple.  Tighten as necessary to get it pointed at the angle you want (I went with vertical).
  • Push the carriage bolts through the back of the 7″ board so that they extend forward about 5″ from the front of the board.
  • Push a washer onto each carriage bolt, then screw a nut onto each bolt to keep the carriage bolt from being able to be pushed back through the board.
  • Wrap some duct tape around the tip of each carriage bolt.
  • Put the rig on the floor next to where you will sit, resting against the edge of the table.
  • Empty out about half of the sand from your sandbag and twist tie / tie / duct tape up the opened end.
  • Wrap the sandbag around the base of the rig, sitting on the base board.  Put more of the weight away from the edge of the table (opposite of where the projector will be).
  • Assemble the rest of the mount per its instructions.  You already have one piece attached to the far side of the 7″ board, and the other piece will be attached to the projector itself.
  • Tighten the projector onto the mount as best you can. If your mount is like mine, it will want to move.
  • Figure out the exact angle you want the projector to be held at, and adjust the nuts on the carriage bolts to hold the projector at that angle.
  • Put the foam boards on the table beneath and in front of the projector.

At this point, your rig is completely set up.  All that’s left now is to hook up the cables, make any necessary adjustments (either to the projector’s angle, to the keystone of the image, to the lens focus/zoom, etc.) and start running your game!

Running the game

  • Create your maps / monsters / etc. in MapTool
  • Start MapTool on your laptop and load up the appropriate campaign
  • Start a server in MapTool
  • Open a second instance of MapTool
  • In that second instance, connect to the first one as a client (it will be in the LAN tab on the connection menu)
  • Hook the laptop to the projector
  • Set your display to the Extend Desktop option (setting the resolutions on each monitor appropriately).  The laptop should the primary (left) monitor, with the projector being the secondary (right) monitor.
  • Drag the second instance of MapTool onto the projector (drag it off to the right)
  • In the second instance, hit Ctrl+Alt+Enter to put it in fullscreen mode
  • Adjust the zoom level on both versions so that your squares are 1″ on a side.  The simplest way to do this is to just adjust it on the main MapTool instance and then use Ctrl+F to force the second instance to the same view as the main instance.
  • Run the game as you normally would online!
  • Extra tip: If the image resolution of your 1″ monsters isn’t great on the table, you can temporarily make a token Colossal so that the players can clearly see the artwork, then shrink it back to size (I use macros for this).

That’s all there is to it!  I haven’t gotten to run a real game with this yet, but it will at the very least get some use at TactiCon here in Denver over Labor Day weekend.  I’m excited to try it out!

Building a simple, portable RPG projector setup

Update 8/24/2010: I’ve improved the design to make the projector floor-mounted with an adjustable angle.  Details are in this post.

At long last, I have built a working, portable projector setup for playing D&D using MapTools to run the game.

First, let’s see the finished rig in all its glory:

Maybe it’s not the most beautiful rig in the world, but by golly it works!

I’ll say right here that I’m a little surprised that I ended up going with a single-pole rig anchored with a sandbag.  I originally expected to build a big cube rig out of aluminum (like Sean Pecor’s), then thought I’d build a wooden tripod, but I settled on this design after receiving lots of great feedback here on the blog and on EN World.  It feels quite stable, too – heavy wood, heavy pipes and a heavy sandbag all combine to result in a rig that makes me feel comfortable that my projector is in no danger of falling (well, except for the coat hangers that are in place until the real mount arrives, that is).  I plan to carry the laptop, projector, cords/mouse and sandbag in an old roll-aboard suitcase and the rest of the rig in one piece in my other hand whenever I take this on the road.

Would you like to build something similar?  Here’s how to do it.

Parts

  • 1 heavy board at least 2 feet long.  Mine was a four-foot long 10 by 2 (actually 9.5″ by 1.5″) that I found in the scrap bin of Home Depot for 51 cents.  I believe it’s pressure-treated – it’s quite dense.  Cost: 51 cents.
  • 2 floor flanges for 1″ galvanized pipe. Cost: $6.38 each, $12.76 total
  • A three-foot length of 1″ diameter galvanized pipe (black), threaded at both ends (technically called a nipple). Cost: $11.37
  • A 90 degree elbow for 1″ galvanized pipe. Cost: $2.36
  • A two-inch long nipple for 1″ diameter galvanized pipe. Cost: $1.22
  • Eight wood screws, 1″ in length. Cost: I had these in my toolbox, but we’ll call it 25 cents.
  • Two curtain rod mounts plus four more wood screws for mounting them. Cost: I had these laying around, but I imagine you would spend about $1 each on them if you had to buy them plus another 25 cents for the screws, I guess.  Feel free to substitute something similar for the projector to rest on.
  • A 60-pound  bag of tube sand. Cost: $3.99
  • Two pieces of 30″ by 20″ white foam board from Michael’s (I would have preferred a single bigger piece, but this is what they had). Cost: $1.50 each, $3.00 total.
  • Some duct tape. Cost: I’ll assume you have this on hand already.
  • A projector mount. I got mine via Amazon from a company called Projector Ceiling Mounts Direct. Cost: $26.40 (with shipping)
  • A projector.  I went with the ViewSonic PJD5152 and purchased it from Buy.com via Amazon. Cost: $463.99 (free shipping)
  • An extension cord and probably a splitter / surge protector. Cost: Already on hand.
  • A laptop – but I’ll assume you have that already.

Total cost:

  • Projector: $463.99
  • Rig: $64.11
  • Projector and rig together: $528.10

Before the projector mount had arrived I was too excited to wait, so I substituted some coat hangers for testing purposes.  Those, too, were lying around – no cost. 🙂 (You can see that version in some of the pictures.)

Also, I ended up using 1″ galvanized pipe, but I was planning on getting 3/4″ galvanized pipe.  Home Depot was out of 3/4″ flanges, though, so I went with 1″. I’m guessing either one will work fine.

Tools

  • A table saw (or some other way of cutting the board – you could also probably get it pre-cut at the hardware store)
  • A drill with a screwdriver bit (you could technically get by with a regular screwdriver, but the drill makes it go faster

Assembly instructions

This version ended up being dead simple to put together, much easier than my tripod – and better, too.  You could knock this together in less than an hour if you had all of the parts ready to go.

  • Cut a 12″ length and a 7″ length from your long board using a table saw. The 12″ length will be the base of your rig and the 7″ piece will be the top plate that the mount connects to.
  • Screw one of the flanges to the middle of the 12″ board using four of the wood screws and your drill or screwdriver.
  • Screw the other flange to the middle of the 7″ board using the other four wood screws and your drill or screwdriver.
  • Manually screw the 36″ pipe into the flange on the 12″ board.
  • Manually screw the 90 degree elbow onto the top of the 36″ pipe.
  • Manually screw the 2″ nipple onto the other end of the 90 degree elbow.
  • Take the 7″ board with the other flange and screw that board/flange assembly onto the other end of the 2″ nipple.  Tighten as necessary to get it pointed at the angle you want (I went with vertical).
  • Put the rig on your gaming table.
  • Empty out about half of the sand from your sandbag and twist tie / tie / duct tape up the opened end.
  • Wrap the sandbag around the base of the rig, sitting on the base board.  Put more of the weight toward the edge of the table (opposite of where the projector will be).
  • Assemble the mount per its instructions.  One piece will be attached to the far side of the 7″ board and the other piece will be attached to the projector itself.
  • Tighten the projector onto the mount as best you can. If your mount is like mine, it will want to move.
  • Figure out the exact angle you want the projector to be held at, and hold the curtain rod holders underneath either front corner of the projector at the proper place to support it.  Mark the places for the screw holes in the curtain rod brackets with a pencil.
  • Take the projector assembly off the base part of the mount, remove the top board, and screw the curtain rod holders to the board in the appropriate spot.  Reassemble – now your projector should stay where you want it.  Feel free to bend the curtain rod holders a little bit as needed.
  • Put the foam boards on the table beneath and in front of the projector.

At this point, your rig is completely set up.  All that’s left now is to hook up the cables, make any necessary adjustments (either to the projector’s position on the mount, to the keystone of the image, to the lens focus/zoom, etc.) and start running your game!

Running the game

  • Create your maps / monsters / etc. in MapTool
  • Start MapTool on your laptop and load up the appropriate campaign
  • Start a server in MapTool
  • Open a second instance of MapTool
  • In that second instance, connect to the first one as a client (it will be in the LAN tab on the connection menu)
  • Hook the laptop to the projector
  • Set your display to the Extend Desktop option (setting the resolutions on each monitor appropriately).  The laptop should the primary (left) monitor, with the projector being the secondary (right) monitor.
  • Drag the second instance of MapTool onto the projector (drag it off to the right)
  • In the second instance, hit Ctrl+Alt+Enter to put it in fullscreen mode
  • Adjust the zoom level on both versions so that your squares are 1″ on a side.  The simplest way to do this is to just adjust it on the main MapTool instance and then use Ctrl+F to force the second instance to the same view as the main instance.
  • Run the game as you normally would online!

That’s all there is to it!  I haven’t gotten to run a real game with this yet, but it will at the very least get some use at TactiCon here in Denver over Labor Day weekend.  I’m excited to try it out!

Maybe 800 by 600 is enough

With my planned projector setup for RPG mapping, it looks like I’ve gotten some good news and some bad news about the projector that I bought.  The good news is that my buddy who works with projectors was able to help me out with my projector last night at the bowling alley, and it looks like the resolution will be just fine.

A quick aside: Toting a laptop, projector, cables and an extension cord into a bowling alley will get you some funny looks.  Accidentally shining the projected image onto the lanes (distracting the other bowlers) will get you yelled at.

Anyway, my friend was able to show me how to adjust the height of the projector and the zoom of the lens to get the image focused from a good height in such a way that the quality of the image was on par with what I was looking for.  It’s still a little pixellated, but not bad at all.  A higher resolution projector wouldn’t make any difference.

The bad news is that if I want a better image quality, I’ll have to use something other than MapTool.  Now, I love MapTool.  I’m not really interested in using anything else, so that means that I’m willing to accept so-so graphics.  The graphics for the maps themselves are fine – it’s the tokens for the monsters that don’t look great.  I’m probably okay with that in the end, but I will at some point experiment with other graphics options.

I’ve also gotten lots of good feedback from commenters on the blog and people on EN World about my tripod setup and other options.  My bowling pal likes the idea of a tripod, with one leg right under the projector and the other two legs some distance back, resulting in a squat isoceles triangle of legs rather than the equilateral triangle I have now.  However, my next approach will be as follows:

  • Get a 12 inch square piece of pretty heavy wood (maybe 3/4″ thick)
  • Mount a pipe flange onto that piece of wood with screws
  • Screw a length of pipe (maybe 24 inches long) into that flange
  • Put a 90 degree elbow on the top of that pipe
  • Screw a short pipe (maybe 4 inches) onto the elbow, sticking out parallel to the table
  • Screw another flange on another piece of wood onto the end of that short pipe
  • Put a projector mount (perpendicular to the table) on the other side of the piece of wood
  • Put the projector on that mount, aiming downward (and maybe slightly outward, with keystone correction)

This, too, should be pretty inexpensive.  I’ve ordered a projector mount for about $27, and I’m guessing that the pipes, flanges, wood and elbow shouldn’t be more than another $25 or so.  I’ll need to get some good clamps to hold the bottom piece of wood to the table, and maybe some kind of weight to put on that wood as well, but I expect the mounting system all-in to cost less than $75.

Next stop: The hardware store!

Projector setup needs better resolution

The good news is that my projector arrived today early enough to give me time to play around with it before I have to leave for a two-day business trip to New York.

The bad news is that I think I need a higher-resolution projector.  Take a look at this close-up of the projected map (click to enlarge):

That’s just too pixellated for my taste. I’ve put some physical tokens next to the digital ones for the sake of comparison.

Having gotten the projector into my hands, I’ve learned a few useful lessons.

  • 800 by 600 resolution flat-out isn’t enough
  • 2500 lumens is plenty to use in normal lighting (yay!)
  • MapTool is going to be fantastic for this purpose (though if I want to jump the projected screen to what I can see on the DM screen, I’d better make sure the scale is the same)
  • The tripod setup isn’t that bad, but I want to pursue the single-pole approach

The main reason for that last point is not so much that the tripod is a little unsteady (though it is) or that the legs get in the players’ way (though they do).  It’s that having the lens right above the middle of the table means that the image will be off to one side, just because of the way projectors work.  The much cleaner solution will be to have the projector mounted more or less directly in front of the DM’s seat, thus projecting nicely out onto the table.

Next steps:

  • Play around a little bit more with this projector to see if I’m missing a way to work around the resolution problem (any suggestions?)
  • After that, return the projector to Buy.com and take the plunge on a higher-res version (sigh)
  • Start working on a single-pole rig that can be clamped to the table in front of the DM or that can sit in a mount at the DM’s feet.

Tripod for RPG mapping projector: First prototype

While I wait for the projector to arrive so that I can begin putting digital maps on my game table, I decided build a prototype of my tripod idea.  Here it is in all its glory:

I don’t plan for this to be the actual version that I use, of course – this is more of a proof-of concept.  And of course it looks a little bit silly with no projector, but I put out a Chessex mat, some tokens, some dice and some character sheets so that I could get a feel of what it would be like to play with it.

First, I’ll tell you what I did.  I started with two eight-foot long pieces of cheap pine (1/2 inch by an inch and a half) that I bought for 77 cent apiece from Home Depot.  I cut each of these in half with a miter saw, ending up with four pieces of wood, each 48 inches long.

I then took a big piece of scrap plywood that I had laying around (it was about 30 inches square to start with and 1/2 inch thick), cut it in half and then cut one of those halves in half again an a table saw, leaving me with a 15 inch square.  I then cut this into a 15 inch equilateral triangle (yay geometry!) on the table saw and drilled a hole in the middle using a hole saw.

Next, I drilled pilot holes for mounting the hinges on the underside of the middle of each side of the triangle as well as at the top of each leg.  I also drilled pilot holes roughly eight inches down each leg for the screw eyes.  I screwed the hinges onto the triangle and the legs, and I screwed the screw eyes into each leg.  I then threaded a piece of kitchen twine through the three screw eyes and tied it to close the loop.

When I set this version up, it was too tall (as I knew it would be), so I shortened the legs to 39 inches each using the miter saw, which left the platform 36 inches above the table top (I’ll probably shorten it to 30 inches in the end, but I can always cut it shorter – I can’t make the legs longer). I also tightened up the twine a little bit from my original pass.  What you see in the photo above is the result of this work.

What’s the verdict?  Well, I’ll admit that I’m having serious doubts about this approach.

  • The hinges have a lot of play in them, which means that the platform can be a little wobbly even if the legs are securely stuck to the ground.
  • The legs, as I feared, are a little awkward for the players to reach around.  They WILL be bumped.
  • While the twine keeps the legs from pulling father apart (and yes, I was planning on using something sturdier than cotton twine for the final version – probably leather string), it doesn’t keep them from being bumped closer together.  That could still cause a collapse if a leg gets shoved inward.

I’m considering a few different options from here.  First, I will play with this prototype a little bit more to see if it might be worthwhile.

  • I’ll try wrapping some duct tape around the hinges to give them less play.
  • I’ll try using some kind of rigid brace between the legs, either wood or metal.  I’m thinking of something like a really long hook and eye, like you might see latching a cabinet or screen door closed, but the longest I’ve found so far is only six inches, which doesn’t stretch far enough.
  • I’ll put some bigger feet on the bottom of the legs (probably four inch squares of plywood), which might give me the chance to clamp them to the table.  I also plan on putting some rubber on the bottom of these feet.

However, I’m also open to the possibility of completely abandoning the tripod idea (which is why I just build a quick and dirty and cheap prototype first).  Some folks on EN World have pointed out that I don’t have to have the lens of the projector mounted over the center of the table, since the projection angle doesn’t spread equally downward and upward from the center of the projector – it spreads mostly upward.  This opens up possibilities such as a single pole with the projector mounted to the top of it, perhaps clamping the pole to the table.  My wife also suggested just using a metal sawhorse and mounting the projector to the side of it, which might totally work.

Thoughts?

Projector setup: Maybe a tripod?

As I mentioned yesterday, I’ve decided to take the plunge to buy a projector for use in projecting my RPG maps onto the game table from my laptop.  I was planning to use Sean Pecor’s design for the rig to hold the projector above the table, but then I thought about a word that my bowling buddy (who works with projectors and other video equipment for a living) used when I described the setup to him:

Tripod.

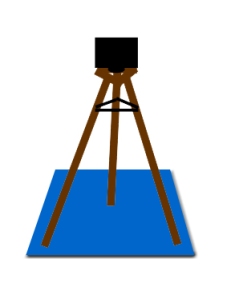
Could it really be that simple?  Could I really just build a tripod to suspend the projector above the game table, rather than building a massive cube?

Well, given that a tripod would be cheap, simple and highly portable, I think it’s at least worth a shot.

I began by doing some sketching of what a tripod for this setup might look like, then swung by the hardware store on my lunch break.  I picked up two eight-foot long pine boards (1.5 inches wide, 3/4″ thick), some small hinges and some screw eyes.  I already have some scrap plywood at home.  The general idea is that there will be some type of triangular platform at the top with a hole in it that the projector will point downward through (along with something to hold the projector in place).  Attached to each side of the triangle will be a hinge with a wooden leg attached.  Each leg will have a screw eye on it (not too far down from the platform), and some leather rope will connect the three screw eyes together to hold the tripod up properly.  There will be some adjustable feet on the bottom of the legs, preferably rubber-tipped.  The whole thing will sit on some type of battle mat (I like Sean’s idea of a dry-erase surface).

What am I missing?  Will the legs get in the players’ way?  Will it be too unsteady?  What is the drawback to the cheap, light, portable tripod approach?  I plan to build a quick and dirty version to test it out.  If it works, I’ll build a nice one.

Projector purchased!

Lord help me, I’ve taken the plunge: I’m building a projector setup for my in-person D&D gaming.  Inspired by Ian at the local store and by Sean Pecor online, I figured that if I’m going to be true to my Online Dungeon Master self while still playing in-person, it only makes sense to bring technology to the table and use my computer to run in-person games, too.

I did a lot of research, culminating with a conversation I had at my bowling league tonight with a guy who works with video setups for a living.  He confirmed that the sort of things I was looking at were indeed the right tools for the job.  I did a bunch of searching on Projector Central and ultimately settled on the ViewSonic PJD5152The features that I like about this projector are:

  • Short throw.  This means that the projector doesn’t have to be very far away from the tabletop in order to project a clear image (which means my rig doesn’t have to be crazy-tall).
  • 2,500 lumens.  That’s pretty bright for a short throw projector, which (I hope) means that I will be able to use it even in a setting where there are normal lights on.
  • 5.5  pounds.  That’s pretty lightweight, which I care about since I plan to take this rig with me when I’m DMing at a store or a convention (hello there, TactiCon!).
  • $464 from Buy.com (via Amazon.com).  It’s still a big purchase, but compared to most of the other options out there, it’s a good deal.
  • 30 day return policy.  If it turns out that this won’t work properly, I can get my money back.

The features that I’m a little more nervous about:

  • 800 by 600 resolution (SVGA).  That’s not super-high.  Now, I’m figuring that it will be fine for my purposes (my projector expert friend agreed), but the other DMs I’ve seen with similar rigs have had 1024 by 768 resolution.  Getting that would have meant a big step up in price.  On the other hand, my bowling buddy said that if I’m going to be using the VGA output on my laptop to connect to the projector, higher resolution wouldn’t do me any good.
  • 2,500 lumens.  While it’s pretty high for a short-throw projector, my bowling buddy was saying that I would want 4,000 to 6,000 for good image quality in normal light.  I couldn’t even find a short-throw projector with 4,000 lumens (3,000 to 3,500 were available for beaucoup bucks).  Sean Pecor seemed happy with his 2,000 lumens, so I’m optimistic, but still a little concerned.
  • The price.  Yeah, it’s a good deal by projector standards, but holy cow that’s a lot of money!

The projector should arrive sometime early next week, at which point I will most likely be in New York on business (that figures).  I plan to try it out without building a rig first, just holding it over a table.  Once I feel confident that this thing is going to work, I’ll begin construction of the rig to hold the thing.  I like Sean’s setup, and I plan to build mine largely based on his.

So, am I nuts?  Any advice for me as I (perhaps foolishly) forge ahead into the realms of becoming a projector-wielding DM?