Online D&D game – Final prep for first session

I wish I had time to put up as in-depth a post as I would like, but I spent far longer than I planned to last night getting everything ready for this evening’s session of my online D&D game.  I’ll at least summarize what was involved.

  • Creating the encounter maps in MapTool (I ended up re-doing them all on one map so that the players wouldn’t have to flip between multiple maps in the campaign)
  • Updating the properties for the campaign per the suggestion of one of my more MapTool-experienced players (pretty minor changes)
  • Creating tokens for all of the bad guys, including their stats and macros for their powers
  • Creating tokens for all of the players (well, except the two who will be bringing their own), including THEIR stats and power macros
  • And of course making sure that I’ll know what I’m doing when I actually run the adventure
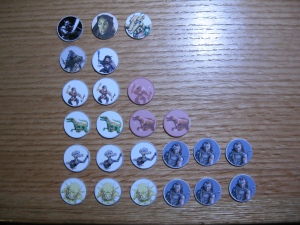
PC Tokens

Top row: Alayne, Thorfin, Faebs. Bottom row: Landon, Fudrick, Jaks

All of this ended up taking somewhere close to 10 hours over the past few days – and that was for an adventure that was already pre-written and for which I had previously created encounter maps and enemy token images!  I shudder to think how much time I’ll have to put in once I start creating my own adventures.

On the bright side, I’ll no longer have to change properties or create PC tokens (or at least not very often), and the more I create monster tokens the more efficient I get at it (using templates for them, for instance).  I’m guessing that the prep work for a typical future session within MapTool (once I’ve already decided what the encounters will look like, what bad guys to use, etc.) will probably take about three hours instead of ten.  Just a guess, though.

Now all that’s left to do is get the group together and run the game!  It sounds so easy when I write it like that…

Advice I’ve received for my LFR session

For my last several posts, I’ve been talking about my decision to plunge into dungeon mastering a Living Forgotten Realms game at my friendly local game store, Enchanted Grounds.  That game will be three weeks from today.  I’ve already put the maps and minis together, so all that remains is for me to get comfortable with the adventure itself and then to run it well.

To that end, I’ve been seeking advice from other DMs, both here on my blog and over on EN World.  Here is the advice that I’ll be trying to keep in mind as I get ready to run my first adventure in public:

  • Be enthusiastic!  Enthusiasm from the DM means enthusiasm and fun for the players.
  • Make sure to really know the story of the adventure, not just the monster stats and skill challenge mechanics.
  • Get a feel for the personalities of the NPCs, especially in skill challenges.  Try to make them memorable and act as they would act.
  • At the table, set up a sheet that reminds me of who the PCs are:
    • Name
    • Class and race (optional, but it helps me for roleplaying)
    • Passive perception and insight
    • Defenses, including non-asset class defenses
    • Initiative modifiers
  • Have a flexible method of keeping track of initiative.  I’ve seen some DMs with little tags that they move around, or I’ve seen people using index cards.  I’ve also seen a dry-erase board, or ultimately D&D 4e Combat Manager (which I love, but not for this particular session).
  • When announcing whose turn it is, also announce who will be after that so that the next person can be thinking about what they plan to do.
  • Look for opportunities for bad guys to do cool or unexpected things – grabbing an item a PC drops, trying a stunt, etc.  This may encourage the players to think creatively, too!  Just make sure I’m ready to handle the rules for cool stuff.
  • Have the bad guys taunt the PCs or otherwise talk or yell or whatever during combat.  Make them characters, not just stat blocks with weapons.
  • When the battle is over except for a meaningless minion or two, just call it.  Don’t take the time to make the PCs hunt down that last little dude who can’t really hurt them.  Have him surrender, or just say that the PCs eventually finish him.

Naturally, these tips apply to dungeon mastering in general, not specifically for Living Forgotten Realms.  What other suggestions do you have in order for me to make this fun for myself and, more importantly, for my players?  Have I forgotten anything obvious?

Creating tokens for in-person gaming

Victory is mine!  In my last couple of posts, I’ve talked about the fact that I’m going to be serving as dungeon master for a real-life D&D game at my local game store, Enchanted Grounds, on July 24, 2010.  It will be a Living Forgotten Realms game.  I don’t own any minis (little statues to represent creatures), so I decided to make my own tokens (little flat representations of creatures) using the guidelines from Newbie DM’s blog.

After a little bit of trial and error, I succeeded terrifically.  The steps are as follows:

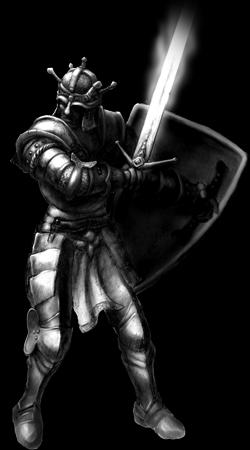
  • Find a good image for a token online, such as this one for a paladin: Paladin
  • Drag the token into PhotoShop
  • Resize the canvas in PhotoShop to be way bigger than the current image, and fill the additional background space to match the background that came with the image (I recommend using the eyedropper tool to get the right color and the paint bucket tool for the fill):Paladin2
  • Open up Token Tool and drag this new image from PhotoShop into Token Tool
  • Pick a nice border in Token Tool.  Also, go with 256 x 256 for the token size
  • Resize and re-center the image in Token Tool to look the way you want
  • Drag the image from the top right corner of Token Tool into PhotoShop:Paladin Token
  • From here, follow the instructions from NewbieDM to copy the token to a new letter-sized image (8.5″ x 11″), duplicating the token image, dragging a bloodied layer over it and making the bloodied layer semi-transparent (note that minions don’t get bloodied, so minion tokens don’t need a bloodied image – you can put one minion on one side of a token and another minion on the other side)
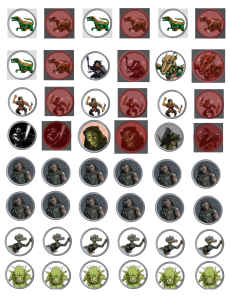
  • Rinse and repeat until you have a whole sheet of these tokens:Token Sheet

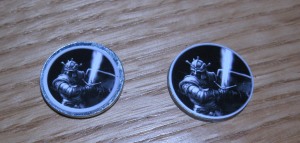
Play around with the size a little bit; I found that you actually want them to be a bit bigger than 1″ across, even though the ultimate size you’ll be punching out is 1″.  I like to have no border on my physical tokens – I like them to take up the whole 1″ circle if possible.  You’ll want to get a 1″ hole punch (I paid $10 for one at Michael’s – it’s pretty heavy duty) and a bunch of 1″ fender washers (I paid $8 for a box of 100 at the local hardware store) and a glue stick.  Below you can see my first pass at the paladin token (when I was aiming for 1″ exactly) and my second pass (when I went bigger) – the second looks way, way cooler.Paladin Tokens

The overall result was awesome, in my humble opinion.  I made tokens for the paladin I play in LFR games (Rhogar), the Avenger I’m playing in my in-person game (Kern), Barbara’s dragonborn Runepriest (Zaaria), and the enemies I’ll need for the LFR module.  These include a wererat, a gnome arcanist, some gnome skulks, some guard drakes, and a whole bunch of human bandits (generally minions).  On the back of the bandits I put goblins and kobolds (common minions, I think).

Tokens

I’m really happy with the way these turned out.  I now have all of the minis that I need for my LFR game, and the maps that I shared yesterday ended up working out great when I used PosteRazor to print them out (I’ve just printed them in black and white for now as a proof of concept, but I know they’ll be fine in color, too).  I’m feeling good about this!

I’ll make the individual token files that I created available on the Downloads page of my blog, too, so you can get them all one by one.

Living Forgotten Realms DM Preparation – Maps

As I mentioned in my last post, I’ll be a first-time DM for a Living Forgotten Realms (LFR) session at my local store on July 24, 2010.  I’ve gotten the adventure module (WATE1-1 Heirloom) and read through it once, which is a good start.  The things I haven’t been certain about are what to do about maps and what to do about tokens.  I’m pretty sure I’ll follow Ismael_DM’s suggestion in the comments of using the tutorial on Newbie DM’s blog to make flat tokens using metal washers.  More on that as I actually give it a shot.  (Thanks for the tip, Ismael_DM!)

As for maps, I’m pretty sure I’m going to stick with what I know: MapTool! While I’d love to set up a projector with my laptop to project a MapTool screen onto the tabletop (and there is a person at the local store who does exactly this), I’m not ready to lay out the cash required to build that sort of thing.

I’m pretty sure, though, that I can build my maps in MapTool and then print them out as “posters” to put on the table for my players to use.  DM Samuel has talked on his blog about doing this, building the maps in a program called GridMapper (which I probably would have loved a few weeks ago before I learned how to really use MapTool) and then printing them out to scale using a program called PosteRazor.  I haven’t tried the printing part yet, but I figured I’d start by building the maps in MapTool.  Printing can come later.

There are three combat encounters in the module I’ll be running (no real spoilers here).  There’s a battle outside of a random inn on a random street, a battle inside a shop and the room beneath it, and a battle that can take place either in a room in an inn, next to a stable, or on the city streets depending on what has happened earlier in the adventure.

The adventure describes how to build each encounter area using Dungeon Tiles.  Now, I don’t have any Dungeon Tiles myself, but Wizards of the Coast has a program called Dungeon Tiles Mapper that you can download for free and which contains images for a bunch of different tiles (not all of them, but a good variety).  Combining that with the big MapTool image download that I have, I was able to recreate the maps pretty well (in my humble opinion).  In some cases I tried to be as faithful as possible to the original, but there were some cases where I decided to make my own improvements.

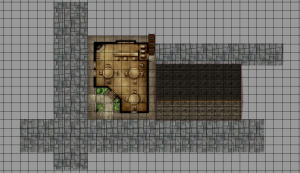
First, I created a map that serves as both the inn exterior for the first battle as well as for the last battle (the downstairs part of the inn).  I used a texture to paint the cobblestone streets, a Dungeon Tile image for the inn itself, a stairs object from the big MapTool download and a roof object from that same download to represent the building next door.Inn Exterior
Next, I created the main room of the shop from the second encounter.  This was dead simple – one Dungeon Tile image.
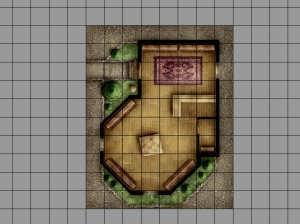
Shop Interior

After that, I created the hideout beneath the shop.  This one was much more involved.  I used some Dungeon Tiles for the spiral staircase, the blue rune, the wooden stairs and the trap door.  I used some flooring from the Dungeon Tiles to paint the stone floor as well as the wooden platform floor.  I used images from the MapTool download for everything else (tables, bookshelves, chair, chest).  I think it turned out really nicely.
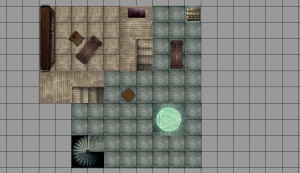
Hideout

Next up was the room in the inn.  Nothing here was from Dungeon Tiles.  The stairs, beds and windows were from the MapTool download and the floors and walls were painted using various wood textures from that download.
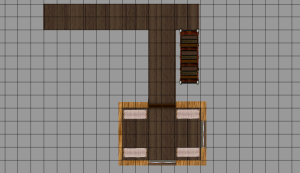
Inn Room

Finally, the exterior of the stable.  It’s a lot like the inn exterior with the streets and the roof.  The horse and cart came from the big MapTool download.
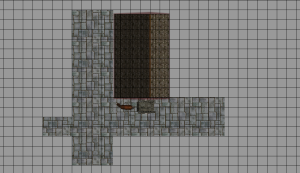
Stable Exterior

My next task will be to try to print these out using the correct scale in PosteRazor.  Wish me luck!  And as always, I’d love to hear your feedback, whether about the maps themselves or about the general idea of printing these out to use at the table (probably on card stock).

MapTool campaign frameworks

After I had done a lot of work to start building macros for my D&D game that I’m running in MapTool, I discovered something – it’s not necessary to reinvent the wheel if you don’t want to.  It turns out that a number of people on the MapTool forums have created what are known as campaign frameworks.

A campaign framework is a work of art.  It’s a MapTool campaign file that contains within it everything you need to run a campaign under a given rule set (D&D Fourth Edition, d20 System, as well as other RPGs).  The particular framework I’ve played around with is from a MapTool forum user called Rumble.  His framework for D&D 4th Edition is in this post.

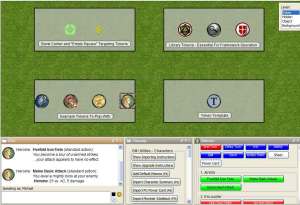
The framework is basically a campaign template.  If you want to start a new campaign, you start with the template file.  When you open the file, you’ll see something like this:

Rumble FrameworkWhat you see here is several pre-made tokens on the top part of the screen, some campaign macros (including those that will let you import character or monster info), and some macros for the sample PC token that’s selected.  The campaign file has an extensive set of properties to keep track of the sort of things my properties do and then some.  For instance, I hadn’t thought of keeping track of action points or experience points in the character sheet, but this property set does it.

Furthermore, the macros that are built in for both PC and monster tokens are all-encompassing and way cool.  They include everything I’ve done (hit point management, attack powers, skills) as well a bunch of things I haven’t done (delaying one’s turn, pulling up a formatted character sheet and power cards).  There are even macros to make editing the character stats easier, rather than having to directly fiddle around with properties.  The attack macros take into account who the target is, figure out their defenses, establish whether the attack hits or not, and so on.  It’s very, very detailed, and from what I understand it all works!

So, I learned that I don’t have to write all of these macros from scratch – others have done it for me.  Macro-writing over, right?

Nope.

See, I LIKE writing macros!  I’m not a professional programmer, but I’m pretty good at programming.  When it’s for a hobby, it’s something I just enjoy doing.  Plus, I like the idea of being able to customize my macros for my players.

Now, I would be foolish if I completely ignored the existence of excellent MapTool frameworks like Rumble’s.  If I’m having trouble with my own macros, I can see how Rumble implemented something.  I’ll certainly take inspiration from some of his ideas (such as tracking XP and action points).  But I don’t feel like using a pre-packaged setup like this because then I would deprive myself of the fun of discovering how to write my own MapTool macros.

All that said, if you’re not into the idea of writing your own macros for the pleasure of writing them and you just want a bunch of macros that work for your D&D 4e game, start your campaign from a template like this one.  There are lots of others on the MapTool forum for a variety of games, and they look fantastic to me.  I love the MapTool community!