D&D Encounters Web of the Spider Queen – Week 2

Previous Week: Week One / Following Week: Week Three

Week Two of the story picks up where Week One left off, in the Old Skull Inn in Shadowdale just after the heroes have fended off a drow invasion. We had five of the same players at the table as last week, and one player who has played D&D 3.5 but who was brand new to 4th Edition:

  • A goblin hunter named Ferrin
  • A goblin scout named Squintch
  • A goblin slayer named Snarl (who doesn’t speak but just, well, snarls)
  • A svirfneblin warpriest named Ziti
  • A drow mage named Zin
  • An eladrin wizard named Lloyd (the new player)

If you’ve been reading my blog for a while, you know that I love introducing new players to the game. Sure, he already knew how to play D&D, but he’s new to 4th Edition, so I’ll take it! I’ll also mention that there was another person in the store who was going to be playing at the later table, and he mentioned that he had seen my Week One post and recognized me. Hi there, dude whose name I failed to catch!

Anyway, after fending off the drow invasion, the svirfneblin cleric in the party received a Sending message in her head from the great wizard Elminster. He explained that he was busy fighting off drow, and that he wanted the adventurers to go get the Pendant of Ashaba from the Twisted Tower.

They soon learned from the innkeeper that the Twister Tower is where the lady of the city, Addee Ulphor, lives. However, the goblins in the group were more interested in checking out the inn’s cellar, where these drow invaders had come from.

Sidebar: Svirfneblin became Smurf Zepplin at our table. I’m picturing one of those giant balloons from a parade now. Awesome!

Smurf Zepplin

Let’s go off the rails!

All right, sure. So, the cellar was a pretty typical storage cellar, except for the clear drow tracks coming from a broken, heavy-looking wooden door in one corner. On the other side of the door was a long ladder heading down into darkness (note that I was making all of this up on the fly, but I faked it well).

Elminster jumped in to the svirfneblin’s head again, complaining about how Lady Ulphor wouldn’t listen to him when he told her not to keep the Pendant in the tower. Ziti used the reply function of the Sending ritual to tell Elminster that the party was ignoring him and instead going into the Underdark beneath the Old Skull Inn.

Well, that got the old wizard’s attention! With the goblins at the bottom of the ladder and starting to explore the long tunnel down there and Ziti halfway down the ladder, Elminster whipped up a Mass Sending to yell at everybody and tell them how important it was that they help at the tower.

Heavy-handed of me? Maybe. I was actually expecting them to still ignore Elminster, in which case I would be making up D&D Encounters as I went along! Hey, I like improv. Fortunately, the party did decide to go check out the tower after all.

Note that they didn’t ask any questions about the tower – let’s roll!

The direct approach

Now, the adventure gives the party lots of options for approaching the tower carefully. A few PCs can scout ahead and enter the front door. The whole group can be stealthy. They can try a water approach, coming to the dock on the back of the tower.

Not my group! “Hey look – there’s the front door. I go knock on it.”

Okay then. The door was damaged and off its hinges, so the party walked right in.

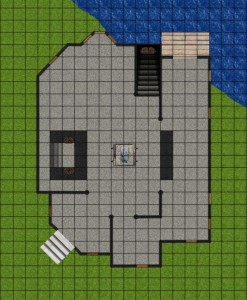
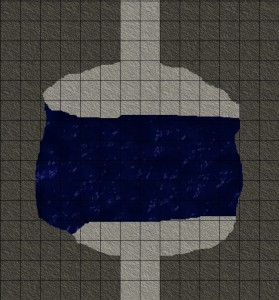
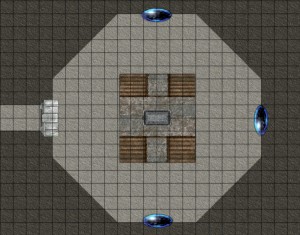
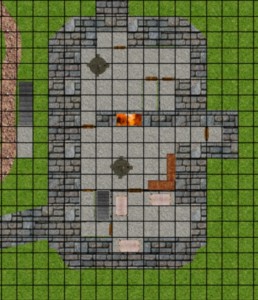
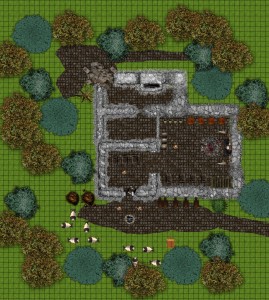
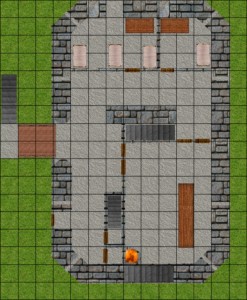
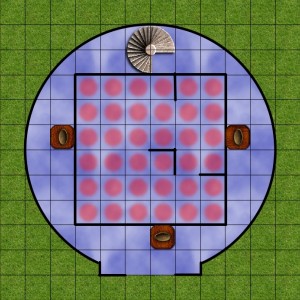
Tower of Ashaba - Gridded

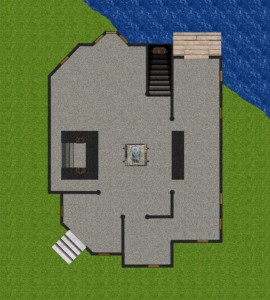
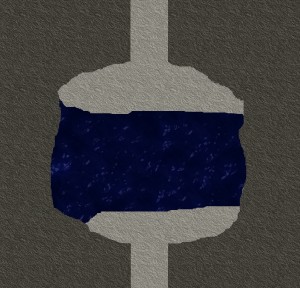
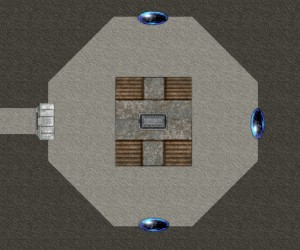
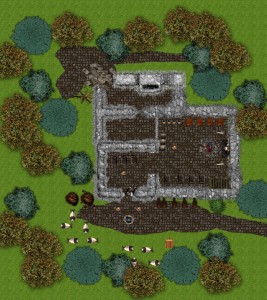
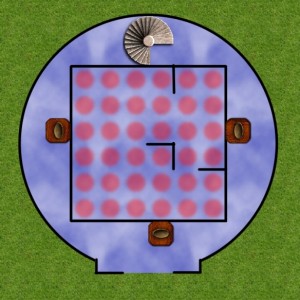
Tower of Ashaba - No Grid

In the middle of this large area, they saw Lady Addee Ulphor. She was backed against a sepulcher and looking nervous. She told the party to leave, “… or else they’ll kill me.” With this, she glanced nervously to the left and right.

A little back and forth with Lady Ulphor followed, until eventually Zin the drow decided to make an Insight check. Ferrin and Ziti did likewise. Ferrin got the feeling that something wasn’t quite right here, but it was Ziti who rolled a critical success on her Insight check and saw that Lady Addee was in fact not Lady Addee at all, but some kind of shapeshifter disguised to look like the Lady.

Attack!

This combat was against the shapeshifter, three drow templars (soldiers) and two drow informants (sneaky guys who can become invisible). Since we had six PCs instead of the five that the adventure assumes, I was planning to throw in an extra informant.

The sneaky, invisible informants won initiative, and I just had them hang back and hide in round 1, maintaining their invisibility. Poor Snarl went next; as a slayer, he was the closest thing the party had to a defender tonight. He charged in and attacked the lady/shapeshifter.

Then came the templars. Snarl was soon in deep doo-doo.

The ranged characters hung back while the cleric and scout started mixing it up, but they soon discovered that the spear-wielding templars had defender auras and could beat the crap out of them if they shifted.

In round three, the shapeshifter was bloodied, so she started retreating. Meanwhile, the informants finally got close enough to start attacking. Squintch was soon unconscious, and Ziti had a moment of awesome by letting Squintch make a saving throw that ended up getting him a 20 and back in the action.

I had decided by the end of round two not to bring in the extra informant; the party already had their hands full. Lots of bloody PCs were limping around the battlefield by the time the drow were wiped out, and the shapeshifter had gotten away, swimming across the river.

I fear that if I had used the extra informant, I might have some dead PCs on my hands. As it stands, Snarl and Squintch are down to two or three healing surges each already. Eek!

Aftermath

So, it was a much tougher fight for the party this week. They explored the tower and saw that the real Lady Ulphor had apparently escaped, but that the Pendant of Ashaba was nowhere to be found. Furthermore, they found drow tracks not only coming UP from the cellar, but also going back DOWN. It seems that the party’s path lies below…

-Michael the OnlineDM

OnlineDM1 on Twitter

May of the Dead: Spooks Under Silverymoon

My contribution to the May of the Dead blog carnival is an adventure for low-level D&D 4th Edition adventurers: Spooks Under Silverymoon. You can download the PDF here, and maps for use in MapTool (scaled to 50 pixels per square) are below.

I originally created this adventure for my wife, my wife’s brother, and his wife. My brother in law and his family were visiting us for the week of Christmas 2010, and I introduced them to D&D. We first played the Castle Ravenloft board game, then created characters for a real D&D game.

The first adventure I ran for them was a Living Forgotten Realms adventure – LURU 2-3 Forgotten Crypts, Hidden Dangers (which you can download here). They enjoyed it very much, and they wanted to know what happens next. So, I spent most of the next day creating what happens next, and Spooks Under Silverymoon is the result.

The basic plot is that the Lady’s College of Silverymoon has started to become infested with ghosts, and the party is hired to go into the catacombs beneath the college to figure out why. It’s a fairly straightforward adventure, with the potential for clever players to bypass combat in a few places.

I’m considering this as a first draft for publication, since I have only run the adventure with a party of 3 PCs before but have written it here for five. Feedback is welcome!

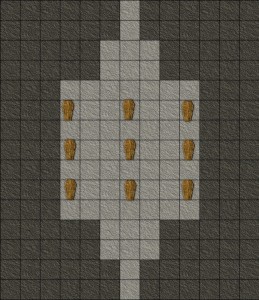
Zombie Chamber - Gridded

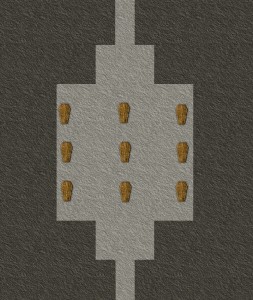
Zombie Chamber - No Grid

Fetid Pool - Gridded

Fetid Pool - No Grid

Square Chamber - Gridded

Square Chamber - No Grid

Ghost Prince Chamber - Gridded

Ghost Prince Chamber - No Grid

-Michael the OnlineDM

OnlineDM1 on Twitter

D&D Next – First playtest report

I had the pleasure of having my gaming group over to the house on Sunday for our first playtest of D&D Next. We played for about 4 hours, with the first 30 minutes being about character selection and rules discussion and the last 30 minutes for talking about the session and providing feedback.

First, I want to give a big shout-out to the Weem, who provided a great map for the Caves of Chaos that I used in my MapTool + projector setup at the table. It’s so nice to not have to draw the maps myself! I’ll admit that I was a moron and that it took me a while to realize that each square represented 10 feet instead of 5, but that’s not Weem’s fault – the map says it quite clearly!

Preparation

Since I always run my games via MapTool, even in-person, I started by plopping the Weem’s map into a fresh campaign file, and then built some monsters. I began with my own 4e campaign framework, and then stripped things down to work for D&D Next. This was mostly easy, though it was a bit messy to write a macro that correctly handles advantage and disadvantage. I got there, though!

There are 34 monsters in the Bestiary for Next, and I prepped about 20 of them prior to the game. They’re pretty quick to put together, fortunately. I like that! Note that prepping them means that I’ve set up tokens in MapTool with an appropriate image, the right stats (hit points, AC, ability scores, speed, XP, etc.), buttons to track damage and buttons for each attack that the monster has.

The characters

Since we had six players and only five pre-generated characters, the party chose to double up on the dwarf fighter. Since it’s a hill dwarf, the first player to pick the character decided that it was a hillbilly dwarf. He named the character Bill to reflect this, which led the person playing the human cleric of Pelor to name his character Ted. The dwarf cleric of Moradin then became Rufus.

The party was rounded out with Gimli the dwarf fighter, Shazzam! the high elf wizzard (she likes the letter Z – and exclamation points), and Stealthy the halfling rogue (my wife likes Once Upon a Time, even though her character wasn’t a dwarf).

I’ll note here that one of my friends was interested in the rogue until he discovered that hiding takes an action. That was a bummer for him.

The adventure begins

My players tend to be more interested in killing bad guys and taking their stuff and less interested in plot. This worked fine with the Caves of Chaos, which does not come with a plot by default. I gave my players some choice among the potential plots listed in the adventure, and they liked the idea of seeking the piece of the Eye of Gruumsh that had ended up in the Caves of Chaos. Off we go!

The group decided to look for tracks near the first cave they saw (Cave A on the map), and a good Wisdom check from Ted revealed kobold tracks. When he went closer to the cave mouth to listen, some kobolds revealed themselves and combat began.

I decided to run this combat in the “theater of the mind”, so we rolled initiative and started killing kobolds. They only had two hit points each, which meant that both fighters and the wizard could reliably kill one kobold per turn (the fighters with the miss effect on their attack and the wizard with Magic Missile). The little lizard creatures went down pretty quickly. This entire combat took all of 10 minutes and 15 seconds. Not bad for fighting nine kobolds with six PCs!

The kobolds didn’t have any treasure or distinguishing markings, so the party left the bodies alone and moved into the cave. They saw a passage sloping down to the right, and to the left was a passage with a nasty smell. They decided to investigate the smell and found a garbage pit full of rats.

Rat stomping

Combat number two was another “theater of the mind” one, with the tiny rats swarming all over the PCs. I decided to throw 24 rats at them – four per PC. The rats started nibbling at PC ankles, and the characters started stomping on them.

When the wizard’s turn came around, she decided to use Burning Hands – our first Vancian spell! She waited until her friends got out of the way, then toasted a dozen rats.

Bill the dwarf fighter strode boldly into the garbage pit and took out the dire rat in one shot, and when the three surviving rats had a turn in round three, they fled. This combat took only 13 minutes; not too shabby.

Traps!

From here, the party started heading down the slope, only to trigger a pit trap. Three PCs fell in, and attracted the attention of four kobolds. Our rogue spent the first round of combat fiddling with the trap to get it open so that the fallen PCs could climb out.

We noticed here that the jumping and climbing rules make pit traps not very scary once they’ve triggered. Getting out of the trap is easy enough; unless the walls are particularly slick, you can climb right out at half speed. As for the people who didn’t fall in, they could jump a number of feet (edit: I originally said “squares” instead of “feet here – not what I meant!) equal to their Strength score, which was at least 8. Add in two feet for extending your arms, and even the wimpy wizard could jump, grab the far edge, and pull herself up. Maybe I was too easy on my PCs here, but that’s the way I ran things.

Anyway, the fight against these four kobolds was pretty easy for the party since they had bright light, giving the monsters disadvantage on their attacks. As I wrote about recently, disadvantage is a big deal, equating to about a -4 or -5 to attack. Still, with all of the shenanigans surrounding the pit trap, this combat took 19 minutes. It’s amazing that this feels like a long combat!

The little boss – a battle with a map

From here, the gang noticed that the passageway eventually ended at a large chamber filled with dozens of kobolds. I decided that this chamber would probably actually have a door, so I created one on the fly. They decided to explore a different passage instead, finding themselves at a locked door.

No problem – we have  a rogue in the party! The pregen rogue has a very cool ability that says she can’t roll below a 10 for any skill that she’s trained in. So she rolls, and if it’s less than 10 we treat it as a 10 on the die. This means that opening locks is no worse than a 16 for her, which popped the storage room right open.

The most interesting item in this room was a cask of wine, which one of our fighters created a hole in with his axe. He then replaced the water in his waterskin with wine.

From here, the next clear direction was down the hall to a chamber that had three tougher-looking kobolds standing around and talking. A frontal assault was declared, and we rolled initiative. I decided that, since there were two waves to this fight and the enemies had the potential to actually take a hit and keep fighting, we would use the map and minis.

All three of the “elite” kobolds were dead by the end of the first round. In the second round, six more regular kobolds came out of a far room, escorting their chieftain. The chief actually had some hit points, but it didn’t matter – he never landed a blow with his axe, even though he was getting two attacks per round. He always had disadvantage thanks to the bright light from the wizard. The whole battle took just under 20 minutes.

Getting a little bit of treasure in the chief’s room was a nice find for the party, although the wizard continued to be disappointed with the lack of hits from her Detect Magic. No magic loot here, guys – this isn’t 4th Edition any more!

Kobold genocide?

The only remaining chamber in this part of the Caves of Chaos was the one that had dozens of kobolds in it. Back down the hall the party went, checking for traps and then opening the door.

They saw a group of 36 adult kobolds in their living quarters, with eight kobold hatchlings in the back corner of the room. A debate ensued among the party members about what to do – kill them or leave? Bill the fighter won initiative and decided to step into the room, slaughter a kobold, and then step back.

At this point, the kobolds reached for their daggers and started throwing, mostly at Bill but some at Gimli who was next to him. Rufus, the cleric of Moradin, was standing right behind them, which meant that her Guardian ability kicked in – all of the kobolds would have disadvantage on their attacks.

Thankfully, I was using the computer to roll the dice. Having to roll twice for each of 35 kobolds would have been a major pain in the butt. When all was said and done after those 35 attacks, the kobolds had only dealt 5 damage – 5 dagger hits for 1 damage each. Disadvantage is POWERFUL! They only needed to hit AC 15, but you only have a 12% chance of doing that when you’re just +1 on your dagger attack and you have disadvantage.

The rogue, the wizard and the cleric of Pelor shot some bullets and magic at kobolds as they backed down the hallway. The cleric of Moradin stayed in place to provide her fighter allies with some protection, but she refused to slaughter the kobolds.

In round two, we had 33 kobolds attacking the fighters with disadvantage. A few more points of damage landed, but nothing too serious. At this point, the cleric of Pelor left her fighters alone with the kobold menace.

Now the kobolds could show what they could do. Since they were out of the bright light, the Guardian was gone and they outnumbered the fighters, this meant the kobolds now had advantage on their attacks. Spears and daggers started landing left and right, and before half of the surviving kobolds had acted, they had dropped both fighters to unconsciousness. The kobolds slammed the doors to their chamber.

The surviving party members came back, stabilized their fighters, and dragged them out of there. The aborted kobold massacre took about 18 minutes, including some time at the end that was just about the dragging of the fighters out of the kobold caves.

Opinions

I’ll put up another post later with our actual feedback from the playtest, but I’d say it was a successful test overall. There’s no way we would be switching from 4e to this game in its current state, but everyone seemed to feel like it has real potential. The one person in our group who’s been playing for 30 years especially enjoyed the game.

We’ll keep on testing, of course. There are plenty of things that we weren’t crazy about, but we feel like this game can be a good one. Definitely a promising start!

-Michael the OnlineDM
OnlineDM1 on Twitter

D&D Encounters Web of the Spider Queen – Week 1

Previous week: Week zero / Following week: Week two

And so the adventure begins!

We had a total of twelve players for two tables of D&D Encounters at 5:00 PM at Enchanted Grounds today. I had four of the same five players from last week (father, son, daughter, another boy) plus two more players (adults). Our party consisted of:

  • Two goblin hunters (that is, hunters who happened to be of the goblin race, not people who hunt goblins) named Ferrin and Pointy
  • A goblin scout named Squintch
  • A goblin slayer named Snarl (who doesn’t speak but just, well, snarls)
  • A svirfneblin warpriest named Ziti
  • A drow mage named Zin

They decided that the four goblins were traveling together, and the drow and svirfneblin were another pair of travelers. The drow saw himself as a spy for the underdark. Hm. This could be interesting.

Six adventurers walk into a bar; specifically, the Old Skull Inn of Shadowdale. After some suspicious glances at the rather monstrous party before her, Ghessla Silvermane welcomed the group to her inn (extracting a promise that they weren’t in Shadowdale to cause trouble – especially the drow). She waved her burly employee Thrad over to start taking some meal orders. The Shadowdale Special was popular with the goblins (especially after the drow mage used Prestidigitation to make their meals wiggle).

The goblin hunters explored upstairs, finding that half of the second and third floors were under construction for some renovations. Downstairs, the goblin scout made friends with a smelly old man called Old Dogsbreath. He started raving about seeing drow in the woods, which Zin was quite curious about.

An attractive woman with long, dark hair told Zin that she was known as Khara Sulwood, and she had recently moved to Shadowdale. She mentioned that Doust Sulwood was her great-grandfather; Zin recognized the name as belonging to a lord of Shadowdale long ago.

A pair of dwarves welcomed Pointy into their merry drinking games.

After a while, folks started heading for bed. Ghessla pulled some of the party members aside and mentioned that allowing people into the Underdark was strictly forbidden under the laws of Shadowdale, laws that just aren’t worth breaking for less than, say, 100 gold pieces. She’s a fun one, that Ghessla.

When down in the inn there arose such a clatter…

Wouldn’t you know it, the quiet of the night was broken by a commotion downstairs. Everyone rushed down to find that the inn was under attack by drow! One invader attacked Ghessla, who crumpled to the ground, her light going out (I was using lighting features in MapTool for the first time, so this was cool). Old Dogsbreath was menacing a drow using his rusty dagger, and the two dwarves were in the process of surrendering when the heroes charged down the stairs.


Sounds and sights of more fighting were noticed outside the inn, so it was going to be up to this ragtag group to save the Old Skull Inn themselves.

Fortunately, they were up to the task! Noticing that I had used a female drow picture for the archer, Zin (our party’s drow) told the gang to try to get after her, since female drow tended to be nasty. Clouds of darkness started popping up left and right, especially once more drow came up from the cellar in round two, but a couple of PCs used their amulets from the character creation week to make the darkness go away.

Poor Snarl couldn’t land a hit on the drow he went after, even burning his action point. He soon found himself bloodied and poisoned, with Ziti having to heal him twice.

As the battle wore into the third and fourth rounds, the adventurers got the upper hand and turned the tide once the strikers started rolling well. The goblins and svirfneblin discovered that I would let them move freely under the tables of the inn, which was great fun. Before long, the inn was littered with the corpses of vanquished enemies, and Ghessla was popping up off the floor, having only played dead.

As the inn patrons were thanking the party and everyone was assessing the damage, Ziti the svirfneblin suddenly heard a voice begin speaking in her mind: “This is Elminster…”

And on that note, we wrapped up week one. Pretty cool stuff!

-Michael the OnlineDM

New maps from Tobold – Iron Keep from Reavers of Harkenwold

A few months ago, Tobold from Tobold’s Blog reached out to me for maps from Reavers of Harkenwold. I ran the adventure last year (review here) and had put up my own recreated maps for the adventure on my blog. (I later discovered that the official maps were available from the Wizards of the Coast web site for D&D Insider subscribers.)

Tobold made use of some of my maps, but he also took the time to create his own versions of the Iron Keep main tower maps using Campaign Cartographer. He was gracious enough to allow me to share his versions here as well. These maps, along with all of my other maps, can be found on my Map Library page. As you can see, his versions are a significant upgrade over what I had originally made!

Grand Tower 1st floor by Tobold

Grand Tower First Floor - My version

Grand Tower 2nd floor by Tobold

Grand Tower Second Floor - my version

Grand Tower 3rd floor by Tobold

Grand Tower Third Floor - my version

Thank you to Tobold for sharing these maps! And if anyone else wants me to share their maps on my site, please reach out to me at onlinedungeonmaster@gmail.com.

Five new maps from Josh Cayer

Online Dungeon Master is usually a one-man operation (that’s me), but I welcome guest posts and contributions. Today, I’m pleased to share some maps and MapTool files created by one of my readers, Josh Cayer. These maps have also been added to my Map Library.

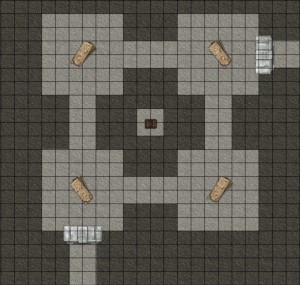
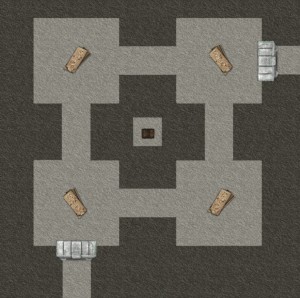
Wizard Tower

The MapTool file can be downloaded here. Josh explains:

It is a combo puzzle/encounter….I have left the solution in place.  Just remove the Orbs from the map.
Upon entry, the illusionary wizard at the bottom of the map appears and tells the players they must place 8 orbs on the map.  The orbs cannot “see” each other horizontally or vertically.
Like I said, there are no orbs on the map at the start.  A new one can be obtained from any of the three bowls.  Only one orb can be in play at a time.  Once an orb is placed, it grows to fill the square, making it impassable.
Once an orb is placed, moving next to it results in a small amount of lightening damage.
A misplaced orb can be moved but there is lightening damage.
The beholders, if killed, continue to come back until all the orbs are placed.

Wizard Tower by Josh Cayer - Gridded

Wizard Tower by Josh Cayer - no grid

Valley map

I particularly like this one. The MapTool file is here.

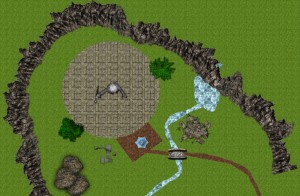
Valley by Josh Cayer - Gridded

Valley by Josh Cayer - no grid

Cave complex

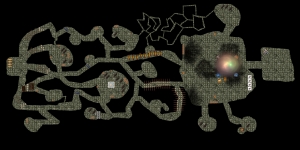
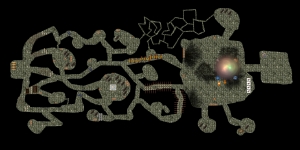
This is a gigantic map! I’ve done what I can to reproduce it from the MapTool file with good resolution, which means that it’s a big file.

Cave Complex (very large) by Josh Cayer - Gridded

Cave Complex (very large) by Josh Cayer - no grid

Ruined temple

The MapTool file for this one is here.

Ruined Temple by Josh Cayer - Gridded

Ruined Temple by Josh Cayer - no grid

Small ship with dock

The MapTool file is here.

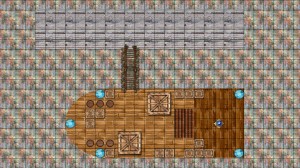
Small ship and dock by Josh Cayer - gridded

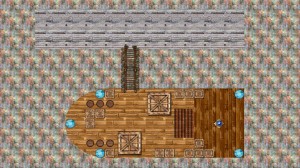
Small ship and dock by Josh Cayer - no grid

Thank you so much to Josh Cayer for submitting these maps! I’ve already received some more maps from another cartographer, which I’ll be posting about soon. If you have maps you’d like to see hosted by the Online Dungeon Master, please send me an email at onlinedungeonmaster@gmail.com.

– Michael the OnlineDM
Maps! Lots of maps! And all in one place, too!

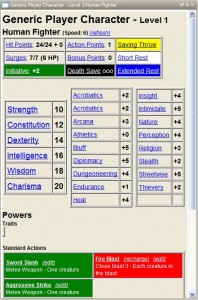
I’ve just returned from a very relaxing vacation, during which I did some extremely cool stuff with nice-looking PC character sheets in MapTool (a preview image is below).

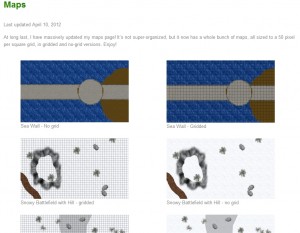
However, since it’s going to take me a long time to write posts about the ridiculous quantity of work I did to put that together, I thought I’d get back into the blogging groove by pointing out that I have updated my Maps page.

Did you know that I had a Maps page? It’s under the Downloads section of my blog. I originally set it up in the earliest days of the blog, back when I was using OpenRPG and Gametable. I sort of abandoned the page, even though I kept creating maps.

I shared most of the maps I created on various places on the blog, but I thought it was high time to put them all on one page so that people who are looking for a variety of maps can find them all at once.

I haven’t done much in the way of organizing the page yet, though maps from the same adventure are grouped together (Reavers of Harkenwold, D&D Encounters Dark Legacy of Evard, etc.). These are all created in MapTool, and I wouldn’t call them super-fancy, but they work great for games in MapTool or Fantasy Grounds or similar programs. I’ve scaled them all to a 50-pixel grid, and I’ve provided versions both with and without the grid for nearly all of the maps.

As of this writing there are between 40 and 50 maps on the page, and I plan to keep adding maps to the page as I create them and post about them.

Enjoy!

-Michael the OnlineDM
ZEITGEIST Session Three: Recap and Review

Previous sessions: Session one, Session two

Our group gathered in mid February for our third session in the Zeitgeist campaign from EN World. This session took us to the climactic finish of Adventure One: The Island at the Axis of the World.

Beware the cannonballs!

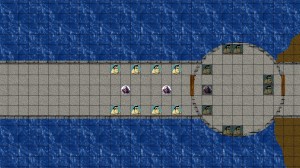
Since my group had ended session two by going a little bit off the rails, I had to create a new encounter to kick off session three. The group was racing along a sea wall surrounding a fortress, trying to follow the trail of some fiery, smoky being that had destroyed a ship in the harbor before leaping onto the wall and into the fort. Unfortunately for our heroes, the wall was being viciously fought over by the defenders upon it and the attackers bombarding it from ships in the harbor.

Sea Wall Battle - showing enemy positions

The battle is fairly simple. The party is approaching along the wall from the left side of the map. Four Rebel Musketeers (custom enemies) are on the north side of the wall, shooting at ships in the harbor, and four more are on the south side of the wall, doing the same thing. Half of each set of musketeers have their muskets loaded and ready at any given time. Two Rebel Soldiers (from the published adventure) are between the rows of musketeers, giving orders.

At the end of each round, a cannonball comes flying across a random row of the wall around the tower, attacking creatures in that row and on either side of that row. This can cause characters (both PCs and enemies) to be pushed off the wall and into the water.

Once the PCs get within ten squares or attack the enemies, the rebels notice them and turn their focus from the ships to the PCs.

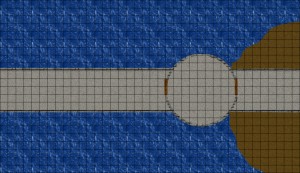
The full encounter is available here (Beware the Cannonballs), and battle maps scaled to a 50 pixel per square grid are below.

Sea Wall map - with grid

Sea Wall map - No grid

Where did he go?

Once the party had conquered the sea wall tower, they moved along the inner wall until they met up with allied soldiers who had succeeded in breaching the wall. The fiery creature they were pursuing was nowhere to be seen, but the commanding officers requested the party’s assistance in dealing with some Danoran prisoners in a brig.

Negotiations with the prisoners went well and led to some intelligence about an entrance to the central tower of the keep through the sewers. The Danorans also gave the party a key that would open a door on the roof of the tower in case they ended up there. These discussions were ultimately interrupted by screams and the sound of running feet across the roof of the brig – the fiery creature was back!

Our heroes rushed into the streets to see the fiery creature, revealed as an eladrin, using a strange orb that caused the inner fortress wall to disappear, replaced by wilderness for a few moments. The fiery eladrin ran across the tops of the hedge maze within the inner fortress wall and then started scaling the central tower. The PCs decided to rush after him.

Vesper, the scout in the party, had found the token back in the mines that gave him tremendous jumping power, so he decided to use that power to go bounding after the eladrin. He hopped along the tops of the hedges in the maze and found himself at the base of the tower, staring up as the eladrin finished ripping out bricks, tearing what looked like a gold wire in the wall (gold circles prevent teleportation in this world) and then disappearing – presumably inside the tower. Vesper climbed to the roof, used the key on the roof door, and started sneaking downstairs.

Meanwhile, the rest of the party found themselves dealing with an irate fey creature named Ghillie Dhu who was blaming them for lighting his hedges on fire (when in fact it was the eladrin who had done so with his fiery aura). Some quick negotiations followed, including a bit of a seduction by the female eladrin in the party, Andraste, and Ghillie Dhu was satisfied that the party was chasing the eladrin who burned the maze, not allied with him. Ghillie Dhu led them through the maze to the base of the tower, where they found a rope had been lowered by Vesper.

Level 1 PCs fighting a level 20 monster

Inside the tower, Vesper had gotten himself into a good eavesdropping position. He was able to see the eladrin, badly bloodied after fighting a bunch of guards in the tower, having a heated exchange with Duchess Evelyn of Shale (the Risuri noblewoman who had invaded the island) and a tiefling named Nathan Jierre. The eladrin, referred to by the duchess as Asrabey, had clearly beaten the duchess and the tiefling, and the duchess was trying to reason with him. Vesper bided his time, readying an attack in case Asrabey tried to hurt the duchess or the teifling any more.

The rest of the party was working on climbing the rope. Some of the PCs made their Athletics checks quickly, but our poor docker bard, Corduroy, struggled and struggled. As the party made it onto the roof, they saw the open door and peaked in, communicating through hand gestures with Vesper below.

Once Corduroy finally made it to the roof, he danced a jig of happiness…

Which made some noise, attracting the attention of Asrabey, who finally looked up and saw Vesper above him. His rage set off Vesper’s readied action, and we were in combat!

This was a beautiful moment in the adventure, where the writer, Ryan Nock, provides the DM with two ways to run the encounter. The default approach is to run Asrabey as an injured level 20 creature with only 27 hit points. This makes him practically impossible to hit, unless a PC rolls a natural 20, uses a power that deals damage without an attack roll (like Magic Missile) or uses a power that still has an effect on a miss (like most daily powers). At the same time, his attacks always hit the PCs unless he rolls a 1.

Alternatively, the battle can be run with Asrabey as a level 2 solo creature. I went hard core – he was level 20.

Combat was quick and deadly. Asrabey set his shield to work chewing on Vesper as the rest of the party rushed inside. The eladrin set up a zone that would soon erupt into flames. Andraste the witch used a power that would deal damage to Asrabey every time he hurt one of Andraste’s allies.

The party started to worry that they had bitten off more than they could chew, but they were doing their best to make use of daily powers and creative effects. Asrabey took a few hits and was clearly teetering, but Vesper was unconscious and laying in the area that would soon erupt into flames.

Asrabey began his turn, the flames rose, and Vesper was burned to death…

At which point Andraste’s effect caused Asrabey to take a few points of damage, killing the eladrin.

My players, including Vesper’s player, literally jumped to their feet, cheering and high fiving one another. It was one of the best moments I’ve had as a DM. Even though a PC died, it was a huge victory that was hard-won. They earned it, 100%.

In the aftermath of the battle, the party managed to steal Asrabey’s sword and cloak – high-level items that they really shouldn’t have and that are quite illegal for them to have taken in-game. But that’s okay… I don’t mind there being consequences later!

Thus ends adventure one of ZEITGEIST. It’s a very cool campaign so far, and I’m hoping to start adventure two as soon as we can get everyone’s schedules to line up. I’ve just learned that two of my six players are moving away in August, and there’s a chance that two more might be going eventually as well, so I hope to make some progress on the campaign while we still can.

-Michael the OnlineDM
Madness at Gardmore Abbey – MapTool campaign file

At long last, I have finished putting together my complete MapTool campaign file for the Madness at Gardmore Abbey adventure. Huzzah! You can download it right here.

I’m pretty sure this is the largest MapTool campaign file I’ve built to date (around 33 MB), and I’m quite happy with it. It has all of the maps, all of the monsters, all of the Deck of Many Things tokens, all of the traps. I’ve got a template token for PCs and a template token for monsters.

The campaign file consists of eight maps with encounters from the adventure, plus a ninth map that’s a holding pen for NPCs, the Deck tokens and some background stuff for the campaign (library token, templates). The maps are labeled according to the encounter numbers that are included on the map. For instance, the map named 01-04 Village has the encounter maps that take place in the outer part of Gardmore Village (Encounter 1: Main Gate; Encounter 3: Double Talk; Encounter 4: Ruined Garrison; plus the overland map of the abbey and the map of Winterhaven).

Because of the number of maps that are in this adventure, I’ve included Wolph42’s Bag of Tricks macros – specifically the Teleport Pads. To use these, you’ll need to click the “Back of Tricks Macros” button in the Campaign pane and then the Initialize Pads button. Once you’ve done that, you can drag tokens around the various maps by dragging them to the teleport pad corresponding to the map where you want them to go. The 01-04 Village map has the portals to every other map.

I hope that folks find this campaign file to be useful. I know that I’ve had a lot of fun with Madness at Gardmore Abbey so far, and I’m looking forward to running the rest of the adventure!

– Michael the OnlineDM
D&D Encounters – Neverwinter week 13

I loved DMing D&D Encounters over the summer, but once the fall came and my Wednesday night bowling league started up again, I had to bow out. However, I still agreed to be the backup DM when needed. I ran a table in week 8 with several weeks’ notice, and tonight I ran another table with about 24 hours’ notice.

Being out of the loop and then jumping in to run a session of Encounters in a hurry is a little bit tricky. I had read the synopsis of the whole adventure when it first came out, but I certainly hadn’t read every session. I did my best to glance over what had happened in weeks 11 and 12, and then dug into prep for week 13.

SPOILERS AHEAD

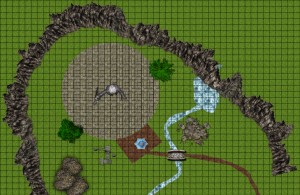
Since I run my games using MapTool on my laptop and a projector to put the map on the table, my first order of business was to create the map for this session. It would be lovely if WotC would make the D&D Encounters maps available to DMs in high-resolution JPG format rather than just as physical posters in the Encounter packet, but I’m up for the challenge of creating the maps on my own as needed. Here is my version of the Week 13 map:

The session begins with the party having chased the Lost Heir of Neverwinter through the streets of town, following the blue flames the Heir has left behind. They discovered last session that the Heir is evidently female, and in this session came the big reveal:

The Lost Heir is actually Seldra.

And moreover, Seldra was causing trouble. She had put up a magical dome of blue fire in the middle of the town square, surrounding herself and the dragon-turned-statue. She seemed to be doing something to mess with that dragon, and the PCs couldn’t do anything about it until they got the dome of flames out of the way.

I had one brand-new D&D player at the table tonight, along with one person in his second-ever session, plus four regulars. The new guy was playing a Binder Warlock, and he jumped right in by using his arcane knowledge to start disrupting the dome of fire. The rest of the party joined the effort as well, some of them physically hacking at the dome, one warpriest praying to his god for assistance, and so on.

Ultimately, the dome was brought down, and the party attacked right away. Seldra summoned some fire elementals and the fight began.

The fire elementals were a little bit strange in that their attacks simply gave the PCs ongoing damage. Being hit by three elementals was no different than being hit by one (since multiple instances of the same ongoing damage don’t stack). The one exception I made was for a critical hit, which I ruled would deal 5 damage right away and ongoing 5 damage (save ends).

Pretty soon, most of the party was on fire. The new guy playing the Binder asked if jumping into the fountain in the square would put out the flames – you betcha! Great idea; I love it when players think creatively.

The Bladesinger in the party was surrounded by elementals and Seldra, and soon found himself in deep trouble. Fortunately, the party has two healers, who kept the Bladesinger up. Unfortunately, the Bladesinger ended the battle without any healing surges left.

Seldra made for a fun foe. I waited until round 3, when she was bloodied, for her to both use her action point and to start sucking the life force out of the elementals – a truly fun mechanic. The dwarf warpriest in the party prevented a ton of damage in one round by using a power that gave everyone Resist 5 All, nicely negating both the ongoing damage from the elementals and Seldra’s fiery aura.

After six rounds of fighting the Bladesinger dropped Seldra with a Magic Missile, and the PCs decided to spare her, since it was clear she wasn’t in her right mind.

Best of all, the session wrapped up in about an hour and a half, which let me get to my bowling league on time. I had no time to warm up, but I guess that’s good for me since I bowled a 227, a 218 and a 200. For a guy whose average was 182 coming into this week, that’s a heck of a series!

So, victory for the party and victory (at bowling) for the DM. Huzzah for everyone!

-Michael, the OnlineDM (OnlineDM1 on Twitter)