Review: DM Minion

A few weeks ago, around the same time that I was approached by BannersOnTheCheap with the offer of free stuff in exchange for a review, I was also approached by Goathead Software with an offer of free stuff in exchange for a review. In this case, the free stuff consisted of their tools for D&D 4th Edition: DM Minion and Player Minion. Yes, I’ve hit the big time now, folks; free stuff is coming my way thanks to my influence (note: tongue firmly in cheek here).

The timing of the offer was good. I had recently received an iPad as a gift from my awesome wife, so I was in a position to be able to try out these kind of apps in a format that makes sense. I spend most of my time on the DM side of the screen, so I would be focusing on DM Minion.

The basic idea of the app is that it lets you run combat efficiently. It’s intended to help you keep track of initiative, hit points, conditions and monster power usage. Several other free tools are out there for this purpose already (MasterPlan and D&D 4e Combat Manager are two that I’m familiar with, and I know there are others), but DM Minion is a paid app (I believe its list price was $4.99, though as I said I was given a free review copy). One of its killer functions is that you can import characters and monsters from the D&D Insider tools… more on that in a minute.

Downloading the app was easy enough. It comes with a 17 page Quick Guide PDF to help you navigate the program. Using it takes a little learning, but the Quick Guide helps.

The highly non-intuitive thing that you have to learn with DM Minion is that it’s not really a stand-alone app; you use it in conjunction with a free account on the Goathead Software web site. From the web site, you can import your .dnd4e files and your .monster files. Once you’ve imported them to your Goathead account, you can access them in DM Minion.

So to recap, the steps are:

  • Create characters/monsters in the DDI tools (Character Builder and Adventure Tools – Monster Builder)
  • Export the .dnd4e / .monster files from the DDI tools to your computer
  • Log in to your Goathead account
  • Upload your .dnd4e / .monster files to your Goathead account
  • Within the DM Minion app, import the PCs / monsters from your Goathead account

I compare this to the fantastic (and free) Power2ool site (which is not built for running combat, to be clear), which integrates directly with the DDI Compendium to allow direct monster import; Power2ool does it right. With Power2ool you can directly import monsters into the program rather than going through the export to PC – import to web site steps (let alone the import to web site – then use in app step). I’m guessing that there are some technological limitations on the iPad that make this impossible or something like that, but the extra steps involved with getting monsters into DM Minion are a major pain.

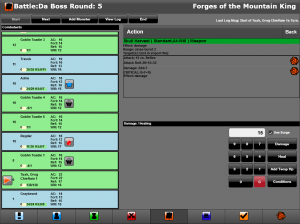
The main combat tracking screen

As for functionality, DM Minion seems to do what it promises. It’s pretty easy to track initiative (including delayed actions and readied actions), track monster HP, track conditions (including the variety of times that they can end), add new combatants to the fight, track which monster powers have been used, etc. It’s not so user-friendly that it blows me away with its simplicity, but it does what it needs to do.

My verdict: If you really want to use an iPad or another tablet to track your combat, DM Minion can do the job if you’re willing to jump through the hoops to get it all set up. I personally use MapTool to do all of this, of course (plus building and editing monsters), and if I weren’t using MapTool I’d probably go back to the free DnD4eCM rather than pay for DM Minion, but if I really wanted to use the iPad I might go for DM Minion.

-Michael the OnlineDM

OnlineDM1 on Twitter

P.S. Amusingly, I believe the creator of DM Minion and Player Minion ended up using some of the MapTool token art that I created for my web site as their icons. Small world! To be clear, I don’t own those images or anything like that, and I thought it was amusing to see someone else using what I created.

Review: Banners on the Cheap for vinyl banners – and battlemaps!

A few weeks ago I received a surprising offer: a person from a company called Banners on the Cheap (which also runs Signs on the Cheap and Magnets on the Cheap) wanted to give me a free banner in exchange for a review on my blog. This was surprising mainly because, let’s face it, Online Dungeon Master is pretty small potatoes as a blog! I’ve never had anyone offer me anything in exchange for exposure on my blog (aside from some obvious spammers).

Vinyl Banners

The creative twist here is that Banners on the Cheap thought I might be interested in ordering vinyl banners for use as RPG maps. See, many dungeon masters / game masters use a vinyl wet-erase mat with a grid on it for their basic mapping needs, drawing buildings and trees and chasms and so on for each map, then erasing. These folks thought that DMs might be interested in printing their own custom vinyl maps with whatever images they like.

It’s a creative idea, you have to admit. Unfortunately, I’m the Online Dungeon Master – I use MapTool for my online games and a projector for in-person maps, rather than a physical map on the table. So close but so far!

Except… as you may have heard, I’m in the process of developing a new card and dice game called Chaos & Alchemy. The game doesn’t use maps or anything like that, but I do plan to be at GenCon and having a cool vinyl banner to advertise the game sounded like an awesome idea. I get a free banner in exchange for this write-up on my site? Works for me!

I decided to keep things fairly straightforward in designing my first advertising sign. I wasn’t quite sure how big the banner should be, so I went with 6 feet wide by 3 feet tall (figuring that this might hang nicely over the front of a game table). The Banners on the Cheap folks seem to be able to do whatever size you want, which is cool.

From there, all I had to do was upload an image file, no bigger than 12 MB. I already had some beautiful cover art for my game, so I put that on one half of the banner. I also had a cool logo, so I put that on the top part of the other half of the banner. For the bottom right I put a slogan and the web site for my game. The image file I created looks like this:

Since I was given a $40 store credit and the 3′ by 6′ banner only cost $23.56 (excluding shipping), I decided to add hemming and grommets to make it easier to hang in case I end up hanging it somewhere. That added $6.99 to the cost. Shipping of around $8 brought my total to $38.58; still below my store credit. Excellent!

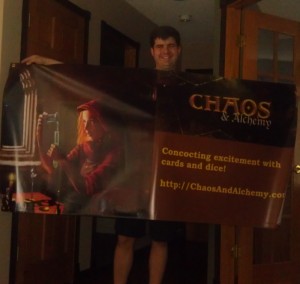
I let my BannersOnTheCheap contact know that I had placed my order, since she had offered to expedite it for me (ooh, the benefits of being a big-shot blogger!), and less than a week later I had this in my hands:

My apologies for looking kind of messy in the picture; I had just gotten home from playing tennis and was too excited to wait to open my banner. Cracking open the box revealed a bit of a “vinyly” odor, but nothing overpowering.

So how is it? I think it’s awesome! My art and logo look fantastic writ large, and the print quality is outstanding. The hemming and grommits feel very sturdy. The material itself is a bit reminiscent of the stuff duct tape is made of, but heavier – it has a web of some kind of reinforcing material running through the vinyl.

Since it’s a vinyl mat, just like a lot of the mats that most DMs use, it works great as a wet-erase mat (I tried this on the white reverse side of my banner). And just like those mats, this is not a dry-erase mat (dry-erase marker is permanent on it). The reverse side of the banner has more of the webbing texture, which may affect your ability to draw on it with wet-erase markers (you get a “bumpy” effect in your lines). The front side is plenty smooth, though.

So, what’s my verdict on Banners on the Cheap as an option for DMs/GMs? The quality is amazing, and the price is quite reasonable for what you get. I can see several situations where this kind of thing could make sense as a gaming map:

  • Putting together a few “evergreen” maps that you can use in lots of different situations (generic outdoor, generic cavern, generic castle, etc.)
  • Printing a simple grid on one of these maps to use as alternative to a Chessex mat (it looks to me like it would be a lot cheaper than Chessex, especially if you’re not using both sides of the Chessex mat)
  • Creating an awe-inspiring map to pull out for a campaign-milestone set piece battle
  • The GM is really rich and enjoys printing fancy new maps for each battle and then collecting them

I’ve got to say that this seems like a pretty intriguing option for DMs out there. A 2′ by 3′ custom-printed vinyl banner from Banners on the Cheap costs $12.81, plus shipping (which is admittedly pricey at $7.17, but that covers shipping for multiple maps). Still, that’s a big, durable, wet-erase-writeable vinyl map delivered to your door for less than twenty bucks.

To compare apples to apples with Chessex, I’ll go with 2′ by 2′. That banner from BannersOnTheCheap would cost $9.38 plus shipping. Chessex lists the equivalent size Battlemat on their web site for $22.98 before shipping (which is $7 for orders under $100). Now, that Chessex mat is reversible and the Banners on the Cheap mat only kind of is (again, the “bumpiness” on the reverse is not ideal), but I personally only ever use one side of my Chessex mat. You can get the Chessex mat from Amazon for $21.49 (and free shipping if you’re on Amazon Prime). If you’re a one-sided map user, BannersOnTheCheap is still cheaper for a plain gridded mat, shipping and all! And that’s even before you consider the fact that you can, you know, print a full color map on the BannersOnTheCheap option.

Ultimately, I’m surprised at how attractive this option is to me. If I weren’t a projector-toting DM, I think I’d spend a few bucks on some “evergreen” maps and one or two plain gridded maps from BannersOnTheCheap. They’re quite durable, they’re wet-erase, they look fantastic when you print designs on them, and they’re darn affordable.

Who knew? I’m actually really glad that these folks approached me, even though I don’t personally need physical maps. I think a lot of DMs might get some serious use out of this. If you do, please tell me about it here!

– Michael the OnlineDM

OnlineDM1 on Twitter

Making the Game part 5 – Legal Stuff – Trademarks and forming an LLC

Previous entryPart 4

Welcome back to my blog series Making the Game, in which I talk about the process of creating my card and dice game, Chaos & Alchemy. In Part 4, I discussed working with a graphic designer to develop a cool-looking card face and how it evolved from rough sketches to a polished product.

Once I had decided that I was really going to try to publish my game, I knew that I would have some questions for a lawyer. I’m a fan of the Law of the Geek podcast, so I had some idea of the intellectual property issues involved with game design, but I didn’t know anything about business structure and I wasn’t sure if I needed to be worried about patents, trademarks, etc. So, I started searching for a lawyer.

Finding a lawyer

I began by calling the office of the local lawyer who helped my wife and I draft our wills. Unsurprisingly, they don’t handle intellectual property stuff, but the receptionist told me that she’d have one of the lawyers email me a list of local attorneys I could try. I never did receive that list; hm. I did later learn that the guy who drafted my will is a gamer – when I called weeks later to ask him if this game company would mean I need to change my will (answer: no), he asked if Chaos & Alchemy is like Dominion, which is a game he enjoys. Yay for having a gamer lawyer!

Since the local lawyer search wasn’t going anywhere, I turned to the internet. I used the Law of the Geek contact page to send a message to Geoff and Melina; unfortunately Geoff’s reply ended up in my spam folder for over a week! I did eventually talk to Geoff on the phone, and he had some excellent advice for me, but by that time I had already found another attorney to work with.

Thanks to a Twitter tip from Paul Baalham, I ended up seeking out a friend of Matt James who is a lawyer and who writes a column on Matt’s site called Protection From Chaos. The lawyer in question is Rob Bodine, and he practices law in Virginia. Rob is a gamer himself and is very interested in the legal side of gaming; he’s working on building a reputation as a “gaming lawyer”. Since I was starting a game company to produce a game, Rob was interested in working with me.

Copyright, trademark and patent

Let me start by saying that I am not a lawyer, so please don’t take any of this as actual advice! But I’ve had to learn a few things about copyright, trademark and patent over the course of making Chaos & Alchemy (although I learned much of this previously from Law of the Geek).

Copyright covers a creator’s right to be the person to make and distribute copies of his or her work. You don’t have to file for it – you automatically have it whenever your creative work (words, art, music, whatever) is “fixed in a tangible medium”, which even includes a file saved on your computer’s hard drive. The words on my game cards and the words in the rules are copyrighted automatically when I write them, for instance. The game mechanics, however, are not protectable by copyright.

Trademark covers my use of the name Chaos & Alchemy, for instance, or my logo. Technically you can get trademark rights just by making use of the trademark in promotional materials and such, but if you want to really protect it you can register it with the US government (there are also state trademark registrations, which are cheaper). My understanding is that the fee to file for a trademark is about $300, and you’ll likely need to pay a lawyer for his or her time on top of that to actually put together and file the paperwork.

My (trademarked) logo for Chaos & Alchemy. The TM will become an R in a circle once the registration goes live

Patent could theoretically protect a game mechanic if it’s innovative enough, but that’s unlikely in my caes. I understand that Wizards of the Coast has a patent on “tapping” a card by turning it sideways from Magic: The Gathering, for instance (although some people think that the patent shouldn’t have been granted; I’m not going there!).

My needs in talking to a lawyer were:

  • Figure out if I need a patent (nope, that was pretty clear from the start – it’s just too expensive)
  • Figure out if I needed to worry about infringing on someone else’s patent (probably not, but doing a thorough search to find out is too expensive for my tiny company)
  • Figure out if I need to register any trademarks (probably a good idea for the name of the game and the logo)
  • Get a contract that I can use with artists to handle the transfer of their copyright in the work they create to me once I buy the work and the rights (doable in about two pages)
  • Learn about setting up a company to publish the game (cheaper and easier than I expected, actually!)

Rob and I exchanged a couple of emails, then had a 45 minute phone conversation to establish the points above (no patent work, yes on a trademark registration or two, yes I could hire him to draw up an artist contract, and yes I should start a company). It was a pretty painless process, and I would definitely recommend Rob for other game designers who need some legal advice.

Setting up a company

One part of my conversation with Rob where I took detailed notes was around setting up a company to publish my game. While I could just publish the game under my own name as a sole proprietor, it would be a good idea for me to set up an LLC – a limited liability company – to publish the game. An LLC is quick and cheap to set up, it doesn’t require complicated paperwork to run, it can have just me as the single member, and it protects my own assets from any liability claims (such as if someone injures himself on my game or someone sues the game publisher for some reason). The LLC is only liable up to the amount of capital that I put in (plus any profits if they materialize, I guess) as long as I set it up correctly.

The steps I followed to set up my LLC were:

  • Pick an available name for the LLC
  • Go to the appropriate web site for my state government and fill out a few pages online, paying a $50 fee to register the company
  • Go to the IRS web site and apply for an Employer Identification Number (EIN) – basically my company’s Social Security Number (no cost)
  • Go back to my state government’s web site and apply for a state business license, which mainly sets me up to pay sales tax for in-state sales ($60 or so for Colorado)
  • Check to see if I need a local business license (in my case I don’t, but that’s apparently unusual)
  • Head to a local bank to set up a bank account for the company

The first step – picking a name – was harder than it should have been. I could have called the company Chaos & Alchemy LLC, but if I ever publish a second game that might seem weird. I liked the idea of Chaos Games LLC, but there’s already a retail store in Colorado with a similar name (Chaos, Games and More). The store name isn’t quite the same, and I could legally use the name I wanted, but I called the store owner as a courtesy and it was clear that he wasn’t thrilled with the idea of me starting a company with a similar name. Since this is exactly the kind of store that might one day carry my game on its shelves, I didn’t want to alienate him!

So, after much brainstorming with my wife, I settled on the idea of picking a card from the game and using its name: Clay Crucible Games LLC. Tagline: Concocting fun with cards and dice!

Handling all of the online paperwork took about took about 30 minutes, if that. I thought I was going to have to wait for something in the mail in order to open a bank account, but I actually could have done it right away.

Opening a small business account at a local credit union required the Articles of Organization that I had submitted to the state online, a certificate of good standing (which the credit union was able to print out on the spot by going to the state’s web site), and my LLC’s bylaws. I didn’t have bylaws, so I asked if I could write them out longhand right there in the credit union, which I did.

Boom: I have a business bank account! And with that, I was off and running; paying lawyers and artists, setting up PayPal, getting a Square reader account, heck yeah!

Cash inflow?

So far, of course, the money has only been flowing out. But I’m finally to the point that I’m ready to take pre-orders for Chaos & Alchemy over on the game’s web site. I’m offering the game at a 10% discount from its regular price to pre-order customers (normally $25, but only $22.50 for pre-order), and I’m throwing in free shipping for US buyers. This means that I won’t be making much of a profit on these games, but that’s okay – I’m mostly curious to see if there’s any interest out there! I’ll be delivering games in early August and the price will go up once the game goes to print, so hop on over if you’re interested.

– Michael the OnlineDM

OnlineDM1 on Twitter

Making the Game part 4 – Graphic design

Previous entryPart 3 / Next entry: Part 5

Welcome back to my blog series Making the Game, in which I talk about the process of creating my card and dice game, Chaos & Alchemy. In Part 3, I discussed the first playtest of the game with strangers, and the way the name of the game came to be.

At this point, I had decided that I was going to develop this game to the point of doing a small print run. Furthermore, I wsa going to do it in time for GenCon. Keep in mind that this was early June, and GenCon is in mid-August, so I was working on a 10-week timeline. Aggressive, but exciting!

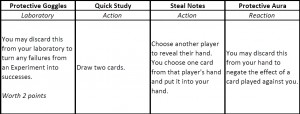
The cards at this point looked like this:

Kind of uninspiring, don’t you think? I knew I was going to need art for the cards, but more importantly I was going to need well-designed cards. While I don’t personally know any illustrators, I do happen to be close friends with an outstanding graphic designer, Bree Heiss.

I called Bree one evening to talk about my game and the role I thought she might be able to play. There were several things that needed some awesome graphic design in my game:

  • Layout of the fronts of the cards (a very big task, incorporating different information for different card types, point values, artwork, artist credit, legal stuff, plus rules text and flavor text)
  • Design for the backs of the cards
  • Design for the box that the game comes in
  • Design for the rules sheet that comes in the box
  • A logo for the game itself

You’ll note that not included in this list is illustrations for the cards or the game box; the graphic designer’s job is design, not illustration. How are the elements arranged on the card? How do the words on the game box intersect with any artwork on the box? These are the kinds of things a designer can help with.

Fortunately, Bree was available for some design work. She even put a contract together for the work she would be doing; very professional (more on contracts in the next segment!). I was thrilled to find that she had given me three options for paying her: A single set fee, a lower fee plus 5% of game profits, and no fee plus 10% of game profits. While I went with the straight fee, I was tickled to see that she had enough confidence in me and my game to be willing to give up her fee in exchange for the chance that I might make a profit. (Note: While anything is possible, I am not assuming I will make any profits here!)

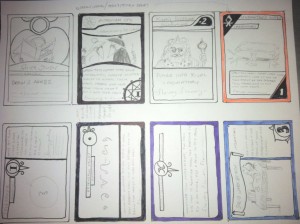
And with that, we started working together. Bree has been my main sounding board throughout this process; it’s amazing how the graphic design and the game design are closely intertwined! She started off by doing some sketches of potential card layouts.

The graphic design magic begins!

From here, I started providing feedback. I liked the idea of making the point value of a card in play nice and clear, as on Mortar and Pestle. I liked that Bree provided variation on themes as well as totally different themes.

At this point, I wasn’t sure if I was going to be able to get even black and white sketch art for my cards, and one of my playtesters (my brother in Pennsylvania) had suggested that an all-text layout might be the way to go. I asked Bree to try one of these. We also talked about ways of trying to clarify which cards in play had ongoing effects and which simply did their thing and then sat there, and one idea was to use a horizontal layout for cards with ongoing effects, to make them clearly different.

The next set of sketches incorporated some of these ideas:

New ideas start to develop

There were some innovative things here. The side-by-side art and text of Telescope on the bottom left and Solid Workbench on the bottom right was a cool idea, but we soon decided that the whole horizontal layout was just too much of a pain to deal with in-hand, even though it looked good on the table.

I liked the circular doo-dad that held the point value of Double Pelican (bottom row with purple border), but I liked the placement of the point indicator on King’s Disfavor (top row, second from right). Having the point value up top meant that players could stack up the cards that had no ongoing effects in their laboratory, showing just the name and the point value.

I also liked the black background of the negative point value on King’s Disfavor; it made it clear that this was a negative card to play on someone else.

With this back-and-forth, a vision for the cards started to take shape. Bree’s next set of sketches showed this zeroing in on a plan (and she also had gotten her scanner set up by this point, so we’re seeing scans instead of photos from here on):

Variations on a theme

Lots of cool stuff going on here. The design I enjoyed the most was this variation on Double Pelican (top row, second from left). I liked the big point indicator on the top right corner of the card. I liked the art box with a nice space but with some curves to it. It felt both clean and cool. Bree wasn’t thrilled with some of the blank spaces on it, so I sent her back a modification of her sketch (note that I am a poopy artist here, and it shows):

Note my efforts at editing the bottom right part of the art box

Bree understood where I was going with this, and put together an actual wireframe using some art she found online (not actual game art – sorry).

I love Bree’s flavor text

Yeah… this was looking good.

Now, there’s more to card front design than just arranging the parts – there’s also font to deal with! Bree supplied me with a dozen different fonts for the title and for the main text. We also used this process to pick a font for the card back, but I’ll address that later (we set the fronts aside for a while to work on the backs).

Once we came back to the fronts, Bree was ready to go all out – color, shading, legal text, art for the cards we had in, the whole nine yards.

I’m liking the color and the point indicator – Bree was experimenting with having it point downward for some cards and left for others. The art looks great (Beth Sobel did a fantastic job on this, her first piece for my game), but the art box is just so… rectangular.

This one is definitely not a rectangle. The filigree below the art window is kind of cool. The point indicator is too orange, though, and the oval art window was a little on the small side; not every piece would look good in it.

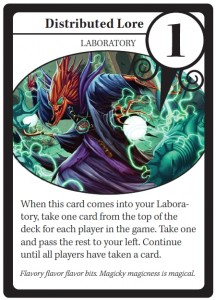
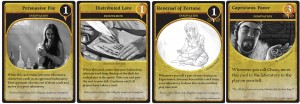
All right – now we’ve got some interesting choices! I personally loved the second layout of these four, Distributed Lore. A slightly curved art box, still plenty of space for text… yeah! I wrote Bree an email, and somehow screwed it up, telling her that I liked number 3 (Reversal of Fortune).

In the ultimate bizarre irony, here’s what I got next:

Yes, I got four cards mocked up to look like card number 1 from the previous set. I liked number 2, I mistakenly said number 3, but Bree did number 1. It was a weird mix-up, but Bree got it all worked out in the end:

Final layout in all its glory

Mmm, delicious! It’s clean and easy to read, but still beautiful. The swirly bits on the point indicator and the filigree beneath the art indicate that this card has an ongoing effect (cards without an ongoing effect will lack this). I just love everything about this layout.

Sharp-eyed readers may have also noticed that this card is of the “innovation” type, which wasn’t present in earlier versions. The rules are still in a little bit of flux based on playtesting, and I only in the last week renamed the Laboratory card type to Innovation in order to avoid confusion with the use of the word “laboratory” that refers to each player’s board.

It’s pretty amazing to see how far the card design has come in just a few weeks. It helps to have an amazing graphic designer like Bree Heiss on your team! None of you are allowed to hire her just yet; she’s still working on Chaos & Alchemy for the next few weeks, so hands off! 🙂 After that, though, hire the heck out of her; as you can see, she’s awesome.

And just wait until you see the  work Bree has done with the card back for Chaos & Alchemy. Fantastic stuff, I promise.

-Michael the OnlineDM

OnlineDM1 on Twitter


OnlineDM Mailbag #2: MapTool versus Fantasy Grounds

Welcome back to the exceedingly irregular OnlineDM Mailbag series! My first mailbag column came back in November 2011, and now in July 2012 I’m finally getting around to the second. I’d love to do more of these, so if you have a question you’d like me to answer on the blog, please send it to me at onlinedungeonmaster@gmail.com.

Tobold writes:

Hi Michael!

I was looking into virtual tables for D&D 4th edition, not necessarily
to run a multiplayer game on, but for preparing my “real table”
campaign by playtesting combat encounters. I know you are a big
MapTools fan, but I’ve also seen several people claiming Fantasy
Grounds 2 was good. Did you ever try Fantasy Grounds 2? Do you have an
educated opinion of which program is better, MapTools or Fantasy
Grounds 2?

OnlineDM answers:

I do know that Fantasy Grounds 2 is quite popular, and from the people I’ve spoken to about it I believe that it’s a great tool. I haven’t personally used it, though, despite the research I’ve done into it.

My conclusion is that Fantasy Grounds is the “pretty” version of MapTool. The 3D dice rolling is very popular. The user interface is designed to look like you’re sitting at an actual wooden table. There are the equivalent of MapTool frameworks built for lots of games, including 4e.

However, I come down firmly on the side of MapTool for my own games. The biggest reason, frankly, is that it’s free. If you want to buy a Fantasy Grounds license that will let you run an unlimited number of games for anyone who wants to play, it’s going to cost you $150. For MapTool – nada. That’s a big deal to me; not that I can’t afford the $150, but MapTool does everything that FG2 does, so why would I pay for FG2?

I love the full customizability of MapTool. I can use it in a very bare-bones way, or I can go nuts with programming the fanciest stuff I can imagine. FG2 allows for this kind of development, too, but again, why pay for it?

Basically, I haven’t seen anything from FG2 that has ever tempted me to pay for it when MapTool is free. If MapTool had failings that FG2 addressed, I’d definitely give FG2 a shot. But it doesn’t have those failings, at least not in my games. I’m totally happy with MapTool and see no reason to pay to switch.

So, just to be clear, I think that Fantasy Grounds is a cool program, and I’m sure that lots of people will find it to be worthwhile. But for me, since I’m already very comfortable with MapTool, I wouldn’t want to pay the kind of money it would cost to use FG2 in the way I use MapTool (letting an unlimited number of people play in games that I host without having to pay a cent).

-Michael the OnlineDM

OnlineDM1 on Twitter

Making the Game part 3 – Outside interest and deciding to go for it

Previous entryPart 2 / Next entry: Part 4

Welcome back to my blog series Making the Game, in which I talk about the process of creating my card and dice game, Chaos & Alchemy. In Part 2, I discussed my first real playtesting sessions and the process of adding a theme to a game that started as raw mechanics.

Tuesday, June 5, was an important turning point in the development of Chaos & Alchemy. This was the day that I took my playtest version of the game (slips of crappy-looking black and white paper stuck inside of sleeves with Magic cards) down to my friendly local game store, Enchanted Grounds, to see if I could get anyone to try it out. The game still didn’t have a name at this point.

I knew that the name would probably have something to do with alchemy, since that was the theme. During my Sunday evening playtest, my game designer friend pointed out that I needed a special word for what happens when you roll doubles in the game, since that’s an important thing – this is when you re-roll the Fortune Die. He suggested that I might want to just make up a nonsense word to call out, sort of like “Uno” in the game of the same name (and yes, I know that’s not a nonsense word!). I thought that if I could find a good word, I could use that as the name of the game, but I had a devil of a time coming up with anything.

I eventually settled on “Chaos” as the word for what happens when you roll doubles and the Fortune Die changes.

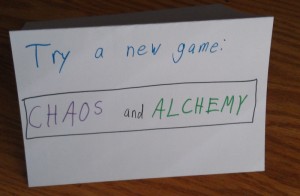
For the name of the game itself, I tried out Alchemy Chaos for a little while, but it felt clunky. Alchemical Chaos… same problem. Just before I left for the game store on that fateful Tuesday afternoon, I took a sheet of card stock and some markers and created a quickie sign that I could put on the table to attract attention:

My first advertising attempt

This was the first use of what became the game’s actual name, Chaos & Alchemy. I found an empty table at the FLGS and set this sign on it, along with the deck of cards and a bunch of dice. I also had my iPad with me to take notes.

I sat there for a while, trying to catch folks’ eyes, but most of the patrons were doing there own thing. One guy came in and was standing around watching his friends play a game, so I invited him to join me – no thanks. Sigh.

Strangers play my game!

After a while, one of the guys who had been playing Magic came over and gestured to the sign to ask about the game. He thought the name sounded cool, and he wanted to learn more. So, he sat down and we started to play a two-player game.

A few minutes into the game, some of his Magic-playing friends who had finished their game started gathering around to watch and to ask questions. I invited one of them to take my place at the table so that I could take notes (okay, I mainly just wanted another person to play my game). The two of them had a blast and were already making suggestions about expansions and new ideas and asking when they could buy this game before they had even finished that first game.

Yeah, that was a good sign.

When they were done, their other three friends, who had been watching most of the game, decided that they wanted to play, too, so the five of them sat down for a big game. This one took about 45 minutes, which is on the high end for game length that I’m shooting for, but not bad for five players. These guys were hungry and delayed their dinner plans so that they could play some Chaos & Alchemy.

All five of them gave me their email addresses so that I could keep them posted about the game and when it would be available.

Turning point

At home that evening, I talked to my wife about the experience I had at the store. We were both feeling good about the game beforehand, but having strangers getting excited about it made a big difference. At some point she said the fateful words:

“You need to take this to GenCon.”

My first GenCon was last year (2011), and my wife came with me for that one. It was a ton of fun, but it looked like we weren’t going to be able to make it this year. Chaos & Alchemy was promising enough (after less than a week, mind you!) that my wife was sending me to Indianapolis.

I was already starting to poke around online to find out what it would cost to get art for my game if I decided to publish it, and this process now became serious. I also realized that I was going to need some legal advice, so I ended up getting in touch with Rob Bodine, who writes the Protection from Chaos column over on Loremaster.org (and yes, I see the irony of his column name when combined with the name of my game).

I would soon be a very busy dude.

– Michael the OnlineDM

OnlineDM1 on Twitter

P.S. The cover art for my new game has now come in from the talented Chris Rallis – take a look over at the Chaos & Alchemy web site. It’s pretty fantastic.

Making the Game part 2 – Outside playtesting and adding a theme

Previous entry: Part 1 / Next entry: Part 3

Welcome back to my blog series Making the Game, in which I talk about the process of creating my card and dice game called Chaos & Alchemy! In Part 1, I discussed the inception of the idea for my game and the first prototype I built and played with my wife.

Two days after the inception of my game, I found myself getting together with some acquaintances for a public playtest of D&D Next, which had just become available for testing about a week earlier. We had a little time to kill before one of our players would be showing up, so I broke out the cards that I had printed up and tried the game with them.

One of the guys totally got it. The other was pretty confused, but soldiered on. It was encouraging enough for me to feel like I should keep working on the game, but I knew that I needed it to have an actual theme rather than raw mechanics. My wife had already suggested something fantasy-ish, and I liked the idea of alchemy for some reason.

I spent a fair amount of time on Sunday, June 3, changing the generic names of cards like “Draw 2” and “Roll Extra” into things like “Quick Study” and “Oversized Cauldron”. I changed the references of cards being “in play” to being “in your laboratory”. A theme was taking shape!

Talk to the pros

I’m lucky to have a good friend who has worked for many years as a professional game designer on board games, card games and computer games, and I got together at his place with him and another friend of ours Sunday evening, June 3, to playtest the heck out of my still-nameless game. I didn’t realize that these guys would be up for three hours of solid playtesting, but that’s exactly what we did.

This was real playtesting at its best. We tried the game as I’d originally designed it, then talked about what was working and what wasn’t. In the initial rules, players had three things to do each turn: draw a card, play a card, and run an experiment (rolling a pair of dice) which could result in extra card draws and plays or in some forced discards (or a mixture). We started toying with this, going to a single draw/play option each turn and adding an extra die to the experiment (now rolling three dice instead of two). This changed things dramatically, making it much more likely that the target die (now renamed the Fortune Die) would change with people rolling doubles since doubles come up a lot more with three dice than with two.

We started focusing on what was fun in the game and what wasn’t. At this point, the main way you could win the game would be to get to 10 points by holding a bunch of cards in your hand – each card in hand was worth a point. This was rather unfun; playing cards to the table was cool and exciting, but just hanging on to a bunch of cards felt kind of lame in comparison. This was a change that would have to be handled at the drawing board rather than at the table, though.

Another issue that caused problems was that the game ended rather suddenly and randomly a lot of the time. If your opponent goes from 5 points to 10 points via a lucky turn, well, that’s it. I started experimenting with rules that said, “If one player ends his or her turn with 10 or more points, each other player gets one turn and then the game ends.” This had the problem of making it BAD to be the first to 10, since everyone else would dump on you. Tricky.

I left that evening with tons of notes and useful feedback, and I got to work. Changing the point mechanism from cards in hand being the main victory condition to cards in hand being worth nothing was surprisingly easy. Lots of cards that previously were played, had their effect and then went to the discard pile became cards that came into your laboratory, had an effect when they came into the lab, and then sat there for the rest of the game being worth a point or two.

Long-distance playtesting

I had sent a file with the cards and rules to my brother in Pennsylvania (I’m in Colorado) after the first night of inventing the game, and I sent him an update the following Monday morning to give him the improved cards with a theme and everything. Imagine my surprise when he said that he had already tried out the mechanics-only version of the game with his fiancee and another friend, and that they liked it! More awesome playtest feedback filled his email, and the game kept getting better.

Having people in other parts of the country playtesting my game would prove to be a constant, useful tool throughout the rest of Chaos & Alchemy’s development.

More to come…

I’ll wrap up this installment of Making of the Game here, with another request for feedback: Is this stuff interesting to my readers? I know that I personally would have enjoyed reading about other peoples’ experiences with game creation when I was getting started, but I might be the only one!

-Michael the OnlineDM

OnlineDM1 on Twitter

P.S. For those of you who are interested in the game itself, I now have an Art Gallery page up on the main site!

Making the Game part 1 – Inspiration and first prototype

Next post in series: Part 2

Welcome to my new blog series – Making the Game. In this series, I’ll talk all about the process I’ve gone through (and am still going through) of creating a game and ultimately producing and selling it. In this particular case, I’m talking about my upcoming card and dice game – Chaos & Alchemy.

Chaos and Alchemy logo – by Bree Heiss

Inception

It all started on May 31, 2012. I was driving home from work, listening to gaming podcasts (as I often do), and I happened to be listening to an old episode of Jennisodes. In this episode, Jenn had recorded a panel of game designers at a conference, and Fred Hicks mentioned something about a game possibly being based around an innovative dice mechanic (nothing specific – he was just saying that an innovative dice mechanic is something that can make a game interesting, and that he might have a file with nothing but dice mechanics).

I don’t know why, but this comment got me thinking. I originally was thinking about role-playing game dice mechanics here, and I thought of a mechanic where checks are resolved by rolling two six-sided dice, each trying to meet or beat a target number. If they’re both over the target number, you have total success. If they’re both under, it’s total failure. If one is over and one is under, it’s a partial success. I was thinking that a tie counted toward success at this point, but I wasn’t sure.

This seemed like it had some potential, but I soon decided that it wasn’t all that interesting for a role-playing game (although if anyone builds a role-playing game around this mechanic, I’d love to hear about it!). Something more like a board game, though, might work.

What would the target number be? I liked the idea of having it change throughout the course of the game, and having a shared die in the middle of the table that people are trying to meet or beat. This would be the “target die”. The game could work with cards, and beating the target die would let you draw cards or play cards while rolling under the target die would make you discard. Rolling doubles would make you re-roll the target die.

First prototype

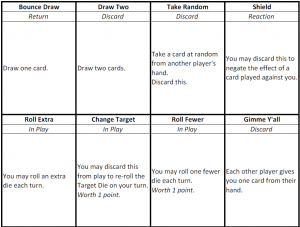
Yeah, this was going somewhere! When I got home from work, I mulled this over as I cooked dinner for my wife, then decided to start making up some cards. Since I use Excel all the time at work, I decided to make up a little card template in Excel. One cell would hold the card name, the next cell would tell what you do with the card after you play it, and the third cell would have the rules text for the card. I messed around with the spacing a little bit and ended up with twelve cards to a page – four cards in each of three rows.

Actual examples of some of my initial playtest cards

Since this was a Thursday, which was my volleyball night at the time, I took a break for a while to go play volleyball. When I came back home, I finished putting together a few more cards (32 cards total), printed out 4 copies of each card, cut them up with my paper cutter and dropped them into sleeves with Magic cards (I just grabbed a few completed Magic decks from years ago that all had the same backs).

I talked my wife into trying the game out with me. We shuffled the giant deck of cards, drew two cards each, and started playing. At this point in time, the goal of the game was to get to 10 points, and each card in your hand counted for a point. The cards had names like “Draw Two”, “Take Random” and “Change Target”. There was no flavor at all – just mechanics.

And it was fun. Surprisingly fun!

I had just created a game from nothing, and it was actually fun for me and my wife to play. I decided it was worth continuing to develop it.

Next steps

From that point, development on my game continued, and I plan to talk more about this in future blog posts.

I want to ask at this point: Is this interesting stuff for my readers? I’m still playing D&D and will continue to write about it, but a lot of my free time is going to Chaos & Alchemy right now, so I’d love to share it if you’re interested.

-Michael the OnlineDM

OnlineDM1 on Twitter

Owner of Clay Crucible Games LLC

D&D Encounters Web of the Spider Queen – Week Zero

Following week: Week one

I’m so excited and happy to be running D&D Encounters again! I ran Encounters last summer for the Dark Legacy of Evard season (recaps of those sessions start here), and I had a blast. I especially love helping newer players get into D&D, and Encounters tends to attract a lot of new players.

This time, the season begins with a “week zero” session for character creation. I had been told that most players don’t bother showing up, since they’ll just make characters on their own in the Character Builder later. I’m happy to say that the players at the 5:00 PM tables decided that week zero was important. I believe we had nine players show up just for character creation.

Once again, I’ll be using my projector rig to run games, and my reputation preceded me at the store. Two of the players were the father and son I first introduced to D&D 4th Edition last summer at Encounters, and they’ve apparently been playing ever since! The father has also been bringing his younger daughter to play, and two more younger players were at my table as well (friends of the son, I believe). So, I’m running a table for four kids ranging from about 8 to 12 years old, plus one adult.

I don’t have kids myself, but I like kids well enough. When it comes to running games for kids, I’m enthusiastic about the opportunity! I really want to encourage the next generation of gamers, and this particular group is already pumped up. They’ve apparently been playing together at Encounters for a while, and when they saw that I was going to be running a game (knowing about my projector), they declared that they were all playing at my table. That’s a pretty good feeling!

As for character creation itself, we had a fun time last Wednesday. The boys all came to the table with ideas about what they wanted to play – two hunters and a paladin. They were excited about the new races from Into the Unknown, too; I believe we’ll have at least one goblin.

The young girl at my table wasn’t sure what she wanted to play, but since she already had experience with playing a controller, defender and striker, she decided to go with the warpriest – a leader – for a change of pace. She originally really wanted to be a kobold, but when we started flipping through the books and realized that the kobold didn’t get a bonus to Wisdom she nixed that idea. This really surprised me – I thought that she had her heart set on being a kobold (and it can totally work to have a kobold cleric), but she wanted that +2 to Wisdom. So, she build a svirfneblin instead.

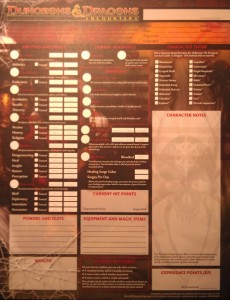
I spent most of my time helping her through the character creation process, and she did really well. It was fun to build from the books instead of just using the Character Builder, and I really enjoyed the custom character sheets that were provided for this season of Encounters.

DMs were also given some treasure cards to represent a very cool neck slot item, one that can pierce a drow’s Cloud of Darkness ability. I believe these were intended to be given to players who participated in an event at PAX, but since we’re in Colorado we didn’t have any PAX-goers at our store. The DM for the other 5:00 PM table had decided that giving these cards out as a reward for showing up to character creation would be appropriate, so that’s what we did. If we have new players come later in the season, they might be able to earn the item through sheer awesomeness; we shall see.

I’ve already prepped the first week’s encounter in MapTool, and I can’t wait to get going. This is going to be fun! I’ll post weekly recaps, along with the maps that I’ve created for each session. Stay tuned!

Subsequent week: Week one

-Michael the OnlineDM

OnlineDM1 on Twitter

Fiasco – first play session and review

My RPG career has consisted mostly of Dungeons and Dragons Fourth Edition, a game I love. However, I’m always interested in discovering new and exciting things. Having heard great stuff about Fiasco on the Jennisodes podcast and elsewhere, I decided I should check the game out. I paid my twelve bucks for a PDF of the game just before leaving for my cruise vacation a couple of weeks ago and then read the game for the first time while aboard the ship.
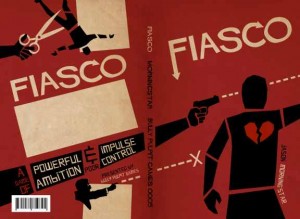
Game overview

Fiasco is a story game with no game master. The game begins with four six-sided dice for each player – two white and two black (although we used gold and purple in our game). All of the dice are rolled into a central pile, and then the players take turns choosing dice to let them pick from lists of Relationships, Objects, Locations and Needs for the characters that they’re creating on the fly. These lists come in Playsets, four of which come with the base game: Suburbia, Small Southern Town, Antarctica and Wild West.

At the end of this setup, each character will have some sort of relationship with the characters on either side of them, and each of those relationships will have a Detail associated with it (object, location or need). All the dice go back into the central pool, and the Scenes begin, with players taking turns.

When it’s your turn for a Scene, you can either Establish or Resolve. If you establish the scene, you describe what’s going on with your character in the scene and perhaps describe some conflict that the character will be working through in that scene. The players then role-play this scene at the table, bringing in the elements from the setup (relationships and details) as they go. At some point in the scene, the other players will decide whether the scene is going to end well for the main character, in which case they’ll give the player a white die from the central pile, or poorly, in which case they’ll give the player a black die. They’ll then play out the positive or negative outcome of the scene, and then the player will give their die to someone else (whoever they want).

If the player decides to Resolve the scene, then the other players decide what the scene will consist of, and the player in the spotlight will decide whether the outcome is positive or negative. They’ll take the appropriate die, play out the consequences, then give the die away.

After each character has had two Scenes, we get to the Tilt. Everyone rolls whatever dice they’ve collected so far (an average of two per player, but you could have anywhere from zero to six dice) and nets their white total against black. The highest net white total and the highest net black total will each get to pick an element from a Tilt Table: Crazy crap that will happen to the characters in the second half of the game.

The game then tells you to take a break and get a snack, talking about the game so far and where it’s headed. I like this rule!

You then move on to Act Two: two more scenes per character, working mostly the same as Act One. The differences are the Tilt elements, of course, but also the fact that the player who gets a black or white die based on their character’s outcome then keeps it instead of giving it away.

At the end of the game (two scenes per character in Act One, then the Tilt, then two more scenes per character in Act Two), each player again rolls their dice and nets white against black. The closer to zero your total, the worse the Aftermath for your character. You then take turns narrating what happens to your character after the movie is over, based on their Aftermath. A high white total or high black total will be a good ending for the character; low numbers are usually death or even a fate worse than death.

Our experience

Seven people showed up for games over the weekend, and Fiasco is not designed for more than five. So, three people who weren’t that interested in role playing decided to play Lords of Waterdeep while four of us sat down for Fiasco.

After I explained how the game worked, we passed around the play sets and decided on Wild West. A note here: Definitely print out the play sets with two pages on each sheet of paper. It’s plenty big enough to read, and then you only have four pages (one each for Relationships, Objects, Locations and Needs) instead of eight pages cluttering up the table during the Setup.

The ultimate layout for our Fiasco game. Tilts are in the middle of the table

My character’s relationships were Gamblers on one side and Criminal/Detective on the other, so it became clear that I was an outlaw. I decided to call him Pecos Pete.

The Detective to my left was Detective Stanton, a half-Chinese man from Chicago who was in Last Chance, Arizona – our made-up setting. Detective Stanton and Pecos Pete shared a Need to get away from an honest woman, ruined.

Stanton’s other relationship was Professional/Client, and we had established that Stanton was the professional detective. His client was the town sheriff, Sheriff McGinty, who had hired him to come to Last Chance to hunt down Pecos Pete. This relationship shared a location – the White Star Chinese Laundry.

Sherriff McGinty was a bit of a dirty cop, however, since his other relationship of Sheriff/Deputy was tied to a Need to get rich through fraud and trickery. He was working with his deputy to ultimately trick Detective Stanton into helping them defraud Pecos Pete out of his gambling winnings.

The deputy’s name was Roscoe, and he was trying to get rich along with the sheriff, but he was also a gambling associate of Pecos Pete. The two of us (I was Pete, remember) shared an object: A doctor’s black bag with and a jar of acid. Hm.

Act One saw the arrival of Detective Stanton in Last Chance and his first interactions with the gambling Pete and Roscoe, ending with him getting invited to a high-stakes after-hours game. We also saw the sheriff and his deputy, Roscoe, have a falling out after the sheriff learned that Roscoe was double-crossing and working with Pete to rob Stanton.

Stanton, meanwhile, ended up coming to the high-stakes game in disguise as Ling Wei, a Chinaman from the laundry who fancied himself a card player (but really had no skill). It was also established that the honest woman, ruined, that Pecos Pete and Detective Stanton shared a need to get away from was named Ruth. She had followed Pete from Chicago to Last Chance years before, and she had once been a lover of Detective Stanton’s.

Stanton closed out Act One with a jump ahead to a scene where he was standing over Ruth’s dead body in the laundry, hands bloodied. Deputy Roscoe came into the room, aiming to rob the detective, but instead stumbling upon the murder scene. Unfortunately for Roscoe, the Sheriff was also following Stanton, who managed to pin the crime on Roscoe. Poor Roscoe ended up in jail, awaiting trial for a murder he didn’t commit.

The Tilts introduced for Act Two were Innocence: Collateral Damage and Something Precious on Fire.

We began Act Two by establishing that Sheriff McGinty was going to try to get Pecos Pete to rob a government stagecoach for him, thus getting rich through fraud and trickery. Roscoe escaped from jail and switched Pete’s jar of acid with his sack of whiskey (I guess whiskey comes in sacks in Last Chance), without Pete’s knowledge. Stanton got stinking drunk after the murder of Ruth and decided to come and kill Pete, which failed miserably.

The sheriff hired some of his posse to act as snipers at the stagecoach robbery, killing Pete once he had taken out the driver and guard. Poor Roscoe came on the scene disguised as the sheriff – not knowing that the posse assassins were secretly associates of Pecos Pete and were planning to kill the sheriff on sight. Blam – dead deputy.

Pete managed to get onto the stagecoach and tried to use his acid to take out the driver, but since it was actually whiskey it ended up igniting thanks to a nearby lantern, engulfing the whole stagecoach in flames.

In the aftermath, things went badly for everyone. Pete ended up dead, having gotten only ashes of burned money for his trouble and then dying by acid when he tried to drown his sorrows in whiskey. Stanton ended up captured by Indians and tortured for years. The sheriff ended up dead, I believe self-inflicted, and Roscoe of course died in the final scene thanks to the double-crossing assassins and a poorly chosen disguise.

The review

Fiasco is an interesting game, and great for people who really love role playing. I think I had expectations that were a little too high, though. Our group isn’t great at role playing, so we struggled a bit. We still had fun and came up with a rollicking tale, but we had our awkward moments.

The whole game took us less than two hours to play, which was good. We kept our scenes short, and even had a few scenes that didn’t really involve role playing, just narration. This worked out well.

I was surprised to learn that my friends strongly preferred wackier play sets. I was expecting that we would start with Suburbia or Small Southern Town, but Suburbia wasn’t even considered. They preferred the zany settings. This was fine with me, but I wasn’t expecting it.

Overall, I’d say that I’m glad I bought and played Fiasco. I don’t think it’s going to be a game that’s in heavy rotation at my tables, since my friends seem to prefer killing monsters and taking their stuff rather than getting deeply involved in role playing. That’s okay with me, too, but it’s fun to play a game like Fiasco every now and then. I’d definitely give it another go sometime.

-Michael the OnlineDM